
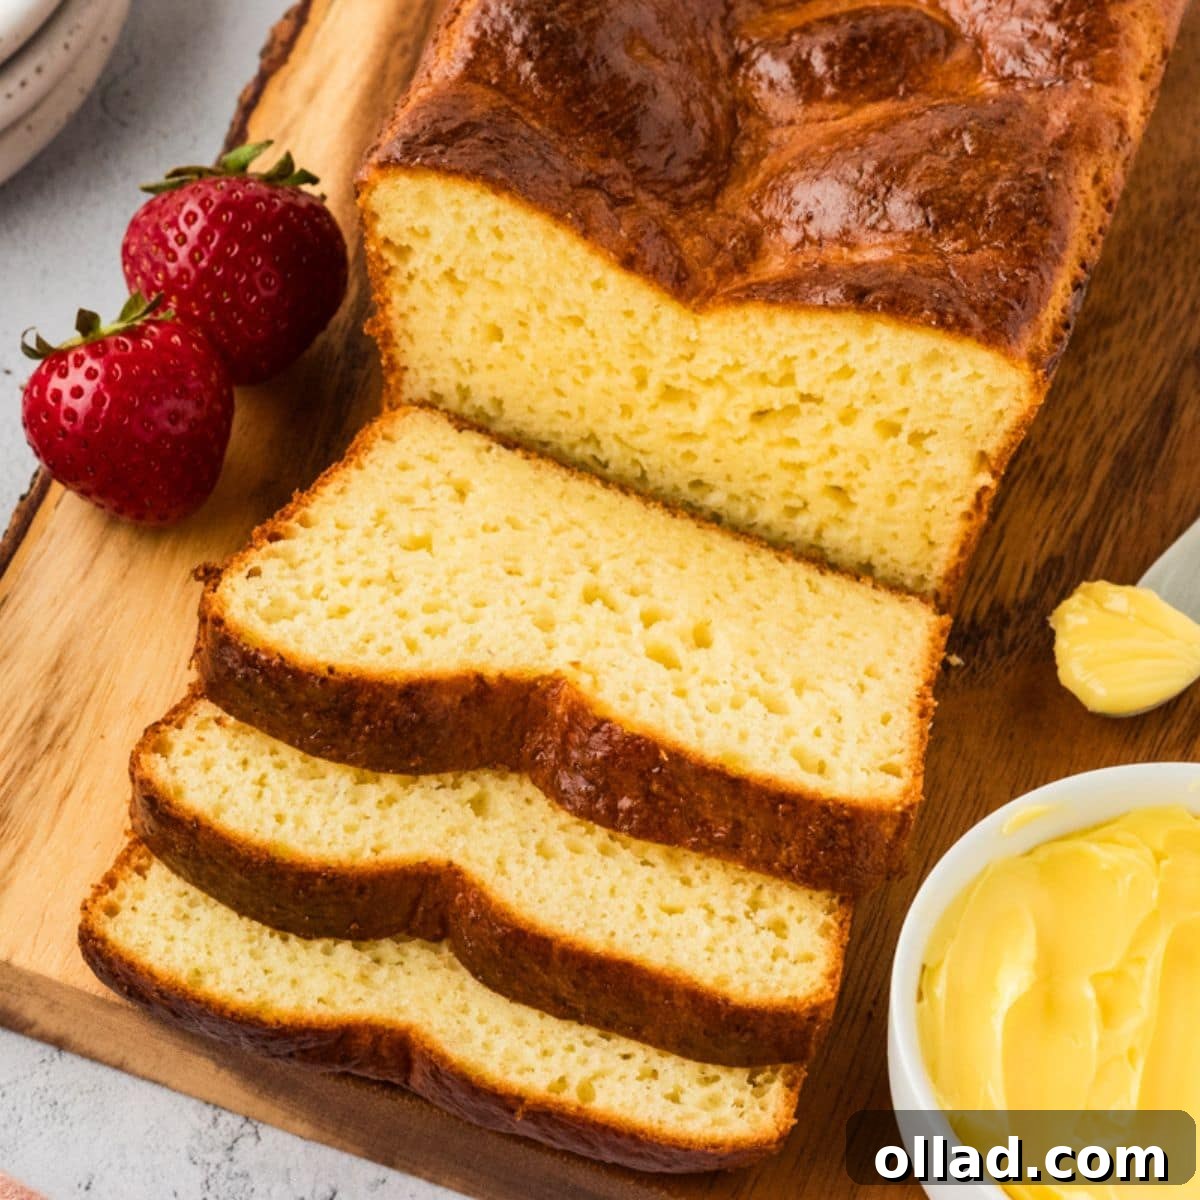
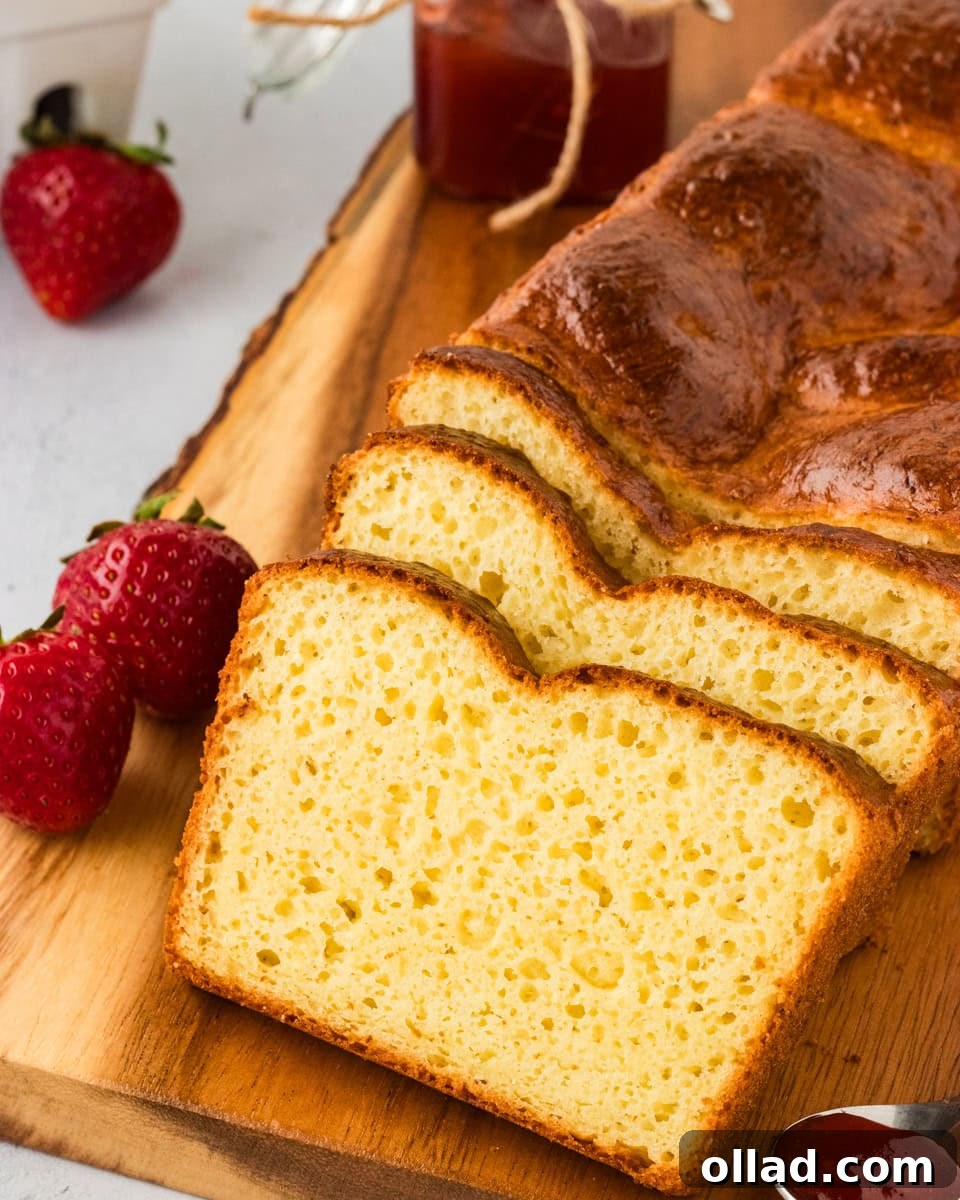
Embark on a delightful baking journey with our incredibly simple gluten-free brioche recipe, promising an indulgent loaf that boasts a remarkably tender crumb and a beautifully shiny, golden crust. This rich and slightly sweet bread is a true revelation for anyone following a gluten-free diet, offering a bakery-quality experience right in your own kitchen. Far sweeter and richer than our classic homemade gluten-free bread, this brioche is an ideal foundation for decadent French toast, a comforting bread pudding base, or simply exquisite on its own. Imagine toasting a warm slice, spreading it with a drizzle of golden honey or a dollop of your favorite jam – it’s so irresistibly good, you’ll find it impossible to stop at just one! This recipe delivers a buttery, rich, and utterly satisfying bread that defies expectations, tasting so authentic, you’d never suspect it’s entirely gluten-free.
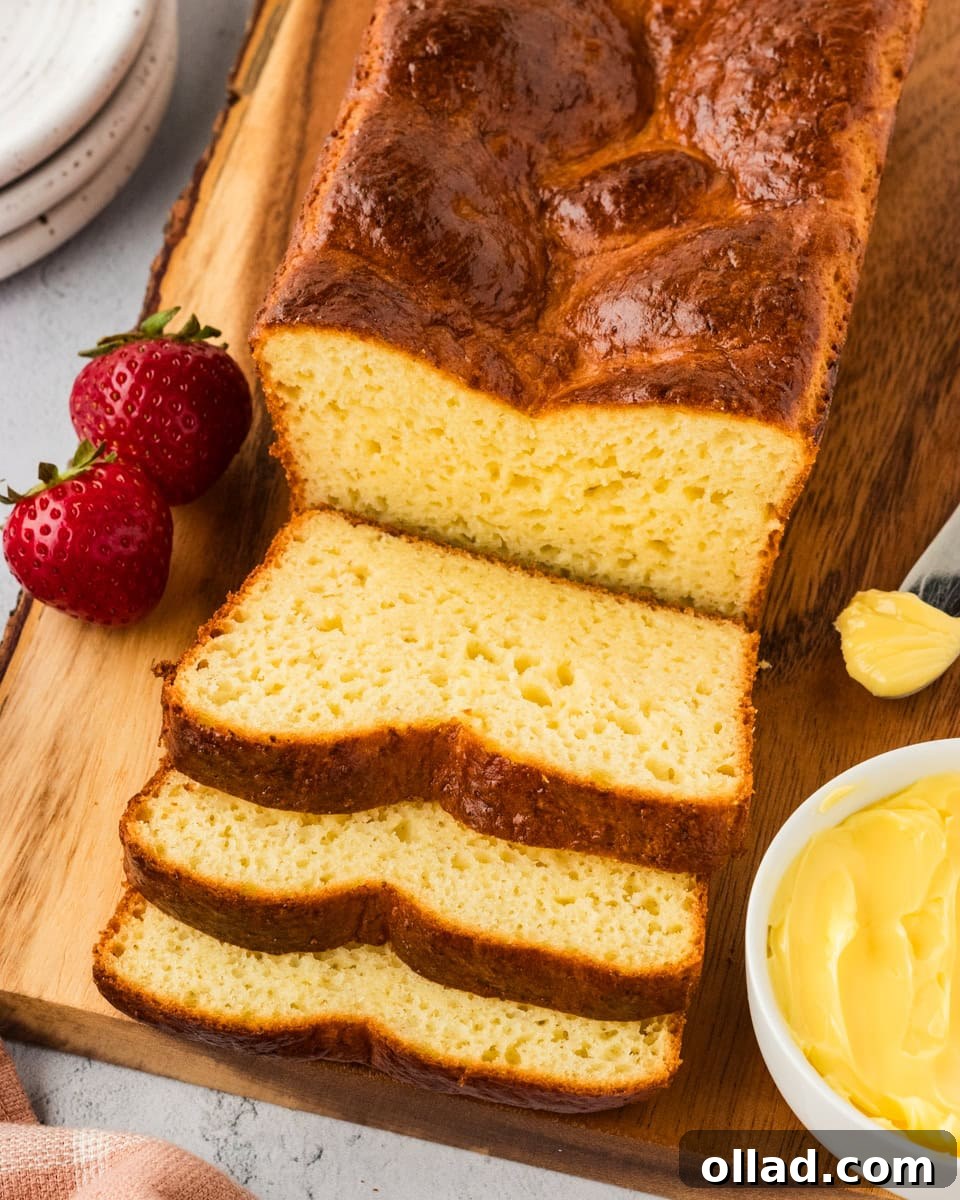
The Art of Homemade Gluten-Free Brioche
For those of us living gluten-free, the absence of certain beloved foods can be a significant challenge. Brioche, with its luxurious texture and rich flavor, was one of the breads I missed most deeply after adopting a gluten-free lifestyle. The quest to recreate this French classic led to extensive experimentation in my kitchen, ultimately culminating in this exceptional gluten-free brioche recipe that perfectly satisfies those intense cravings. Traditional brioche, originating from France, is renowned for its enriched dough, characterized by a generous inclusion of butter and eggs, which contribute to its distinctive richness and tender texture. My recipe skillfully mimics these classic characteristics by utilizing a carefully selected blend of gluten-free flour, essential psyllium husk powder, a touch of sugar, and instant yeast, all combined with an abundance of butter and eggs. The result is a surprisingly simple and achievable recipe that brings the joy of authentic brioche back to your home, proving that gluten-free baking can be just as decadent and rewarding.
Essential Ingredients for Perfect Gluten-Free Brioche
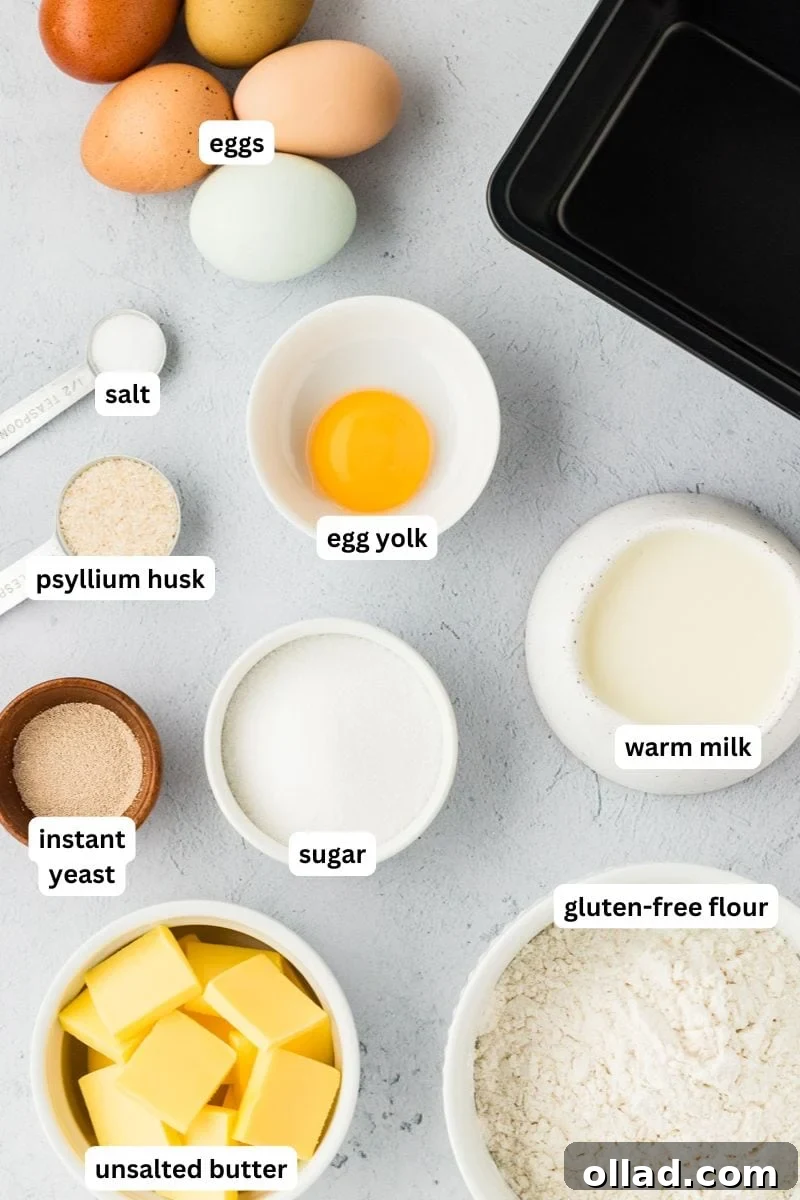
Creating an exquisite gluten-free brioche begins with understanding the role each ingredient plays in achieving that perfect texture and flavor. Here’s a detailed look at the core components that make this recipe a success:
- Gluten-Free All-Purpose Flour Blend with Xanthan Gum: The foundation of our brioche. I specifically recommend a high-quality gluten-free all-purpose flour blend that already includes xanthan gum. Brands like Pillsbury gluten-free flour are excellent choices, as they are formulated to perform well in yeast-leavened baking. Not all gluten-free flours are created equal; some blends may not have the right balance of starches and flours for yeast-based recipes. If your chosen blend doesn’t contain xanthan gum, it’s crucial to add it – a general guideline is ¼ teaspoon per cup of flour. Xanthan gum acts as a vital binder, helping to replicate the elasticity and structure that gluten provides in traditional bread making.
- Sugar: More than just a sweetener, sugar plays multiple critical roles. It provides essential food for the instant yeast, helping to activate it and encourage a robust rise. Additionally, sugar contributes to the beautiful golden-brown crust of the brioche, caramelizing during baking for an appealing finish.
- Psyllium Husk Powder: This is an absolutely indispensable ingredient in gluten-free baking, especially for enriched doughs like brioche. Psyllium husk powder is a powerful binder and provides the necessary structure and elasticity that gluten-free flours inherently lack. It absorbs moisture and forms a gel-like substance, mimicking gluten’s ability to create a pliable, workable dough that holds its shape and rises beautifully, preventing a crumbly texture.
- Instant Yeast: For this recipe, ensure you use instant yeast, not active dry yeast. Instant yeast is a baker’s best friend as it doesn’t require prior activation in warm liquid and can be mixed directly with dry ingredients. This simplifies the process and reduces preparation time, making it easier to achieve a consistent rise.
- Unsalted Butter: The hallmark of a rich brioche is its high butter content. You’ll need 6 tablespoons of unsalted butter, cut into small ‘pads’ or slices. The most crucial tip here is that your butter must be *very soft* – almost room temperature but not melted. Butter that is too firm will not properly incorporate into the dough, leading to an uneven texture. While I haven’t personally tested this recipe with dairy-free butter, some readers have reported success with high-quality vegan butter sticks designed for baking.
- Salt: A small but mighty ingredient, salt enhances the overall flavor profile of the brioche, balancing the sweetness and enriching the taste of the other ingredients. It also plays a subtle role in regulating yeast activity.
- Eggs: True to its traditional roots, this gluten-free brioche relies heavily on eggs, demanding 4 whole eggs plus an additional egg yolk. These eggs are vital for imparting incredible richness, contributing to the tender crumb, and helping the loaf develop its characteristic golden hue during baking. Due to their integral role in both texture and flavor, I strongly advise against substituting the eggs in this recipe.
- Milk: Warm milk is essential for two reasons: it helps to activate the instant yeast, providing the ideal environment for it to begin its work, and it introduces crucial moisture to the dough. Aim for a temperature between 95-100°F (35-38°C) – warm to the touch but not hot, which could kill the yeast. You can gently warm it in a microwave or on the stovetop.
Expert Tips for Gluten-Free Brioche Success
Achieving a perfect gluten-free brioche is a rewarding experience, and these expert tips will guide you through the process, ensuring a delicious outcome every time:
- Perfectly Softened Butter: The consistency of your butter is paramount. If you forget to take your butter out of the fridge in advance, a quick hack is to slice it into small pieces and microwave it in short 10-second bursts, flipping the butter between each burst, until it’s very soft but not melted. Alternatively, place the butter slices in a sealed ziploc bag and submerge the bag in a bowl of warm water for a few minutes. This ensures the butter integrates smoothly into the dough, creating a uniformly rich texture.
- Leverage Your Stand Mixer: While it’s possible to mix brioche dough by hand, an enriched dough like this, with its high fat and egg content, greatly benefits from a stand mixer equipped with a paddle attachment. The mixer efficiently incorporates all ingredients, especially the butter and eggs, developing a consistent and smooth “batter-like” dough. This thorough mixing is crucial for gluten-free dough, as it helps create structure and aeration in the absence of traditional gluten networks.
- Mindful Mixing with Milk: When adding the warm milk, do so slowly and incrementally. Gluten-free dough can quickly become too thin if over-hydrated. Continue mixing until the dough achieves a smooth consistency, reminiscent of a thick cake batter. Stop mixing once this texture is reached; overmixing gluten-free dough can sometimes lead to a denser, tougher loaf once baked, as it can compromise the delicate structure built by the binders. Refer to our step-by-step photos below for visual guidance on the ideal dough consistency.
- Shaping for that Signature Look: To achieve the beautiful, rustic, and uneven top often seen on traditional bakery-style brioche, I recommend using a large cookie scoop or two spoons to dollop the dough into your prepared loaf pan. This method creates delightful lumps and valleys on the surface, which bake into an attractive, irregular crust.
- Knowing When It’s Done: Your gluten-free brioche loaf is perfectly baked when it presents a gorgeous golden-brown color. To confirm internal doneness, insert a cake tester or a wooden toothpick into the center of the loaf. It should come out completely clean, indicating the bread is cooked through. If using a thermometer, the internal temperature should be around 200-205°F (93-96°C).
Troubleshooting Common Gluten-Free Brioche Challenges
Baking can sometimes present unexpected challenges, but with a few pointers, you can confidently navigate them and still achieve a fantastic gluten-free brioche. Here are solutions to two common issues:
Why Didn’t My Gluten-Free Brioche Bread Rise?
The rise of your brioche occurs at two critical stages: during the initial proofing phase before baking, and again in the oven (oven spring). If your bread isn’t rising as expected, several factors could be at play:
- Yeast Vitality: Always double-check that your instant yeast is fresh and not expired. Old or inactive yeast is the most common culprit for a failed rise. Store yeast in an airtight container in the refrigerator or freezer to prolong its shelf life.
- Temperature Control: Ensure your milk is the correct temperature – warm (95-100°F / 35-38°C) but never hot. Milk that’s too hot will kill the yeast, while milk that’s too cold won’t activate it sufficiently. Similarly, your oven temperature must be accurate for proper oven spring.
- Proofing Environment: Gluten-free doughs, like their gluten-containing counterparts, thrive in warm and slightly humid conditions during proofing. If your kitchen is cool, consider finding a warmer spot for your dough to rise. You can create a warm environment by placing the covered dough in an oven that has been briefly warmed to its lowest setting (then turned off), or by placing it near a sunny window or warm appliance. Patience is also key; allow ample time for the dough to rise adequately.
- Flour Blend Issues: While less common if using a recommended blend, an unsuitable gluten-free flour blend that lacks proper binders or starches can also hinder a good rise.
Why Did My Loaf Sink in the Middle?
A sinking loaf, particularly in the middle, is almost always a sign of over-proofing. This occurs when the dough is left to rise for too long during the proofing process. During rising, the yeast produces carbon dioxide, creating air bubbles that give the bread its light texture. However, if these bubbles expand too much, the dough’s delicate structure can’t support the increased air, leading to a collapse. Think of it like a balloon that’s been over-inflated.
To prevent this, it’s crucial to monitor your loaf closely during proofing. You want the dough to nearly reach the top of the loaf pan, but not significantly beyond it. Look for visual cues: an over-proofed loaf will often show a pockmarked or pitted surface on top, indicating that the air cells are stretched to their limit. If you notice these signs, gently deflate the dough, reshape it, and begin the rising process again. This “reset” can often save your loaf from collapsing, allowing the yeast to produce new, stable air bubbles.
Delicious Ways to Enjoy Your Gluten-Free Brioche
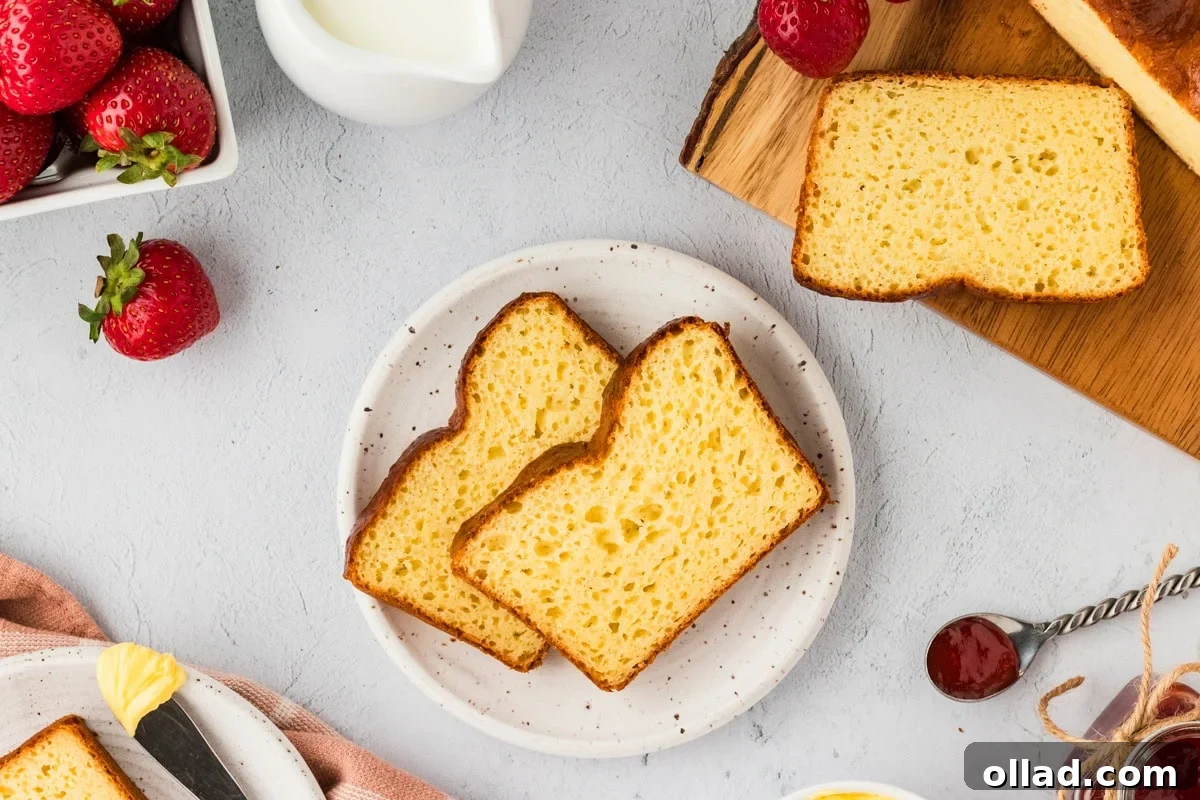
This gluten-free brioche bread is a masterpiece of baking – eggy, soft, incredibly rich, and subtly sweet. It truly shines in many culinary applications. While it might be a bit more delicate than traditional brioche due to its gluten-free nature, its flavor and texture are absolutely divine! Here are some of our favorite ways to enjoy this versatile bread:
- Classic French Toast: Its tender crumb and sweet profile make it the ultimate choice for gluten-free French toast. It absorbs the egg custard beautifully, resulting in a golden, custardy interior and crispy edges.
- Simple Toast: Enjoy it toasted with a generous spread of butter, a dollop of your favorite fruit jam, or a drizzle of sweet honey for a quick and satisfying breakfast or snack.
- Savory Sandwiches: While sweet, its richness can also complement savory fillings. Try it for a gourmet grilled cheese or a delicate tea sandwich.
- Decadent Casseroles: Elevate your breakfast or brunch with this brioche in our gluten-free pumpkin French toast casserole or our delightful cinnamon roll French toast casserole. Its sturdy yet soft texture holds up wonderfully in baked dishes.
- Comforting Bread Pudding: Transform leftover brioche into a luxurious gluten-free bread pudding. The rich bread soaks up custards and flavors, creating an incredibly comforting dessert.
Storage and Freezing Instructions
To maintain the freshness and exquisite flavor of your homemade gluten-free brioche, proper storage is key. Once the loaf has completely cooled to room temperature, slice it according to your preference. Store the slices in an airtight container or a sealed plastic bag at room temperature for up to 5 days. For extended freshness, you can transfer the airtight container or bag to the refrigerator, where the brioche will remain fresh for up to a week. If you wish to enjoy your brioche over a longer period, it freezes exceptionally well. Wrap individual slices tightly in plastic wrap before placing them in a freezer-safe bag or container. This prevents them from sticking together and helps retain moisture, allowing you to store them for up to 3 months. When ready to serve, simply let the frozen slices thaw at room temperature, or gently warm them in a toaster or oven for a fresh-baked experience.
More Gluten-Free Baking Adventures!
If you’ve enjoyed mastering this gluten-free brioche, you’ll love exploring other delicious bread recipes from our collection:
- Gluten-Free Bread Machine Bread
- Gluten-Free Sourdough Bread
- Gluten-Free Potato Bread
- Gluten-Free Baguette
Gluten-Free Brioche Recipe
Julia Elizabeth
1 loaf
10 mins
30 mins
1 hr
1 hr 40 mins
This easy recipe for gluten-free brioche creates a loaf with a tender crumb and shiny crust, perfect for French toast or bread pudding!
Ingredients
- 1 ⅓ cups gluten-free all-purpose flour blend with xanthan gum (I use Pillsbury Gluten-Free flour)
- ¼ cup sugar
- ½ teaspoon salt
- 1 ½ teaspoon psyllium husk powder
- 1 packet instant yeast
- 6 tablespoons unsalted butter, very soft and cut into small pads, plus extra for greasing the loaf pan
- 4 eggs, divided
- 1 egg yolk
- ½ cup milk, warm (around 95°-110°F)
Instructions
- To the bowl of a stand mixer, add your gluten-free flour, sugar, salt, psyllium husk, and instant yeast. Whisk by hand until everything is mixed together.
- Fit your bowl onto the stand mixer with the paddle attachment and turn on low speed. Add in your softened unsalted butter cut into pads one at a time, then add 3 eggs and the extra egg yolk, also one at a time.
- Once mixed, slowly pour in your warm milk and allow the mixer to continue to stir gently until everything is incorporated.
- Mix on medium speed until your dough, which will resemble cake batter, looks smooth.
- Butter an 8 ½ x 4 ½ loaf pan. Use a large cookie scoop or spoon to scoop the batter into the loaf pan, creating lumps and valleys, which create that signature look on the top of brioche bread.
- Cover with plastic wrap and allow the bread to rise on the counter until it almost reaches the top of the loaf pan. The time will depend on many factors, such as temperature and humidity, but try 45 minutes to an hour first and then check on it in 10-minute intervals until it reaches the correct height. Mine took about an hour to rise.
- Preheat the oven to 350°F, and while it’s preheating, gently brush the top of your loaf with an egg wash made from the remaining egg.
- Bake your bread for 30 minutes, until a cake tester comes out clean, and allow it to rest and cool in the loaf pan for about 30 minutes before removing it.
- Allow the loaf to rest until cool, then cut and enjoy with butter, jam, honey, or all of the above!
Notes
- To make an egg wash, beat one egg and brush it over the top of the loaf before baking to achieve a beautiful golden shine.
- To Store: Store at room temperature for up to 5 days in an airtight container. For longer freshness, refrigerate for up to 7 days.
- To Freeze: Wrap individual slices tightly in plastic wrap and store in the freezer for up to 3 months. Defrost at room temperature before serving.
- Mama always says, “Check all of your labels for gluten-free certification!”
Nutrition Information
Serving: 1 loaf
Calories: 1763 kcal
Carbohydrates: 183 g
Protein: 49 g
Fat: 100 g
Saturated Fat: 53 g
Polyunsaturated Fat: 8 g
Monounsaturated Fat: 28 g
Trans Fat: 3 g
Cholesterol: 1044 mg
Sodium: 1481 mg
Potassium: 536 mg
Fiber: 24 g
Sugar: 62 g
Vitamin A: 3507 IU
Vitamin C: 0.02 mg
Calcium: 425 mg
Iron: 10 mg
Nutrition information is automatically calculated and should only be used as an approximation.
Additional Info
Baking, Side Dish
French
Tried this recipe?
Mention @mamaknowsglutenfree or tag #mamaknowsglutenfree!
How to Make Gluten-Free Brioche: A Step-by-Step Visual Guide
Follow these detailed steps, accompanied by visual cues, to craft your perfect gluten-free brioche loaf:
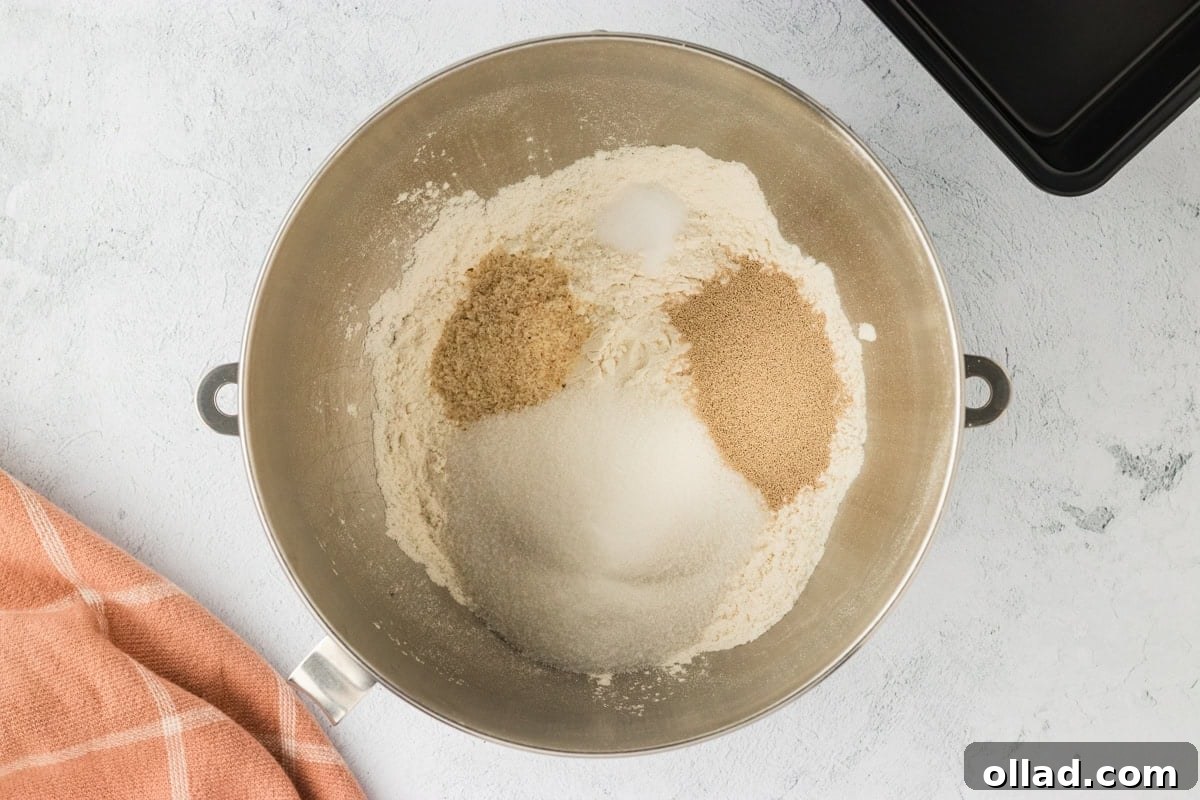
Begin by adding 1 ⅓ cups of your chosen gluten-free all-purpose flour, ¼ cup of sugar, ½ teaspoon of salt, 1 ½ teaspoons of psyllium husk powder, and 1 packet of instant yeast into the bowl of your stand mixer.
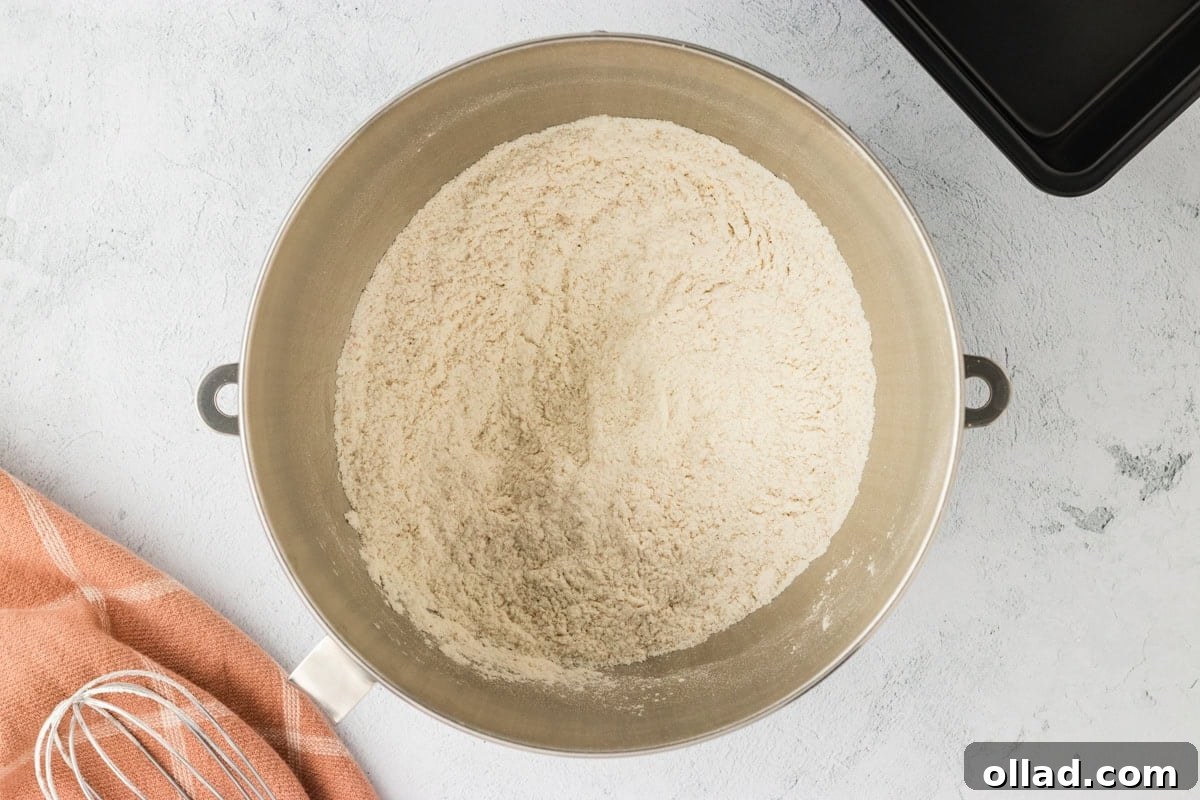
Using a whisk, gently combine all the dry ingredients until they are thoroughly mixed and evenly distributed. This ensures consistent flavor and rise.
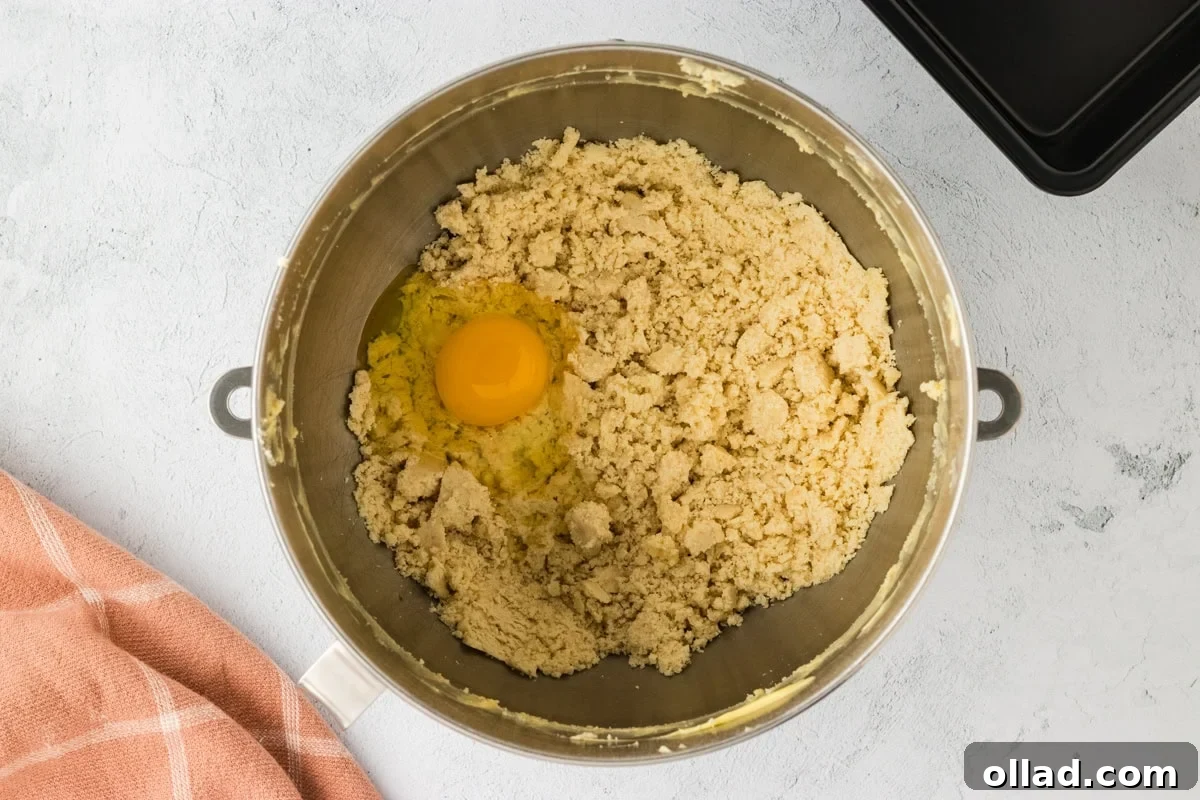
Attach the bowl to your stand mixer and fit it with the paddle attachment. Turn the mixer to a low speed. Gradually add the 6 tablespoons of very soft unsalted butter, one small pad at a time, allowing each piece to incorporate. Then, add 3 whole eggs and the single extra egg yolk, also one at a time, ensuring they are well-mixed before adding the next.
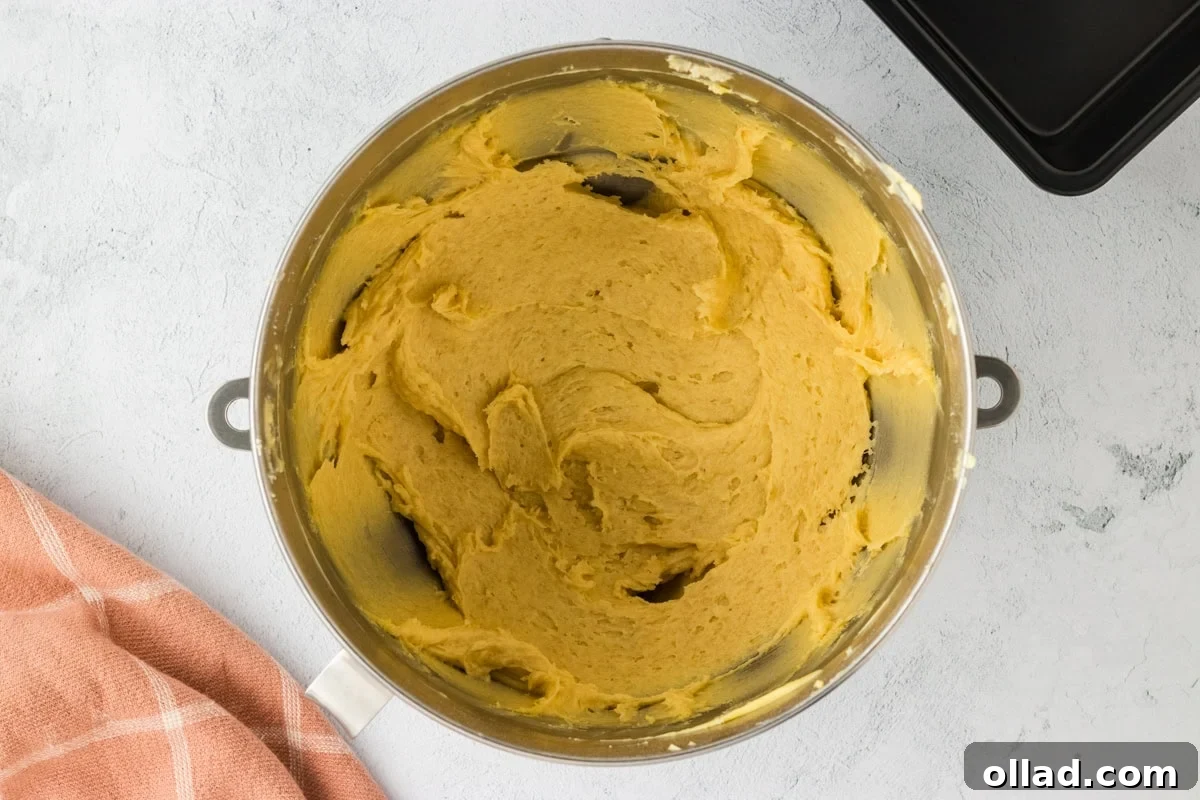
Once the butter and eggs are mixed in, slowly pour in the ½ cup of warm milk. Continue to let the mixer stir gently on low speed until all the liquid is fully incorporated into the dough. Avoid rushing this step to ensure a smooth consistency.
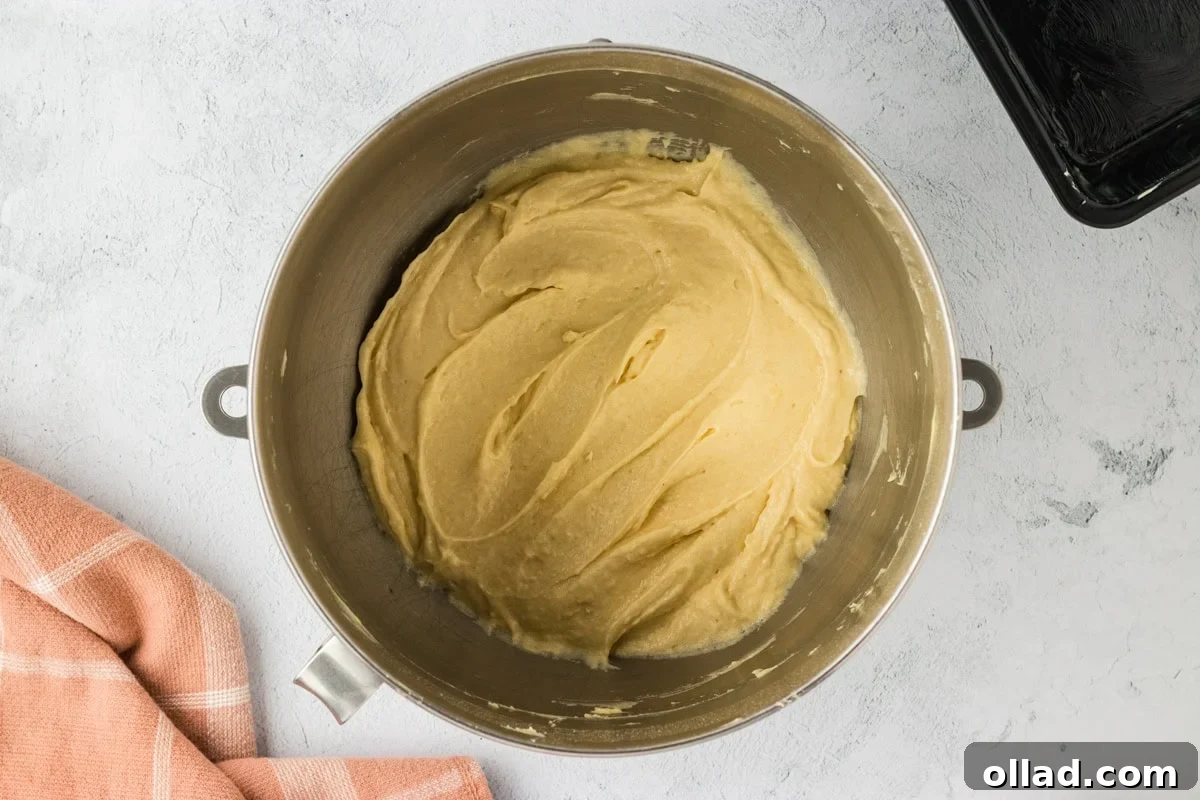
Increase the mixer speed to medium and continue to mix until the dough achieves a smooth, uniform consistency, resembling a thick cake batter. This thorough mixing helps create the desired texture for your gluten-free brioche.
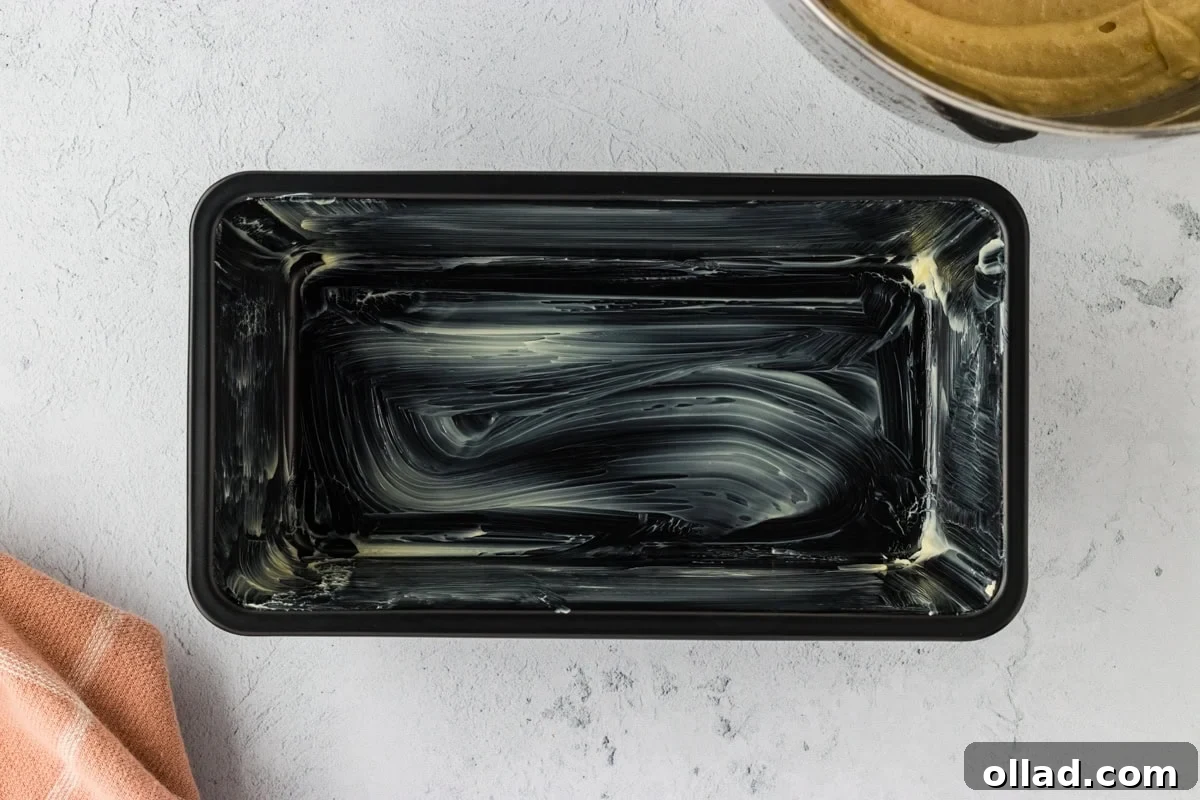
Thoroughly butter an 8 ½ x 4 ½ inch loaf pan. This generous greasing prevents sticking and aids in easy removal after baking.
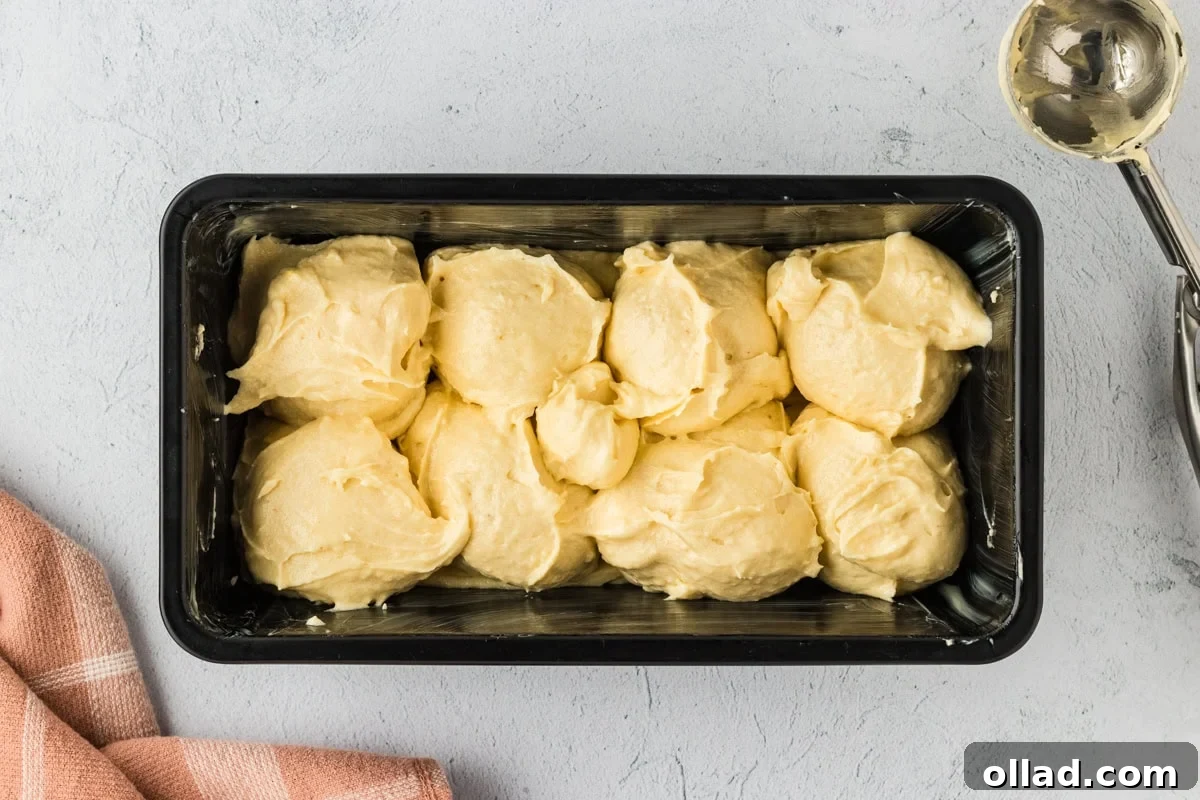
Using a large cookie scoop or a spoon, carefully dollop the brioche batter into the prepared loaf pan. Intentionally create uneven lumps and valleys on the surface; this technique is key to achieving the characteristic rustic and appealing look of traditional brioche bread.
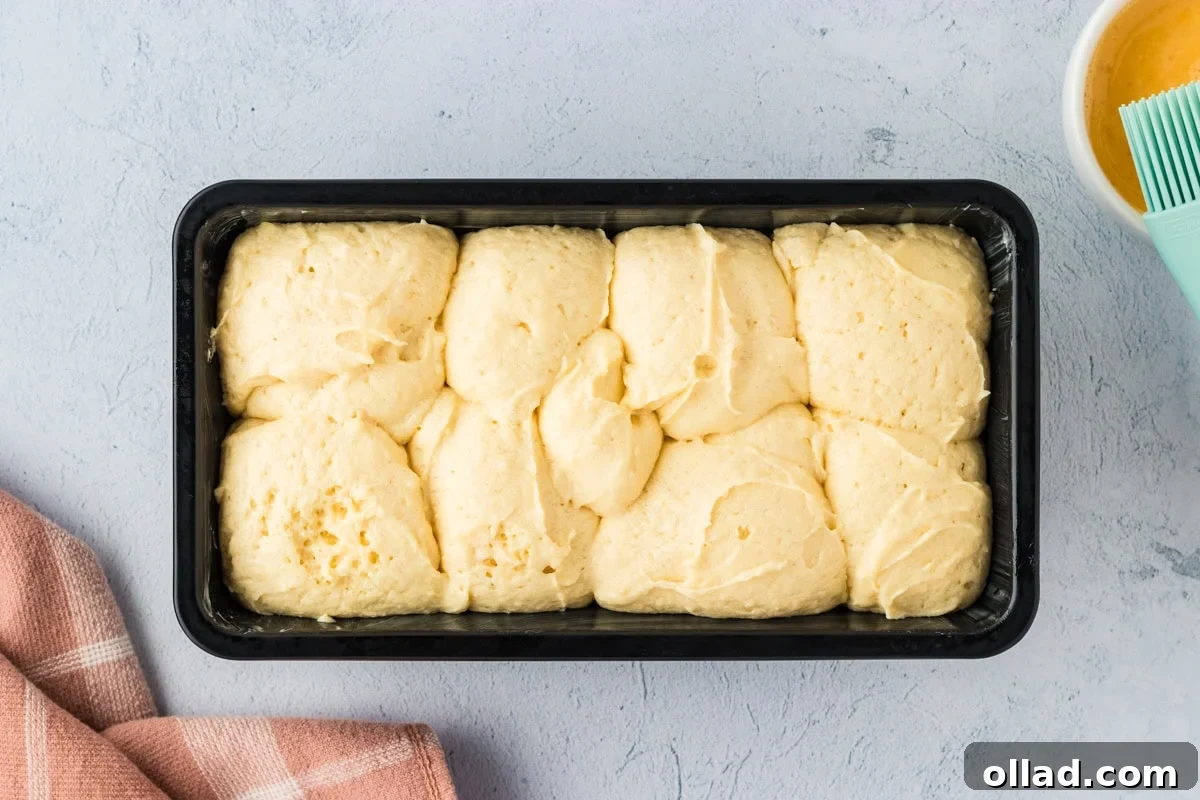
Cover the loaf pan with plastic wrap and allow the dough to rise on your counter. The goal is for the dough to almost reach the top of the loaf pan. The rising time can vary based on your kitchen’s temperature and humidity, but typically ranges from 45 minutes to an hour. Check it in 10-minute intervals after 45 minutes until it reaches the desired height. In my experience, it usually takes about an hour.
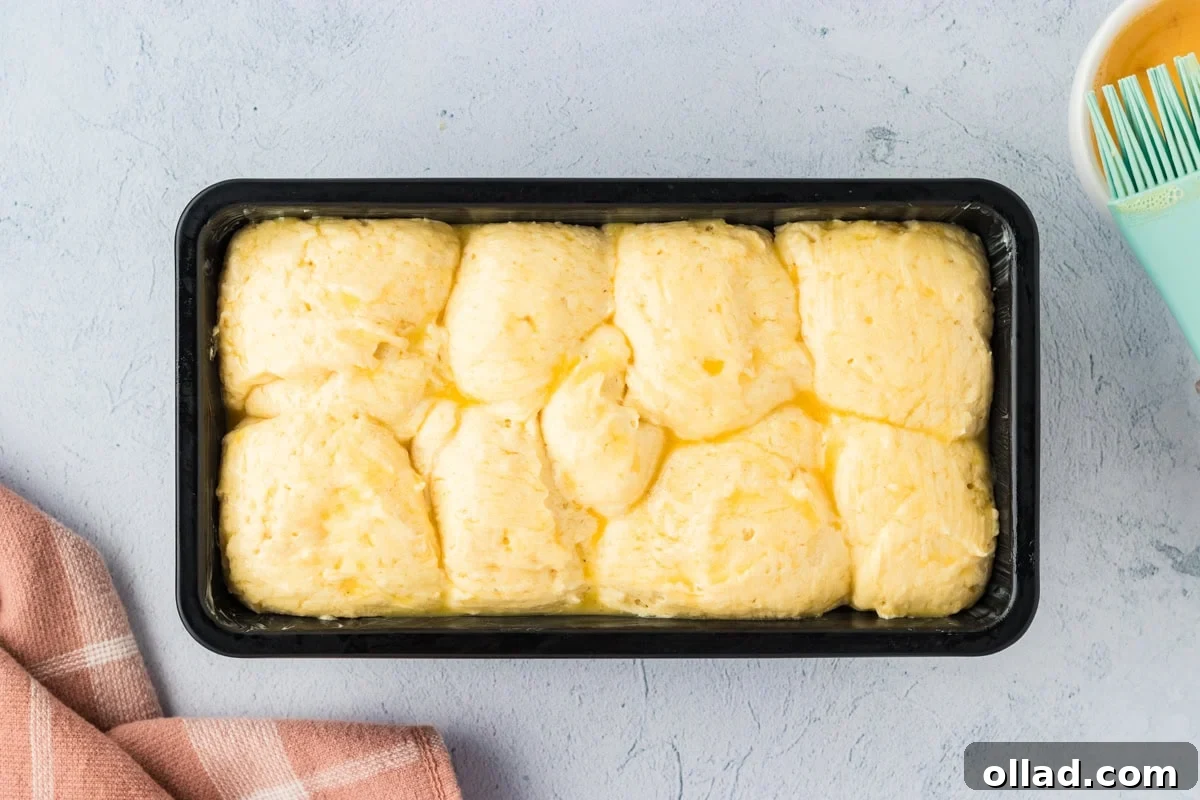
Preheat your oven to 350°F (175°C). While the oven is preheating, gently brush the top surface of your risen brioche loaf with an egg wash, prepared from the remaining egg. This will give your brioche its characteristic golden shine.
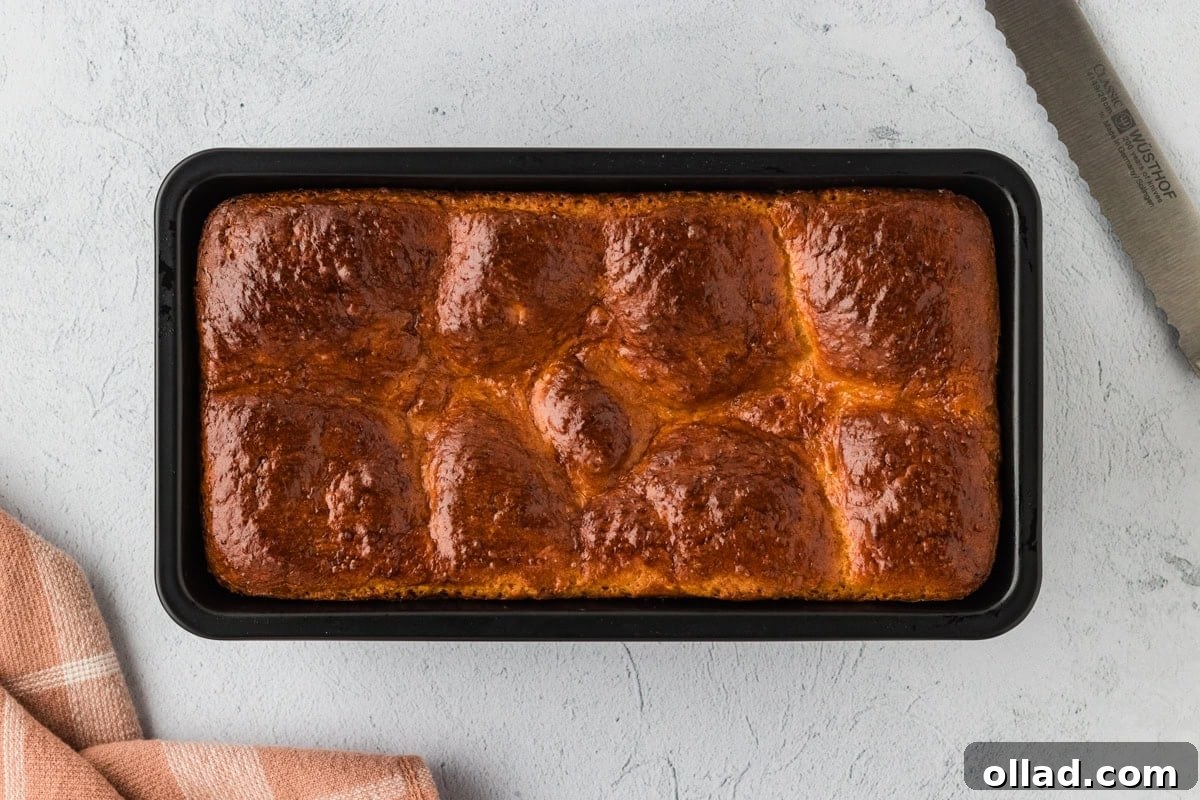
Bake your bread for approximately 30 minutes, or until a cake tester inserted into the center comes out clean and the crust is beautifully golden brown. Once baked, let the loaf rest and cool in the loaf pan for about 30 minutes before carefully removing it. Allow the brioche to cool completely on a wire rack before slicing. Then, cut into generous slices and savor with butter, jam, honey, or a combination of your favorite toppings!