

Mastering Gluten-Free French Macarons: Your Ultimate Guide to Bakery-Style Perfection
Unlock the secrets to baking exquisite French macarons right in your own kitchen with this comprehensive gluten-free recipe. Macarons are naturally crafted with almond flour, making them an ideal and delicious choice for anyone seeking gluten-free desserts. Each delightful cookie promises a delicate, crisp outer shell that gives way to a perfectly chewy center, all lovingly filled with a smooth, velvety buttercream frosting. Utilizing readily available, straightforward ingredients such as finely ground almond flour, fresh egg whites, granulated sugar, and a touch of cream of tartar, you’ll be amazed at how achievable it is to create these elegant, professional-looking treats from scratch.
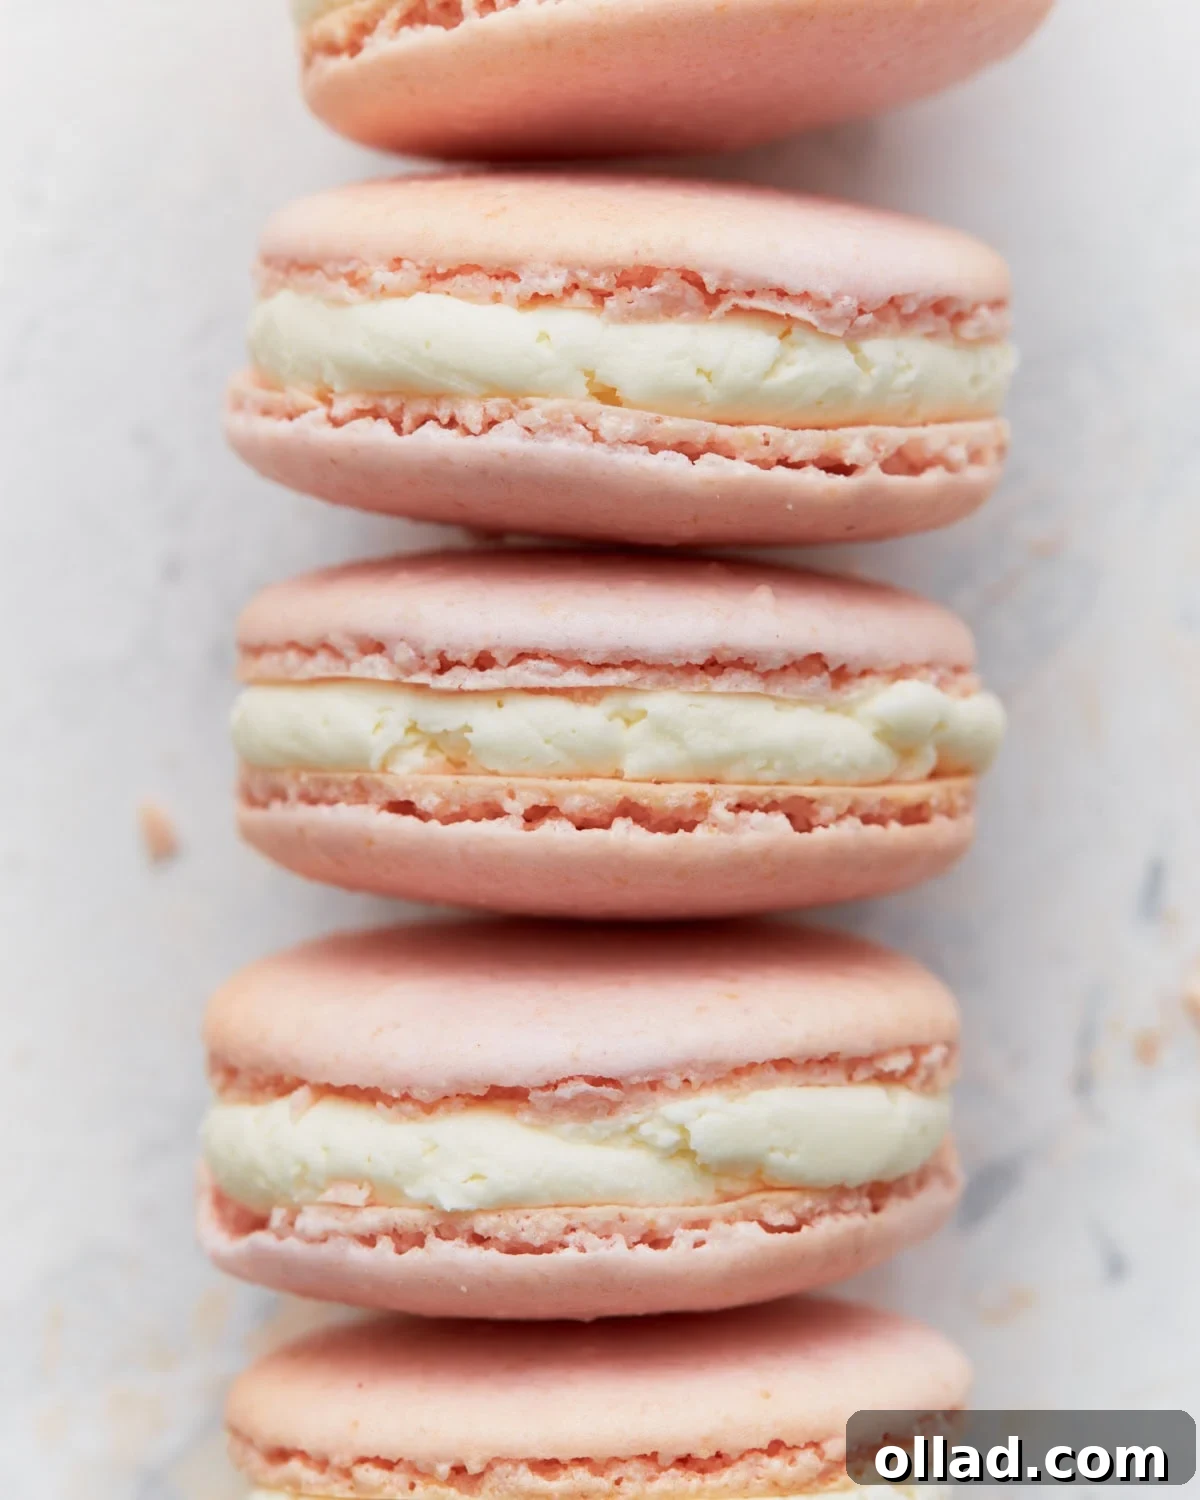
Baking macarons is not just a culinary task; it’s a delightful adventure, and my goal with this recipe is to make it feel accessible and enjoyable for bakers of all skill levels. I’ve invested considerable time perfecting the ‘macaronage’ technique – the critical, gentle folding of almond flour and powdered sugar into a stiff meringue. This guide will meticulously describe what the batter should look and feel like at each stage, ensuring you achieve that elusive perfect consistency. With only a handful of fundamental ingredients like egg whites, almond flour, powdered sugar, and a hint of vanilla, you’ll produce shells that bake up with an irresistibly crisp exterior and that coveted soft, chewy interior. There’s something incredibly satisfying about creating a batch of these elegant cookies when you desire a sophisticated treat that isn’t overly complicated to prepare. If you embark on this delicious journey, please share in the comments what delightful filling you choose for your gluten-free French macarons!
Why Choose Gluten-Free French Macarons?
French macarons inherently lend themselves to being a naturally gluten-free delicacy, primarily because their structure relies on almond flour rather than traditional wheat flour. This makes them a fantastic choice for individuals with celiac disease, gluten sensitivity, or those simply choosing a gluten-free lifestyle. Unlike many gluten-free baked goods that require special flour blends or adaptations, macarons embrace almond flour as their core ingredient, celebrating its fine texture and subtle nutty flavor. This recipe ensures that everyone can indulge in the luxurious experience of a perfectly crafted macaron without compromise, offering peace of mind and pure enjoyment. It’s not just about avoiding gluten; it’s about savoring a cookie that is intrinsically light, flavorful, and exquisitely structured.
Essential Gluten-Free Macaron Baking Tips for Success
Creating perfect macarons can feel intimidating, but by following these crucial tips, you’ll significantly increase your chances of success and achieve those beautiful, professional-looking shells.
- Precision is Key: Weigh Your Ingredients. Macaron baking is a science, and even slight variations in ingredient amounts can throw off the delicate balance. I cannot stress enough the importance of using a reliable digital kitchen scale to weigh your almond flour, powdered sugar, egg whites, and granulated sugar. Measuring by volume (cups) can lead to inconsistencies due to varying compaction levels of dry ingredients, whereas weighing ensures exact proportions every single time. This precision is fundamental for consistent results.
- Achieve Ultra-Smooth Shells: Sift Dry Ingredients Twice. The texture of your macaron shells is paramount. To prevent any gritty texture or visible specks, it’s vital to double-sift your almond flour and powdered sugar. This process removes every tiny lump and ensures an incredibly fine, airy mixture. Not only does it contribute to ultra-smooth shell tops, but it also helps to evenly aerate the batter, which is a key factor in preventing hollow macarons. Don’t skip this step – it’s a small effort with a big impact!
- Build a Strong Foundation: Whip the Meringue Fully. The meringue forms the backbone of your macaron. You must beat the egg whites until they reach stiff, glossy peaks that hold their shape perfectly when you lift the whisk. The meringue should look like shaving cream – firm, shiny, and stable. An under-whipped meringue lacks the necessary structure, leading to a weak batter that collapses in the oven, resulting in cracked tops and flat, footless shells. Conversely, an over-whipped meringue can be dry and difficult to incorporate, so aim for that firm, but still somewhat pliable, consistency.
- Master the ‘Macaronage’ Technique. This is perhaps the most critical step. Macaronage refers to the gentle folding of the dry ingredients into the meringue. Fold slowly and deliberately, using a spatula to scrape the sides and bottom of the bowl, bringing the batter up and over. The goal is to deflate the meringue just enough to achieve a specific consistency: the batter should flow off your spatula in thick, continuous ribbons, like slow-moving lava. When you can lift your spatula and draw a clean figure-eight with the flowing batter without it breaking, you’ve reached the perfect ‘macaronage.’ This ideal consistency is what allows for the formation of those characteristic ruffled ‘feet’ at the base of each shell.
- Allow for Proper Drying: Rest the Shells Completely. After piping your macaron circles, patience is a virtue. You must let the piped shells rest uncovered at room temperature for an adequate amount of time. This resting period, often referred to as “crusting,” allows a thin, dry skin to form on the surface of the shells. This skin is crucial because it traps the steam during baking, forcing the macaron to rise upwards and create the signature ‘feet.’ If the shells are even slightly tacky, the trapped steam will have nowhere to go but out, causing the shells to crack instead of rising with smooth, domed tops. The resting time can vary depending on humidity, but typically ranges from 30 minutes to an hour or more, until the tops feel completely dry and matte to the touch.
- Calibrate Your Heat: Check Your Oven Temperature. Macarons are notoriously sensitive to temperature fluctuations. Even a minor difference of 10-15 degrees Fahrenheit can dramatically affect the outcome, leading to issues like browning, cracked shells, or a complete absence of feet. Investing in an inexpensive oven thermometer is highly recommended. It will give you an accurate, consistent reading of your oven’s actual temperature, allowing you to make precise adjustments and ensure optimal baking conditions every single time.
Gluten-Free French Macarons
Servings: 20 macarons
Prep: 1 hr
Cook: 16 mins
Rest Time: 1 hr
Total: 2 hrs 16 mins
Enjoy these French classics at home with this Gluten-Free French Macarons recipe. Macarons are typically made with almond flour, making them perfect for anyone who needs or prefers gluten-free desserts.
Equipment
- 1 hand or stand mixer
- 1-2 baking sheets
Ingredients
Macaron Shells
- 4.59 oz. (130g) powdered sugar
- 4.59 oz. (130g) blanched almond flour, finely ground*
- 3.53 oz. (100g) egg whites, room temperature (about 3 large eggs)
- ¼ tsp cream of tartar
- 3.17 oz. (90g) granulated sugar
- ½ tsp vanilla extract
- 1-2 drops gel food coloring, optional
Filling (Basic Buttercream)
- ½ cup unsalted butter, softened
- 2 cups powdered sugar
- 1 tsp pure vanilla extract
- 1-2 tbsp heavy cream
Notes
*Use blanched almond flour. Unblanched almond flour contains the almond skins, which can make macaron shells speckled, gritty, and prone to cracking. Blanched flour gives a smoother, more delicate result.
Nutrition Information (Approximate per serving)
- Serving: 1 macaron
- Calories: 173 kcal
- Carbohydrates: 24g
- Protein: 2g
- Fat: 8g
- Saturated Fat: 3g
- Polyunsaturated Fat: 0.2g
- Monounsaturated Fat: 1g
- Trans Fat: 0.2g
- Cholesterol: 13mg
- Sodium: 10mg
- Potassium: 17mg
- Fiber: 1g
- Sugar: 23g
- Vitamin A: 153 IU
- Vitamin C: 0.004mg
- Calcium: 16mg
- Iron: 0.3mg
Nutrition information is automatically calculated and should be used as an approximation only.
Additional Info
Course: Baking, Dessert
Cuisine: French
How to Make Gluten-Free French Macarons Step by Step
Follow these detailed instructions to create beautiful and delicious gluten-free French macarons. Pay close attention to each step for the best results.
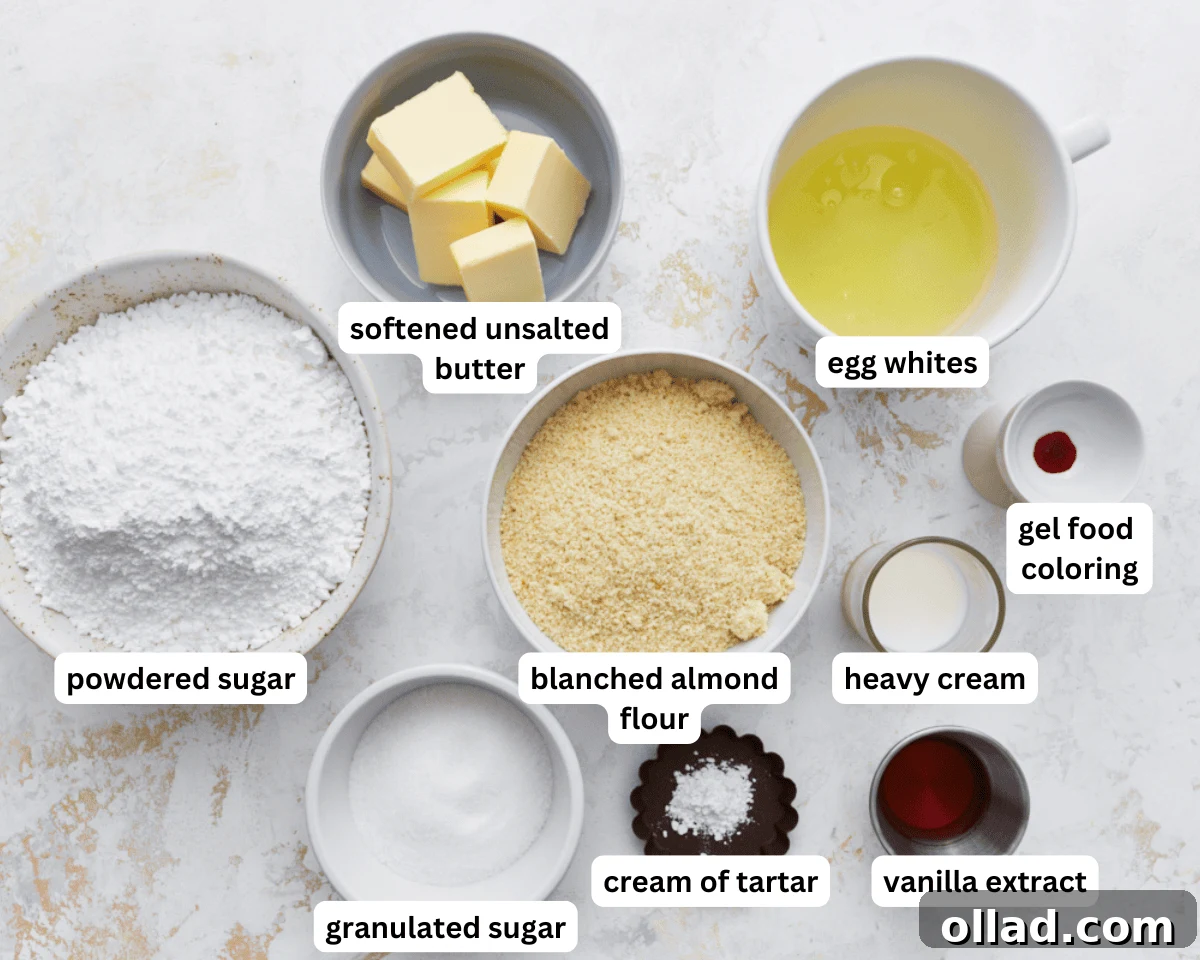
1. Gather and Prepare: Begin by carefully gathering all your ingredients. Ensure egg whites are at room temperature, which helps them whip up more effectively. Line two sturdy baking sheets with either parchment paper or high-quality silicone baking mats. Set these aside, ready for piping. Having everything prepped before you start mixing will streamline the process.
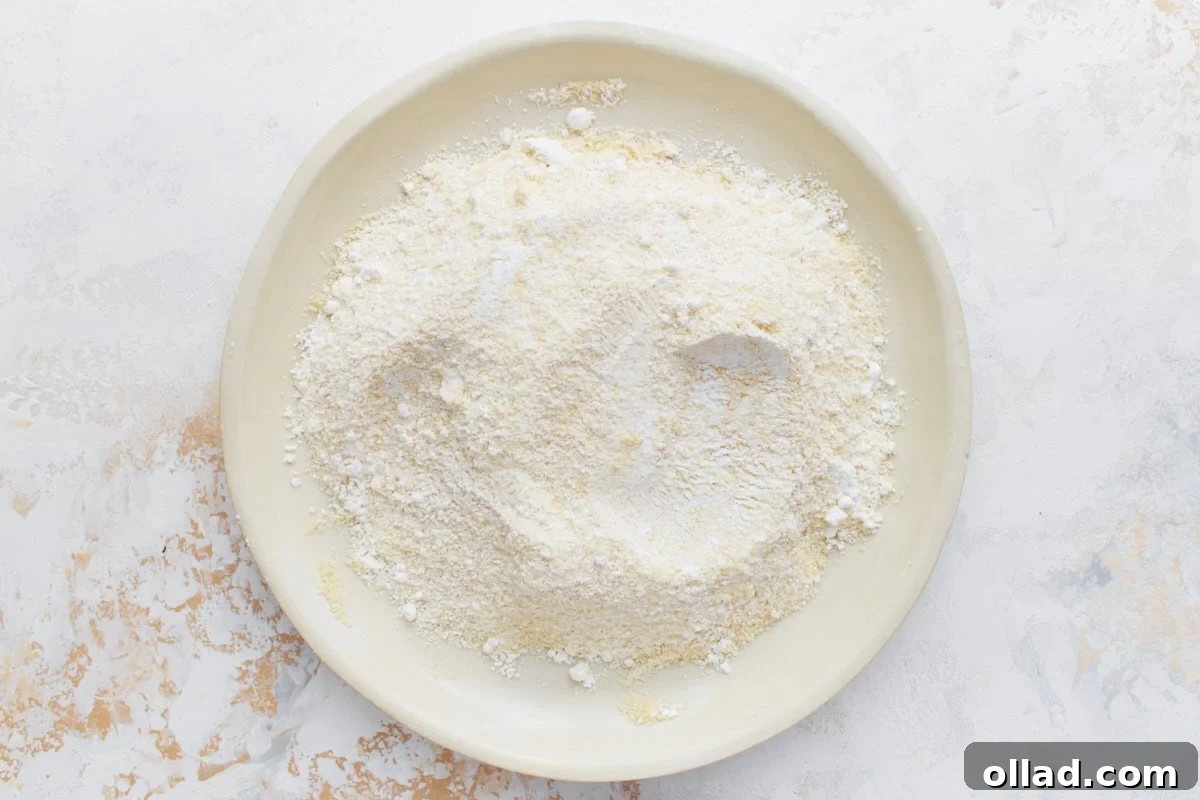
2. Double Sift Dry Ingredients: In a medium bowl, combine 4.59 oz (130g) of powdered sugar and 4.59 oz (130g) of blanched almond flour. Sift this mixture through a fine-mesh sieve into another clean bowl or onto a large plate. Then, sift the mixture a second time. This crucial step removes any tiny lumps from the powdered sugar and ensures the almond flour is extra fine, preventing gritty or speckled shells. Discard any coarse bits that remain in the sieve after the second sifting.
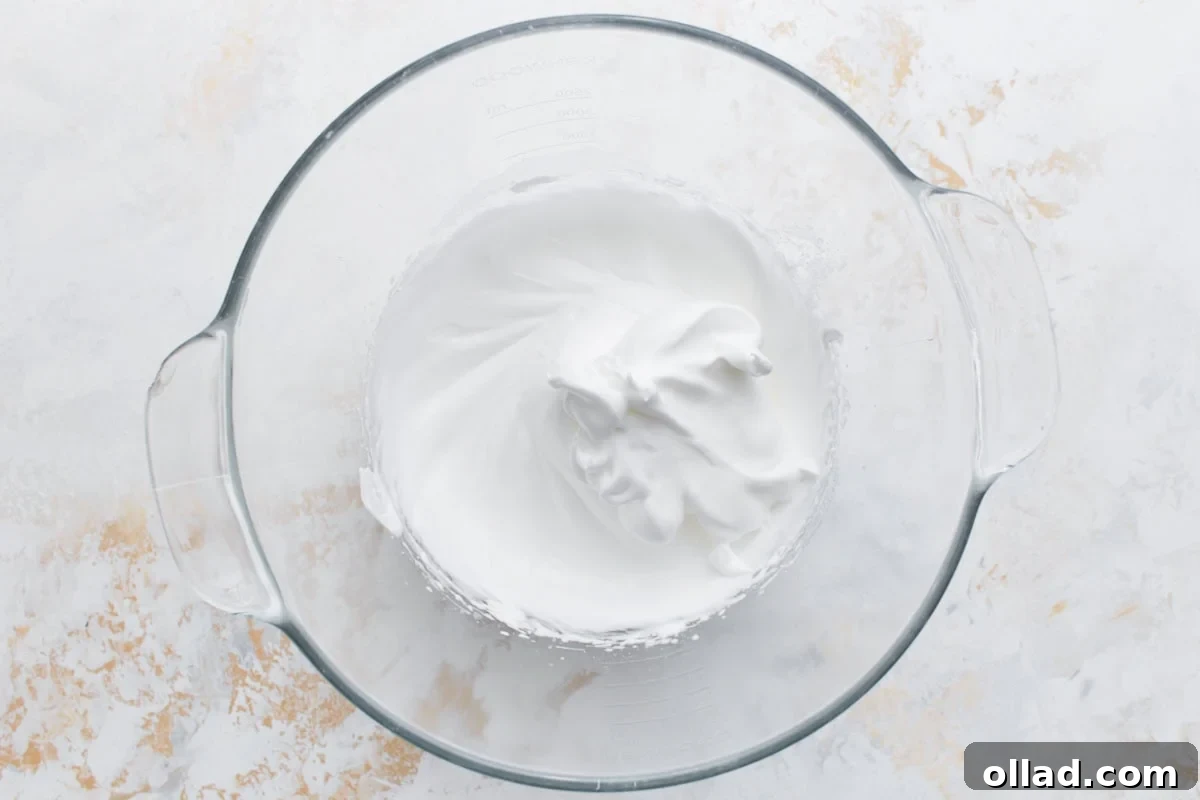
3. Whip the Meringue: In the clean bowl of a stand mixer fitted with a whisk attachment (ensure the bowl and whisk are grease-free, as any trace of fat can prevent egg whites from whipping), begin beating 3.53 oz (100g) of room temperature egg whites on medium speed until they become foamy and bubbly. At this stage, add ¼ tsp of cream of tartar, which acts as a stabilizer. Continue mixing, gradually streaming in 3.17 oz (90g) of granulated sugar, one tablespoon at a time, allowing it to fully dissolve before adding more. Increase the speed to medium-high and beat until the meringue forms stiff, glossy peaks that stand straight up when the whisk is lifted. This process typically takes about 4–5 minutes, depending on your mixer. The meringue should be firm and stable.
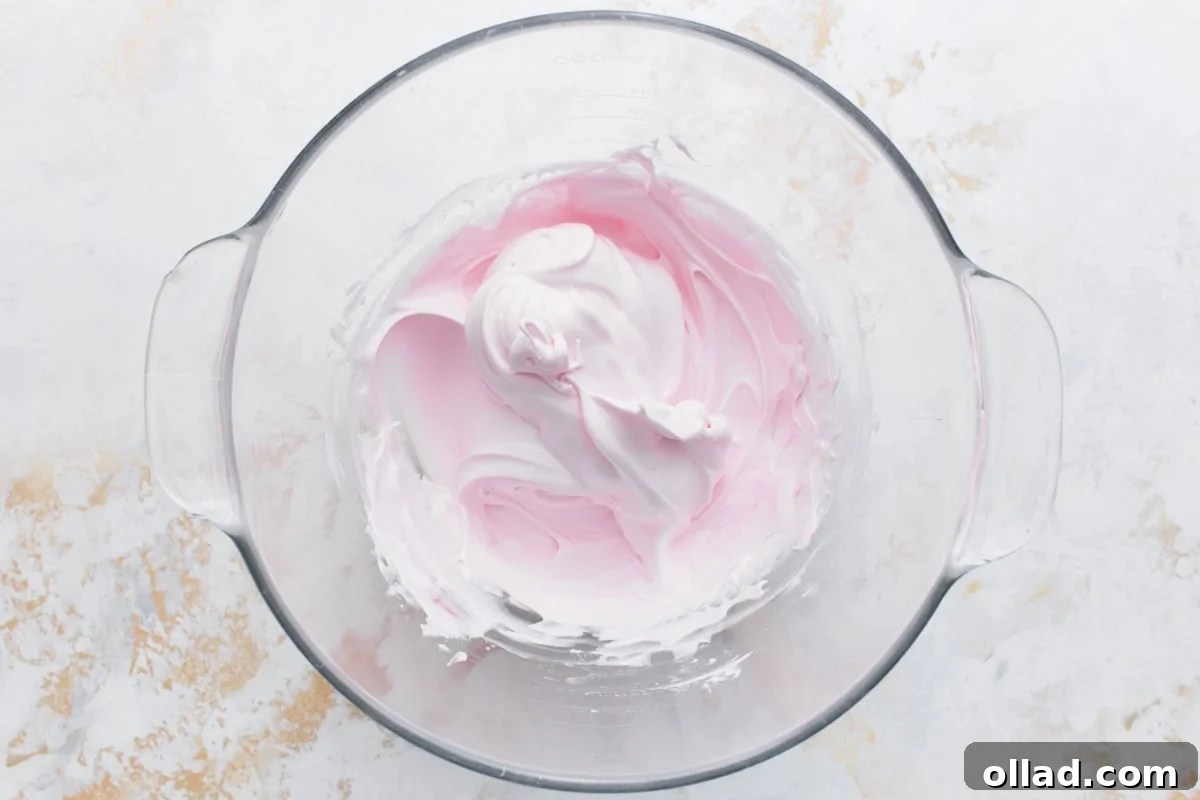
4. Add Flavor and Color: Gently fold in ½ tsp of vanilla extract and 1–2 drops of gel food coloring, if you are using it, into the stiff meringue. Mix just until the color is evenly distributed and the vanilla is incorporated. Avoid overmixing at this stage to maintain the meringue’s volume.
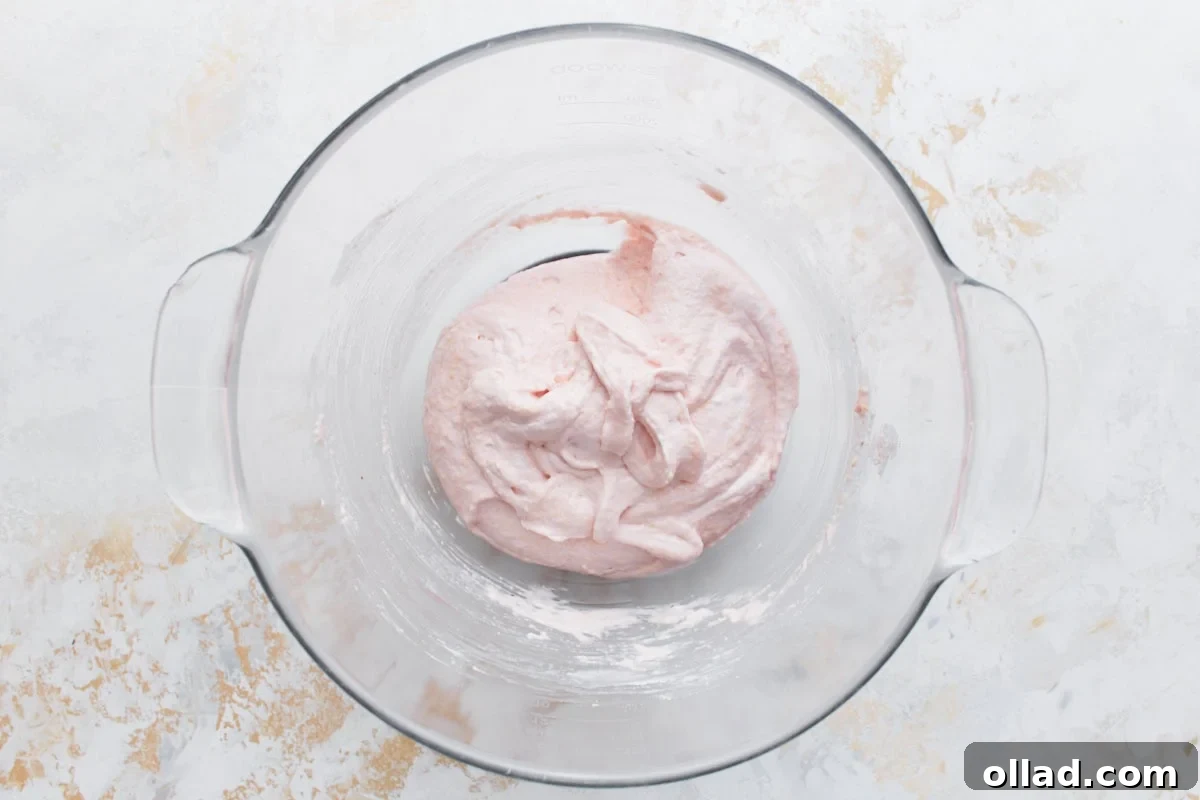
5. Perform ‘Macaronage’ (Fold the Batter): This step is critical. Add the sifted almond flour and powdered sugar mixture to the meringue in three separate additions. After each addition, use a rubber spatula to gently fold the dry ingredients into the meringue. The technique involves scraping down the sides of the bowl, then bringing the batter from the bottom up and over the top, pressing out air as you go. Continue this gentle folding until the batter reaches the “lava-like” consistency – it should flow off your spatula in smooth, thick ribbons. You can test this by lifting your spatula and drawing a figure-eight with the falling batter; if it flows continuously without breaking, it’s ready. Be careful not to overmix, as this will lead to runny batter and flat macarons.
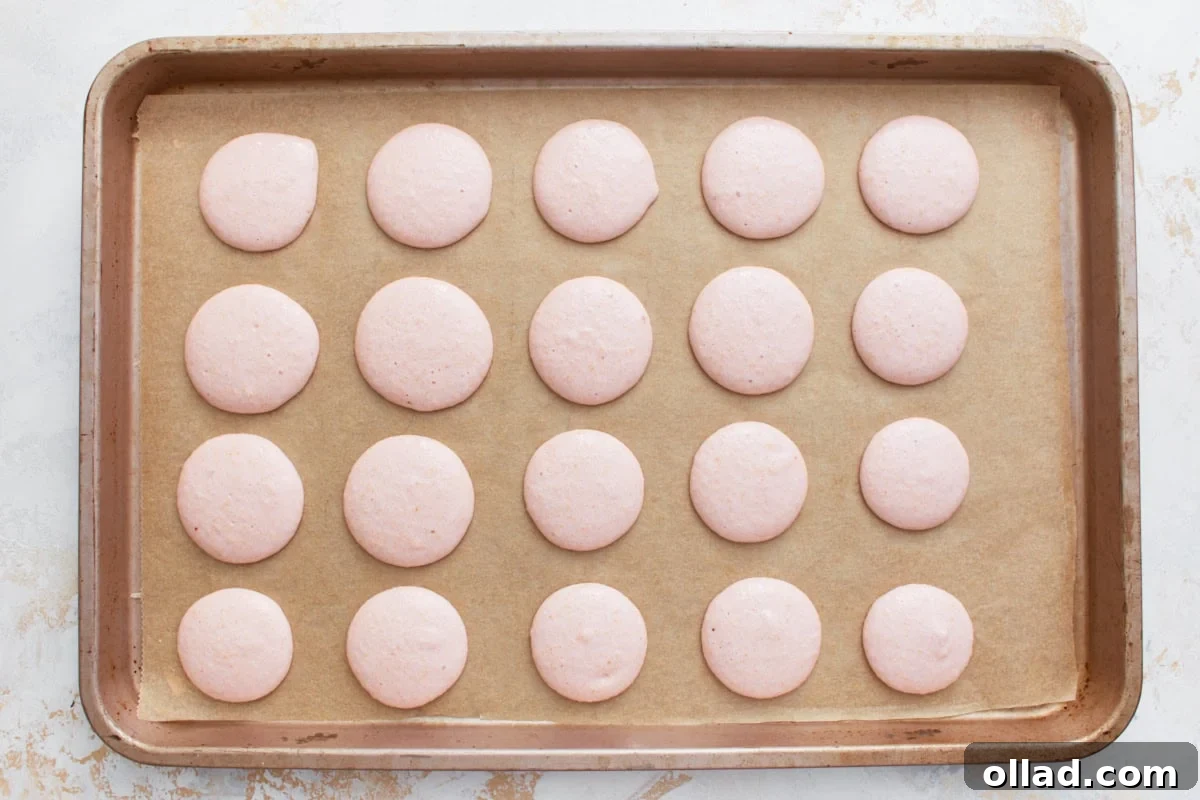
6. Pipe the Shells: Transfer the prepared macaron batter into a piping bag fitted with a round tip (approximately ½ inch or a Wilton 1A tip). Hold the piping bag perpendicular to your prepared baking sheets. Pipe 1-inch circles onto the parchment paper or silicone mats, ensuring they are spaced about 1 inch apart to prevent them from merging. Once piped, firmly tap each baking tray against your counter several times (4-5 vigorous taps) to release any trapped air bubbles within the shells. Use a toothpick to gently pop any visible air bubbles on the surface for a smooth finish.
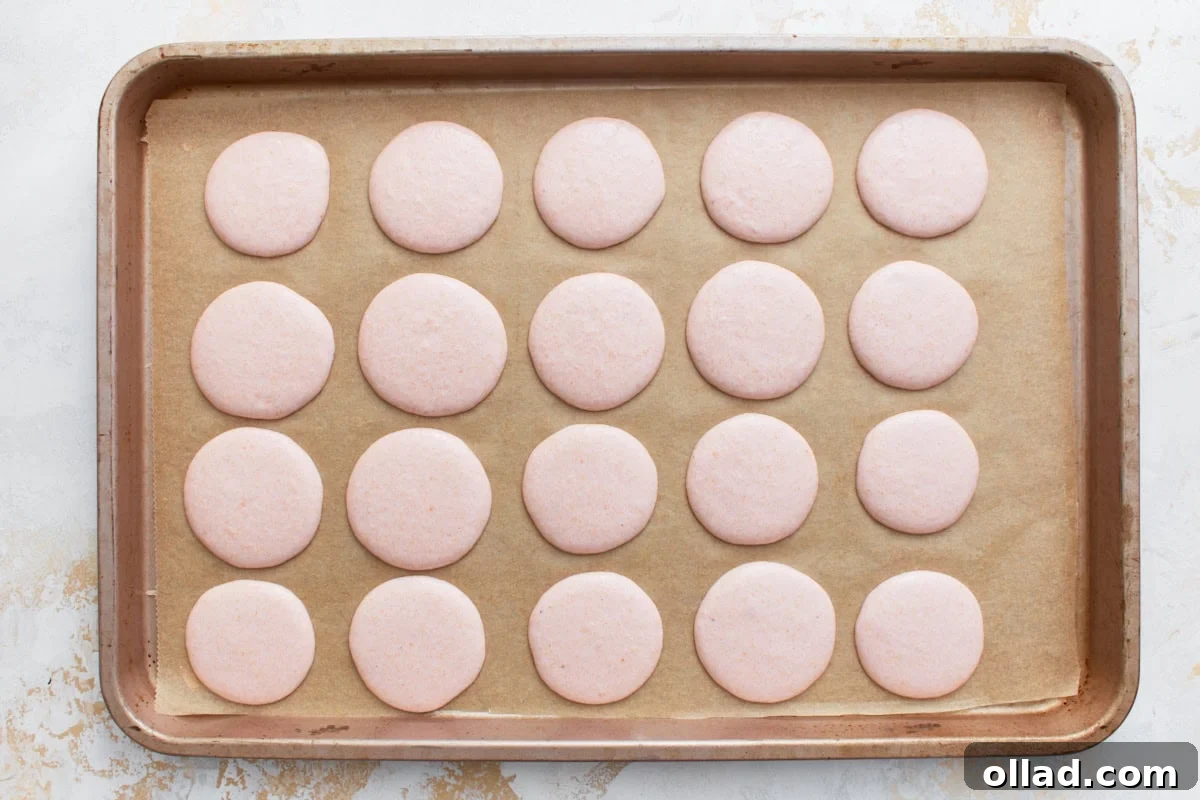
7. Rest the Shells: This step is crucial for achieving the characteristic “feet.” Allow the piped macaron shells to rest uncovered at room temperature for approximately 1 hour. The exact time can vary depending on the humidity in your environment; in a humid climate, it might take longer. The shells are ready when their tops feel completely dry and matte to the touch, and you can gently touch them without any batter sticking to your finger. This dry “skin” is what will help them develop feet in the oven.
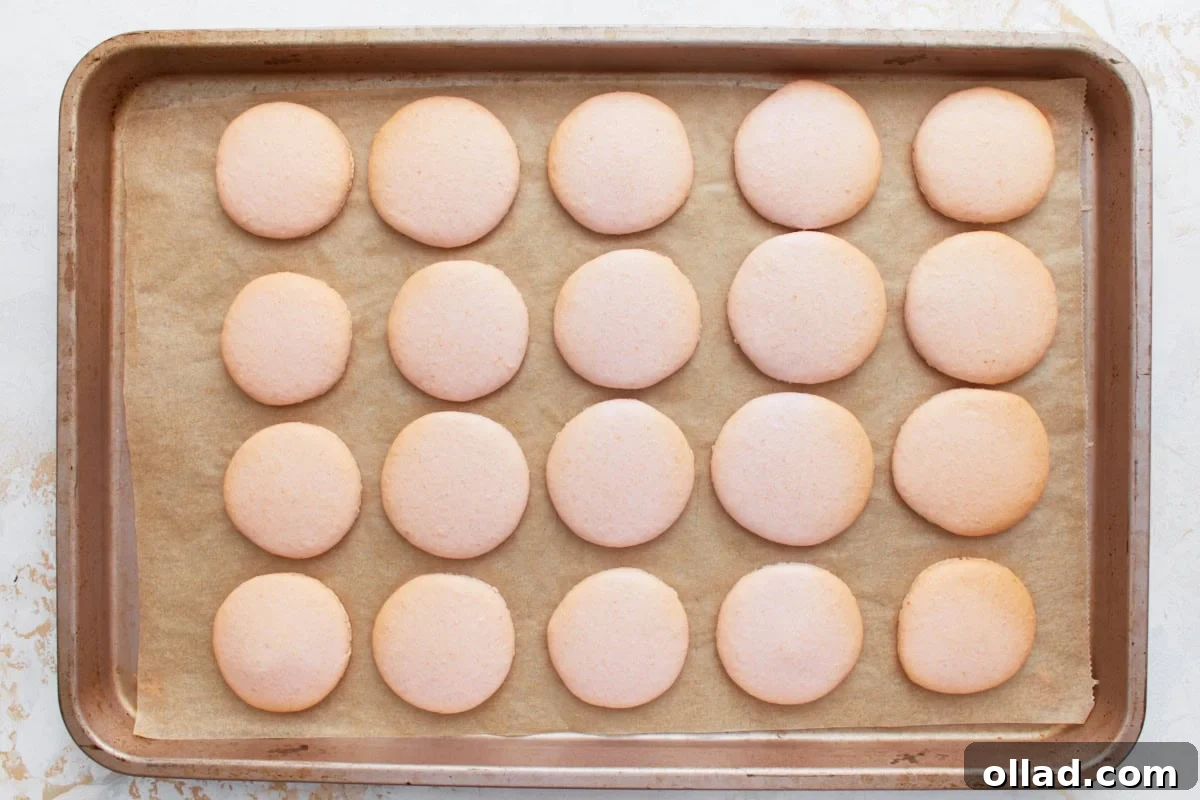
8. Bake the Shells: Preheat your oven to 300°F (150°C). It is highly recommended to use an oven thermometer to ensure accuracy. Bake one tray of macarons at a time for 14–16 minutes. The exact baking time can vary by oven. The shells are done when they have developed prominent “feet” and no longer wobble or stick to the parchment paper when gently touched. Avoid over-baking, which can lead to hollow or brittle shells. Once baked, remove the trays from the oven and allow the shells to cool completely on the baking sheet before attempting to remove them from the parchment or silicone mat. Peeling them off too early will cause them to break.
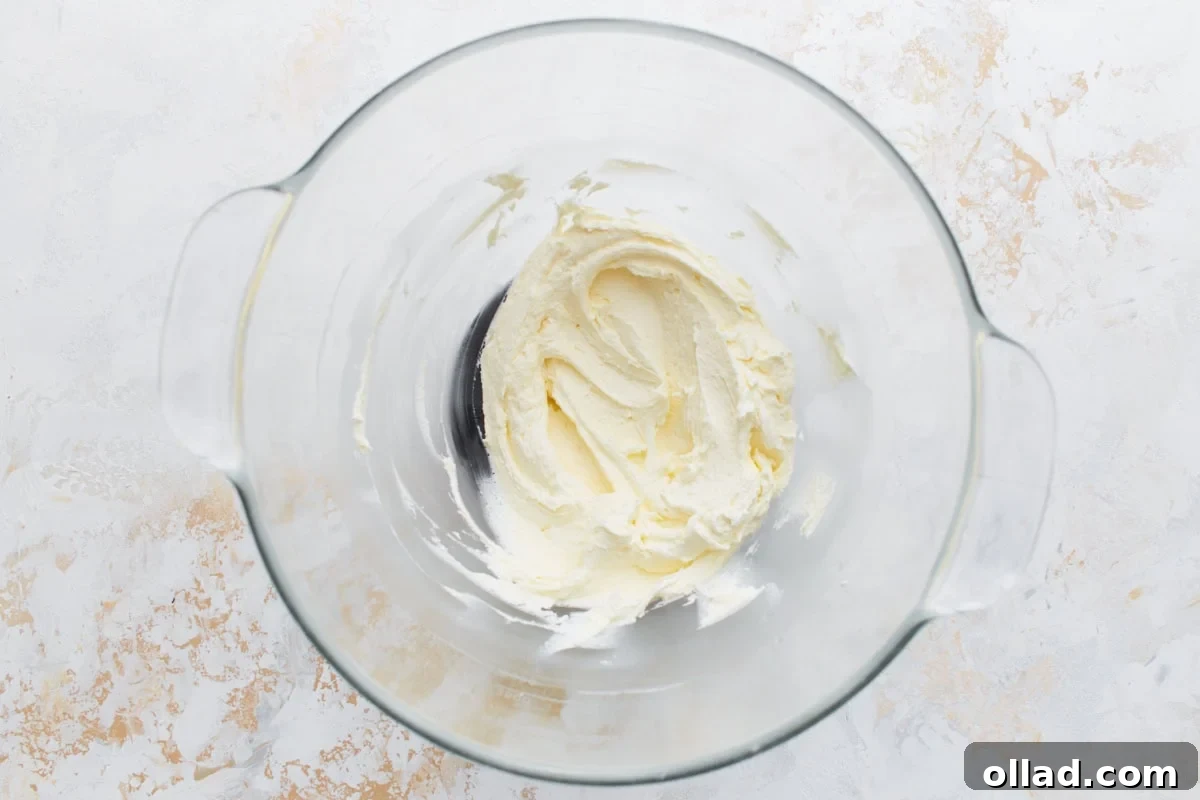
9. Prepare the Filling: While the macaron shells are cooling, prepare your buttercream. In a clean mixing bowl, beat ½ cup of softened unsalted butter with an electric mixer until it is light and creamy, about 2-3 minutes. Gradually add 2 cups of powdered sugar, mixing on low speed until combined, then increase to medium-high and beat until fluffy. Mix in 1 tsp of pure vanilla extract and 1–2 tbsp of heavy cream. Start with one tablespoon and add more if needed to reach a smooth, fluffy, and pipeable consistency. You want the buttercream to be soft enough to pipe but firm enough to hold its shape.
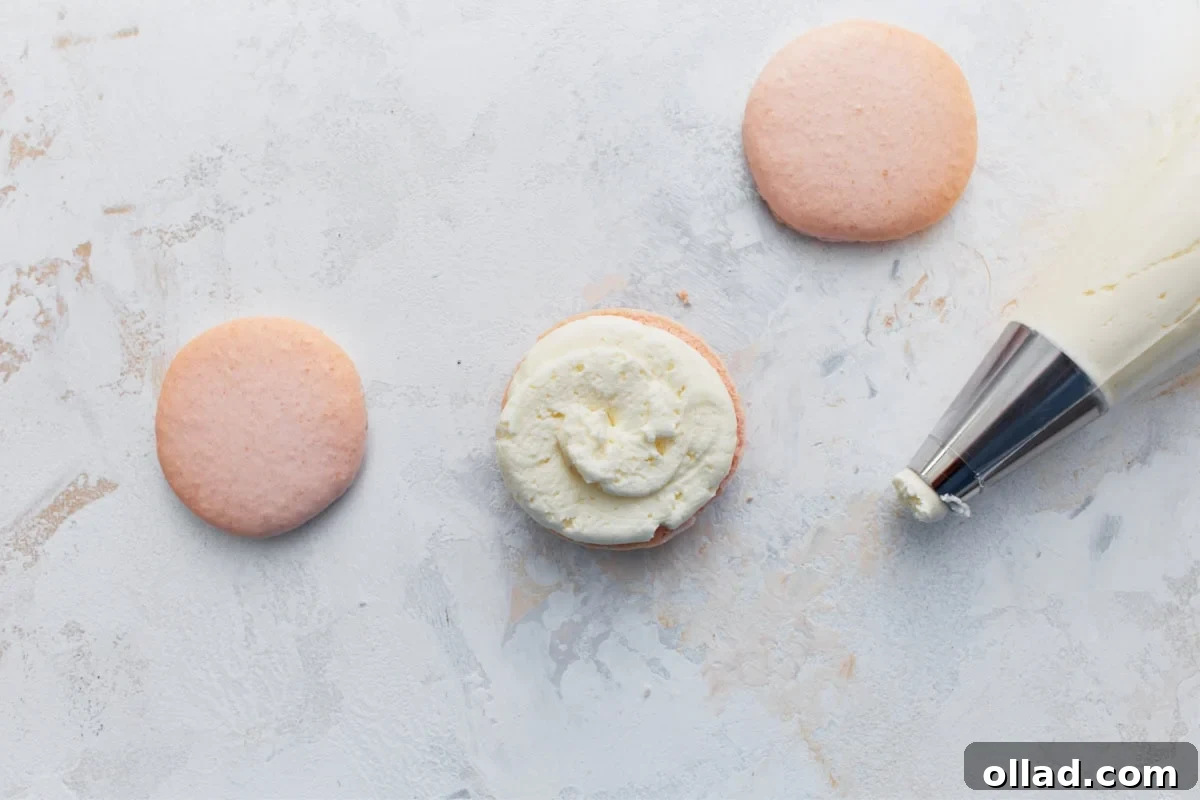
10. Assemble the Macarons: Ensure your macaron shells are completely cooled before you begin assembly. Once cool, they should easily lift off the parchment paper. Pair shells of similar size. Pipe a small, generous amount of buttercream onto the flat side of one macaron shell. Gently take another matching shell and press it on top to form a sandwich. Apply just enough pressure to spread the filling to the edges without cracking the delicate shells.
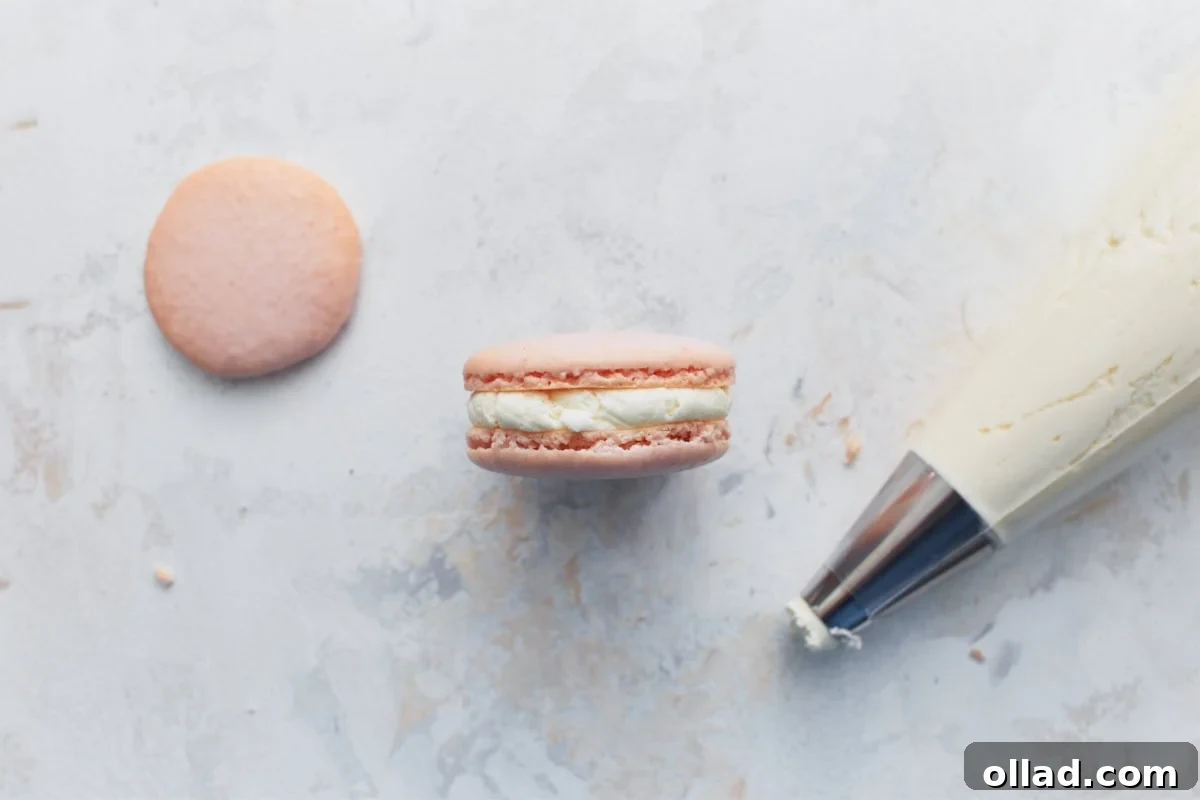
11. Rest and Serve (Maturation): For the absolute best texture and flavor, assembled macarons benefit greatly from a “maturation” period. Refrigerate the filled macarons in an airtight container for at least 24 hours. This allows the moisture from the filling to slightly soften the chewy center of the shells, creating that signature melt-in-your-mouth experience. Before serving, let them come to room temperature for about 20-30 minutes to ensure the buttercream is soft and creamy. Enjoy your perfectly crafted gluten-free French macarons!
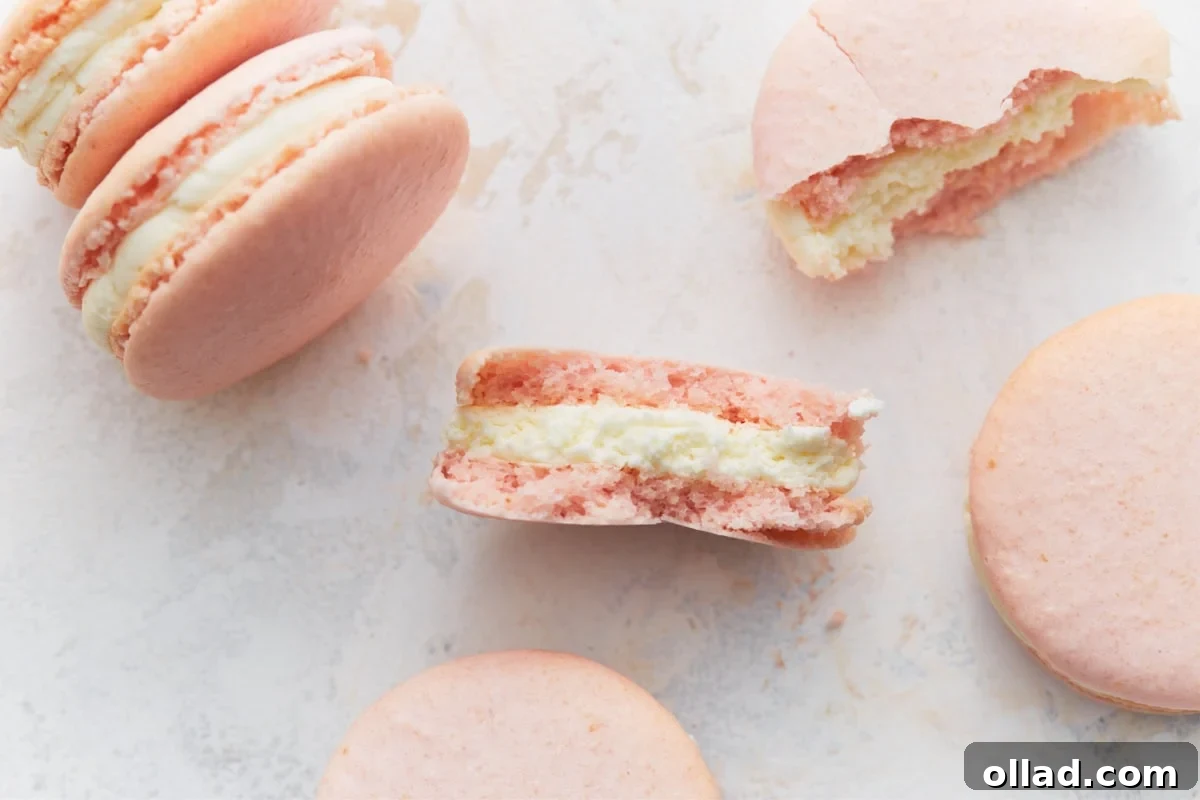
Delicious Gluten-Free Macaron Recipe Variations
Once you’ve mastered the basic technique, the world of macaron flavors and designs opens up! Get creative with these exciting variations:
- Infuse with Different Extracts: While vanilla is a classic, don’t hesitate to experiment! Swap vanilla extract with almond, lemon, coffee, pistachio, or raspberry extracts to create distinct flavor profiles. Consider seasonal extracts like peppermint for holiday macarons or bright citrus flavors like orange or lime for spring and summer treats.
- Explore Diverse Fillings: The buttercream in this recipe is a wonderful base, but the possibilities for fillings are endless. Try rich chocolate ganache, tangy lemon curd, sweet strawberry jam, luxurious cream cheese buttercream, or even a delicate espresso buttercream for coffee lovers. Matching the filling flavor to the shell’s extract creates a harmonious bite.
- Play with Color and Design: Gel food coloring allows for vibrant shells. Use different colors to create a rainbow assortment, perfect for themed parties or gift boxes. You can even try marbling two colors together in the piping bag for a unique swirled effect. For a truly festive look, add sprinkles to the piped shells before resting, or dust with cocoa powder or edible glitter after baking.
- Add Garnishes and Embellishments: Elevate the visual appeal of your macarons. Before baking, you can sprinkle a tiny pinch of flaky sea salt on chocolate-flavored shells or some finely chopped nuts. After filling, roll the edges of the filled macarons in desiccated coconut, chopped pistachios, or finely crushed freeze-dried fruit for added texture and flavor.
Common Troubleshooting for Perfect Macarons
Macarons can be finicky, but understanding common issues can help you diagnose and correct problems for your next batch. Don’t be discouraged; practice makes perfect!
- Cracked Shells: This is a frequent issue and usually indicates that the macaron shells did not rest for a sufficient amount of time to form a dry “skin.” Without this skin, the steam generated during baking has nowhere to escape but through the top, causing cracks. Ensure the shells feel completely dry and matte to the touch before baking. Another culprit can be an oven temperature that is too high, causing them to bake too quickly and crack. Always use an oven thermometer to verify accuracy.
- No “Feet”: The ruffled edge, or “feet,” is a hallmark of a properly baked macaron. Flat macarons without feet typically stem from either an overmixed batter or an under-whipped meringue. The meringue must be whipped to stiff, glossy peaks to provide the necessary structure. If the batter is overmixed, too much air is deflated, preventing the feet from forming. Aim for the “lava-like” consistency during macaronage – it should flow slowly, not run quickly. When in doubt, it’s easier to slightly under-mix and fold a few more times than to over-mix, which is irreversible.
- Hollow Shells: Discovering hollow shells after baking can be frustrating. This often happens when the meringue is not whipped enough, lacking sufficient stability, or when the batter is overfolded, leading to air pockets that collapse during or after baking. Ensure your meringue is whipped until firm, tall peaks form. During macaronage, fold gently and stop as soon as the batter achieves the correct ribbon consistency; do not continue folding past this point. An unstable oven temperature can also contribute to hollows, so monitor it closely.
- Wrinkled Tops: If your macaron tops appear dull, wrinkled, or uneven, it could be due to a low oven temperature or shells that rested for too long. A low oven doesn’t allow the shells to rise properly, causing them to spread and wrinkle. Conversely, if the dried skin becomes too thick from resting excessively, it can also lead to a wrinkled appearance. Verify that your oven is fully preheated to the correct temperature and avoid leaving piped shells out significantly longer than the recommended resting time once they feel dry.
- Batter Too Thick: If your macaron batter remains stiff, doesn’t flow easily, or breaks when trying to perform the figure-eight test, it is under-mixed. The goal is to deflate the meringue just enough to create a flowing batter. Continue to fold a few more turns with your spatula, gently pressing against the sides of the bowl. Test frequently after each fold to ensure you don’t accidentally overdo it. The perfect texture should fall from your spatula like slow, glossy lava.
- Batter Too Runny: Unfortunately, a runny macaron batter means it has been severely over-mixed. The delicate structure of the meringue has broken down, and too much air has been knocked out. At this stage, there is no way to repair the batter, and it will result in flat, spread-out cookies without feet. To prevent this in future batches, stop folding the very moment you achieve a smooth ribbon that can form a continuous figure-eight. It’s better to err on the side of slightly under-mixing than to over-mix.
- Food Coloring Thins the Batter: Using liquid food coloring instead of gel can introduce excess moisture into your delicate macaron batter. This added liquid can weaken the meringue and make the batter too runny, leading to shells that spread or have structural issues. Always opt for high-quality gel food coloring, which provides vivid color with just a few drops, without affecting the batter’s crucial consistency.
Elegant Serving Suggestions
These gluten-free French macarons are stars on their own, offering a touch of refined elegance to any occasion. Serve them simply on a beautiful platter as a sophisticated standalone dessert, or elevate your afternoon with a delightful pairing. They are exquisite when accompanied by a freshly brewed cup of hot coffee, a delicate espresso, or your favorite aromatic tea. For a grander dessert display, consider arranging them alongside other delectable gluten-free treats such as vibrant Gluten-Free Lemon Bars or charming Gluten-Free Mini Cheesecakes, creating a perfect spread for holidays or special gatherings. I particularly enjoy adding them to a festive cookie tray, nestled amongst other delicate cookies like crumbly Gluten-Free Shortbread Cookies and crisp Gluten-Free Vanilla Wafers, creating an irresistible assortment that’s sure to impress.
Proper Storage Instructions for Freshness
To maintain the exquisite texture and flavor of your gluten-free French macarons, proper storage is essential. Store filled macarons in an airtight container in the refrigerator for up to 5 days. Interestingly, the texture of macarons actually improves after resting for 24 hours in the refrigerator. This “maturation” period allows the moisture from the filling to subtly soften the chewy center of the shells, creating that signature melt-in-your-mouth experience that is characteristic of truly exceptional macarons. Always let them come to room temperature for about 20-30 minutes before serving for optimal enjoyment.
For longer preservation, macarons freeze wonderfully. Arrange filled macarons in a single layer on a baking sheet and freeze until they are firm, typically about 30 minutes to an hour. Once firm, transfer them to a freezer-safe, airtight container, separating layers with parchment paper to prevent sticking. They can be frozen for up to 1 month. To thaw, simply transfer them to the refrigerator overnight, or for a quicker thaw, set them at room temperature for approximately 20 minutes before serving. Unfilled macaron shells can also be frozen or refrigerated separately for similar durations, making them an excellent component to prepare ahead of time for upcoming holidays, parties, or thoughtful gift boxes.
Frequently Asked Questions (FAQ) About Macarons
What is almond flour, and why is it used in macarons?
Almond flour is finely ground, blanched almonds. It’s used in macarons because it provides a light, delicate texture and a subtle nutty flavor that complements the sweet meringue. Unlike wheat flour, almond flour is naturally gluten-free and contributes to the macaron’s unique crisp-chewy consistency.
Can I use liquid food coloring instead of gel?
It is highly recommended to use gel food coloring. Liquid food coloring adds too much moisture to the macaron batter, which can destabilize the meringue and lead to a runny batter, resulting in flat, cracked, or hollow shells. Gel colors provide vibrant hues with only a few drops, without affecting the batter’s consistency.
How long do homemade macarons last?
Filled macarons, stored in an airtight container in the refrigerator, are best enjoyed within 3-5 days. Their flavor and texture actually improve after a 24-hour maturation period in the fridge. Unfilled shells can be stored similarly or frozen for up to a month.
What does “macaronage” mean?
Macaronage is the French term for the critical mixing process where dry ingredients (almond flour and powdered sugar) are folded into the meringue. The goal is to gently deflate the meringue just enough to achieve a batter that flows like “slow lava” and can form a continuous figure-eight from a spatula without breaking. This consistency is essential for proper feet formation and shell texture.
Why are my macarons hollow inside?
Hollow macarons can be caused by several factors: under-whipped meringue (not stable enough), over-mixed batter (too much air deflated), or an oven temperature that is too high or inconsistent. Ensuring your meringue is stiff and glossy, your macaronage is precise, and your oven temperature is accurate (using an oven thermometer) are key to preventing hollows.
More Elegant Gluten-Free Desserts to Try
- Vegan Chocolate Mousse
- Gluten-Free Olive Oil Cake
- Gluten-Free Tres Leches Cake
- Gluten-Free Cheesecake
- Flourless Chocolate Cake
Embarking on the journey of baking gluten-free French macarons is a rewarding experience, transforming simple ingredients into delicate works of edible art. With patience, precision, and the detailed guidance provided in this recipe, you’re well on your way to creating stunning, bakery-quality treats. There’s immense joy in seeing those perfect ‘feet’ emerge and tasting the delightful crisp-chewy texture you’ve meticulously crafted. Happy baking, and enjoy every exquisite bite!