

The Ultimate Guide to Easy & Flexible Gluten-Free Cassava Flour Tortillas
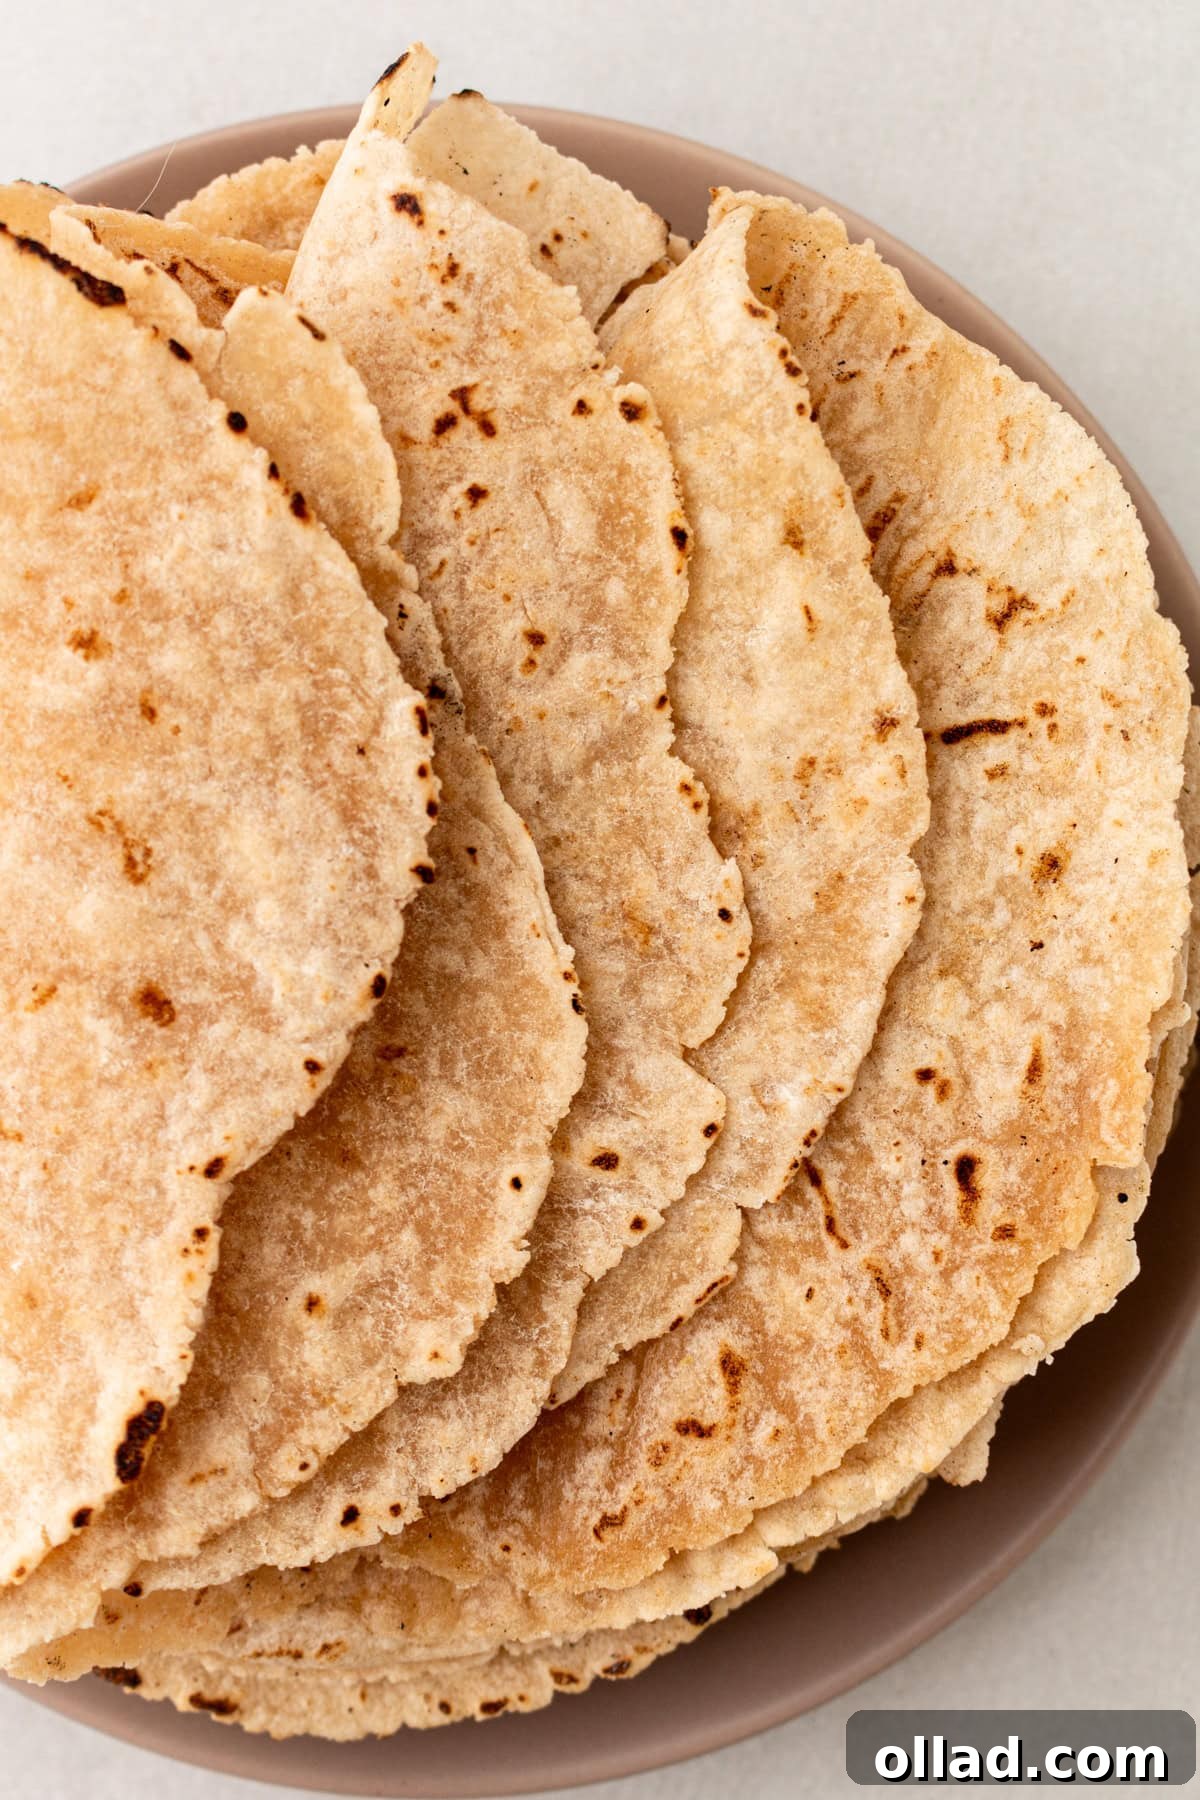
Embark on a culinary journey to create the most incredible gluten-free tortillas you’ve ever tasted! These cassava flour tortillas are not just simple to make, they are revolutionary. Forget store-bought alternatives that often lack flavor or pliability; with just six common ingredients and a few minutes of your time, you’ll be enjoying soft, flexible, and perfectly chewy tortillas ideal for any meal. Thanks to the inherent starchiness of the cassava root, these tortillas boast a delightful texture that makes them perfect for loading with your favorite taco fillings, wrapping up a hearty lunch, or simply savoring straight from the skillet as a delightful snack.
After years of experimenting with countless gluten-free tortilla recipes, I can confidently say that this cassava flour version has earned its place as a new household favorite. The beauty of cassava flour lies in its mild, neutral flavor and incredible versatility, making it a stellar base for a wide array of dishes. To elevate these tortillas even further, we incorporate a touch of tapioca flour, which is crucial for achieving that desirable extra flexibility and signature soft, slightly chewy bite. From vibrant taco nights to quick and healthy school lunch wraps, and even transforming into crispy homemade chips, these tortillas are a game-changer for anyone following a gluten-free diet or simply seeking a superior homemade option.
Why Choose Cassava Flour for Your Tortillas?
Cassava flour, derived from the versatile cassava root (also known as yuca), is a fantastic gluten-free alternative that truly shines in tortilla making. Unlike some gluten-free flours that can result in crumbly or stiff textures, cassava flour naturally provides a smooth, pliable dough that mimics traditional wheat flour incredibly well. Its fine texture and neutral flavor mean it won’t overpower your fillings, making it adaptable for both savory and sweet applications. Opting for cassava flour also means you’re choosing a whole food ingredient that’s naturally grain-free and nut-free, catering to a wider range of dietary needs and preferences.
The secret to cassava’s success in tortillas lies in its high starch content. When hydrated with hot water, these starches gelatinize, creating a dough that is not only easy to work with but also results in a tortilla that holds its shape, folds without cracking, and offers a satisfying chew. This natural binding ability significantly reduces the need for excessive gums or binders often found in other gluten-free recipes, allowing the authentic flavor of your ingredients to stand out.
The Magic of Tapioca Flour and Xanthan Gum in Gluten-Free Tortillas
While cassava flour forms the robust base for our tortillas, tapioca flour and xanthan gum play indispensable supporting roles in perfecting their texture. Tapioca flour, also extracted from the cassava root, is known for its incredible elasticity and chewiness. A small addition of tapioca flour to the mix significantly boosts the flexibility of the tortillas, preventing them from tearing when folded and contributing to that delightful, slightly elastic bite we all love in a good tortilla. It acts as a natural softener and helps achieve a tender crumb, ensuring your tortillas remain soft even after cooling.
Xanthan gum, on the other hand, is a common ingredient in gluten-free baking that acts as a powerful binder and thickener. In the absence of gluten, which naturally provides structure and elasticity, xanthan gum steps in to mimic these properties. It helps to hold the dough together, preventing it from becoming too crumbly and improving its workability. For tortillas, xanthan gum ensures the dough is cohesive enough to roll out thinly without breaking and helps the cooked tortillas maintain their integrity, making them sturdy enough for all your favorite fillings. Together, these two ingredients, alongside cassava flour, create a harmonious blend that delivers perfectly balanced gluten-free tortillas every time.
Homemade vs. Store-Bought: A Game Changer
For many, the idea of making tortillas from scratch might seem daunting, but once you experience the difference, there’s no going back. Homemade tortillas, especially these cassava flour gems, offer an unparalleled freshness and flavor that store-bought versions simply can’t match. You have complete control over the ingredients, ensuring no unwanted additives, preservatives, or hidden allergens make their way into your food. This is particularly beneficial for those with gluten sensitivities or other dietary restrictions.
Beyond health benefits, the sensory experience of homemade tortillas is truly superior. The aroma of freshly cooked tortillas filling your kitchen is intoxicating. The taste is vibrant, and the texture is perfectly soft and pliable, a stark contrast to the often dry, stiff, or overly gummy texture of many commercial gluten-free options. Plus, making your own can be surprisingly cost-effective in the long run, especially if you enjoy tortillas frequently. It’s a simple process that adds a touch of culinary magic to your home cooking, transforming ordinary meals into extraordinary feasts.
Expert Tips for Flawless Gluten-Free Cooking
Crafting perfect gluten-free cassava flour tortillas is an art that becomes effortless with a few key techniques. These tips, honed through extensive gluten-free baking, will ensure your tortillas turn out soft, flexible, and utterly delicious every single time.
- The Critical Role of Hot Water: Cassava flour is highly absorbent, and using water that’s hot, but not at a rolling boil, is crucial. Hot water helps the starches in the cassava flour gelatinize, activating their binding properties and leading to a more pliable and less crumbly dough. Too much heat can make the dough overly sticky, while water that’s too cool will result in a dry, fragile dough. Aim for water that is steaming hot but safe to handle, allowing the dough to come together beautifully.
- Achieving the Perfect Dough Consistency: The ideal dough should feel soft, smooth, and slightly tacky but should not stick excessively to your fingers. It should be easy to press and manipulate without falling apart or leaving residue. If your dough feels too sticky, add a tiny bit more cassava flour (half a teaspoon at a time). If it’s too dry and crumbly, add a splash of hot water (again, half a teaspoon at a time), mixing until the desired consistency is reached. This balance is key to easy rolling and perfect texture.
- Uniform Thickness for Even Cooking: Whether you’re using a tortilla press or a rolling pin, consistency in thickness is vital. Aim for a 6-inch circle that is approximately 1/8-inch thick. Unevenly rolled tortillas will cook unevenly, leading to burnt edges and undercooked centers. A tortilla press makes this much easier, but with a rolling pin, focus on applying even pressure across the dough. Using two pieces of parchment paper for rolling helps prevent sticking and allows for smoother, more uniform results.
- Mastering the Skillet Temperature: A medium-high heat on your cast iron skillet is the sweet spot. Too low, and the tortillas will dry out and become stiff before they cook through. Too high, and they will burn quickly on the outside, leaving the inside raw. Allow your pan to heat thoroughly before placing the first tortilla. You’ll know the temperature is right when the tortilla sizzles gently upon contact and small bubbles begin to form on the surface within 20-30 seconds. This ensures a beautifully golden-brown finish and a fully cooked, pliable tortilla.
- Keeping Tortillas Soft Post-Cook: As soon as a tortilla comes off the hot skillet, transfer it to a clean kitchen towel. Wrap it loosely within the towel and stack subsequent tortillas on top. The residual steam trapped by the towel will keep the tortillas warm, soft, and flexible, preventing them from drying out and becoming rigid. This simple step is essential for maintaining their delightful texture until they are ready to be served.
Cassava Flour Tortillas
Ashley Barbey
10 tortillas
10 mins
15 mins
25 mins
Equipment
-
1 cast iron skillet
-
Mixing bowls
-
Whisk or fork
-
Tortilla press (optional, or use a rolling pin)
-
Parchment paper
-
Damp kitchen towel
Ingredients
- 1 ¼ cups cassava flour
- 1/3 cup tapioca flour
- ½ teaspoon kosher salt
- ¾ teaspoon xanthan gum
- 4 tablespoons butter, melted (can also use coconut oil for dairy-free)
- ¾ cup very hot/just boiled water
Instructions
-
In a medium-sized mixing bowl, combine the dry ingredients: cassava flour, tapioca flour, kosher salt, and xanthan gum. Whisk them thoroughly to ensure they are well distributed and free of lumps. This initial step is vital for an even dough consistency.
-
Pour in the melted butter (or coconut oil) and the very hot water. Stir vigorously with a sturdy spoon or spatula for about 1 ½ to 2 minutes until all ingredients are completely incorporated and form a cohesive dough. It’s important to mix until no dry flour spots remain, which ensures a smooth texture in the cooked tortillas. The dough should feel soft and firm enough to press without sticking to your fingers.
-
Divide the dough into 10 equal portions, each weighing approximately 43 grams. At this stage, the dough might appear a little loose, but it will firm up as it rests. Cover the dough balls with a damp kitchen towel to prevent them from drying out and let them rest for 3-5 minutes. This brief rest period helps the flour fully hydrate, resulting in a more pliable and crack-free dough.
-
Prepare your workstation by placing each dough ball between two sheets of parchment paper. Gently press down on each ball to flatten it slightly into a thick disc.
-
If you have a tortilla press, use it to press each disc into a uniform 6-inch circle, about 1/8 inch thick. Alternatively, use a rolling pin to carefully roll out each disc to the same dimensions, ensuring even thickness across the entire tortilla for consistent cooking.
-
Continue shaping the remaining dough balls. Simultaneously, place a cast-iron skillet over medium-high heat and allow it to preheat thoroughly. A well-heated pan is key to achieving the perfect golden spots and cooked-through texture.
-
Working one tortilla at a time, carefully peel it from the parchment paper and lay it into the hot skillet. Cook for 45-60 seconds per side, or until lightly golden brown spots appear and the tortilla puffs slightly. Flip with a spatula and cook for an additional 45-60 seconds on the second side. Immediately transfer the cooked tortilla to a clean kitchen towel and wrap it to keep it warm and soft.
-
Serve your freshly made cassava flour tortillas warm with your choice of delicious fillings and toppings. Enjoy the soft, flexible texture that makes them perfect for any meal!
Notes from the Chef
- As the tortillas come off the pan, stack them inside a clean kitchen towel. This clever trick traps the steam, keeping them wonderfully soft and pliable. Nobody enjoys a stiff, unyielding tortilla!
- Cassava flour has a very mild flavor profile, so don’t hesitate to be generous with the salt or fat. For an extra kick, consider kneading in a pinch of garlic powder, onion powder, or a dash of your favorite spice blend directly into the dry ingredients. This will infuse your tortillas with an extra layer of flavor.
- If you find the dough is sticking to the parchment paper while rolling, a very light dusting of additional cassava flour on the parchment can help.
- For a richer flavor and golden hue, you can brush a tiny bit of melted butter or oil onto the skillet before cooking each tortilla, though it’s often not necessary with a well-seasoned cast iron.
Nutrition
Serving: 1 tortilla
Calories: 107 kcal
Carbohydrates: 16g
Protein: 0.5g
Fat: 5g
Saturated Fat: 3g
Polyunsaturated Fat: 0.2g
Monounsaturated Fat: 1g
Trans Fat: 0.2g
Cholesterol: 12mg
Sodium: 160mg
Potassium: 6mg
Fiber: 0.5g
Sugar: 1g
Vitamin A: 140 IU
Vitamin C: 1mg
Calcium: 24mg
Iron: 1mg
Nutrition information is automatically calculated, so should only be used as an approximation.
Additional Info
Dinner, Lunch, Breakfast, Snack
Mexican, American, Gluten-Free
Gluten-Free, Dairy-Free (if using coconut oil), Grain-Free, Nut-Free
How to Make Cassava Flour Tortillas: A Visual Step-by-Step Guide
Follow these easy steps with accompanying visuals to master the art of homemade cassava flour tortillas:
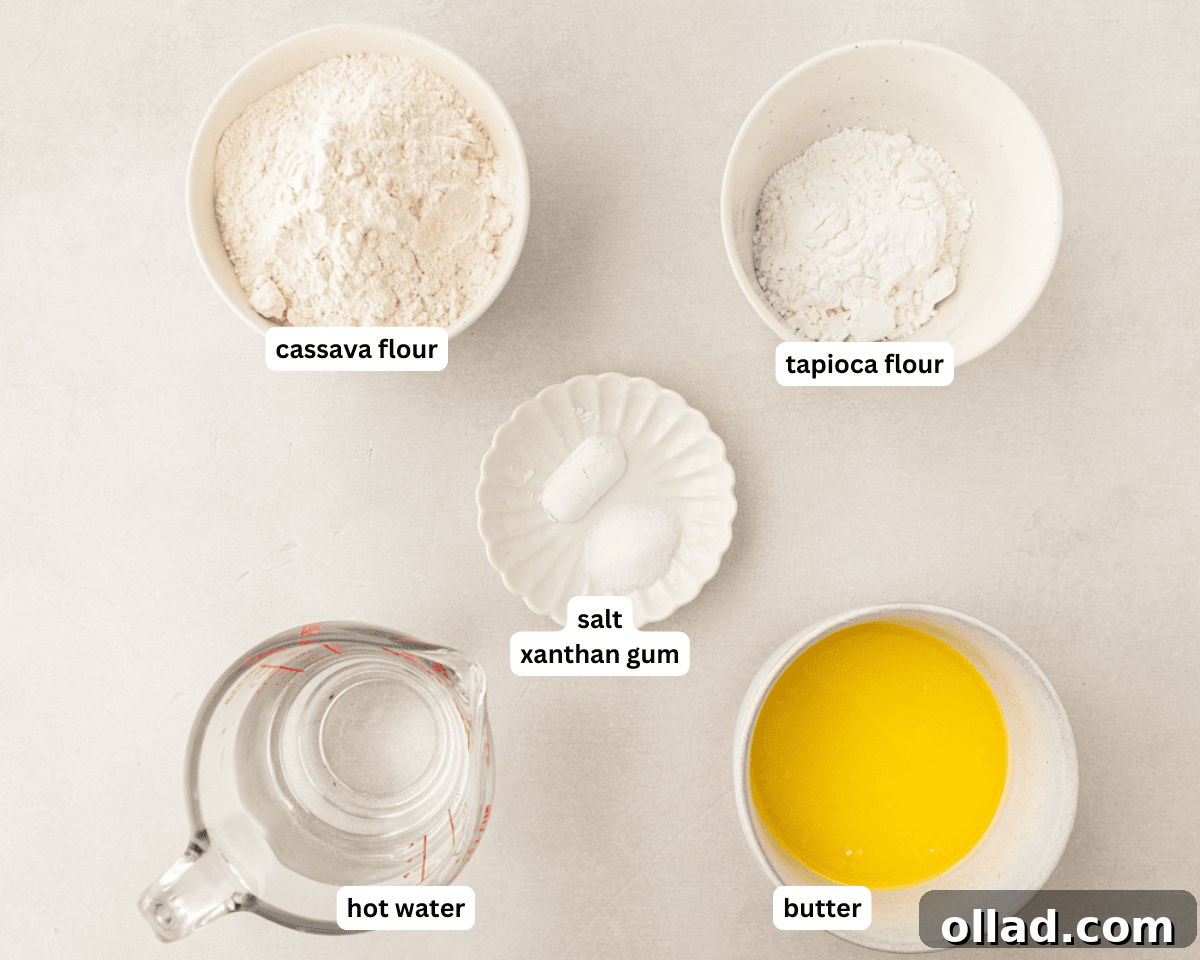
Step 1: Gather Your Ingredients. Begin by laying out all your ingredients: cassava flour, tapioca flour, kosher salt, xanthan gum, melted butter (or coconut oil), and very hot water. Having everything prepped ensures a smooth and efficient cooking process.
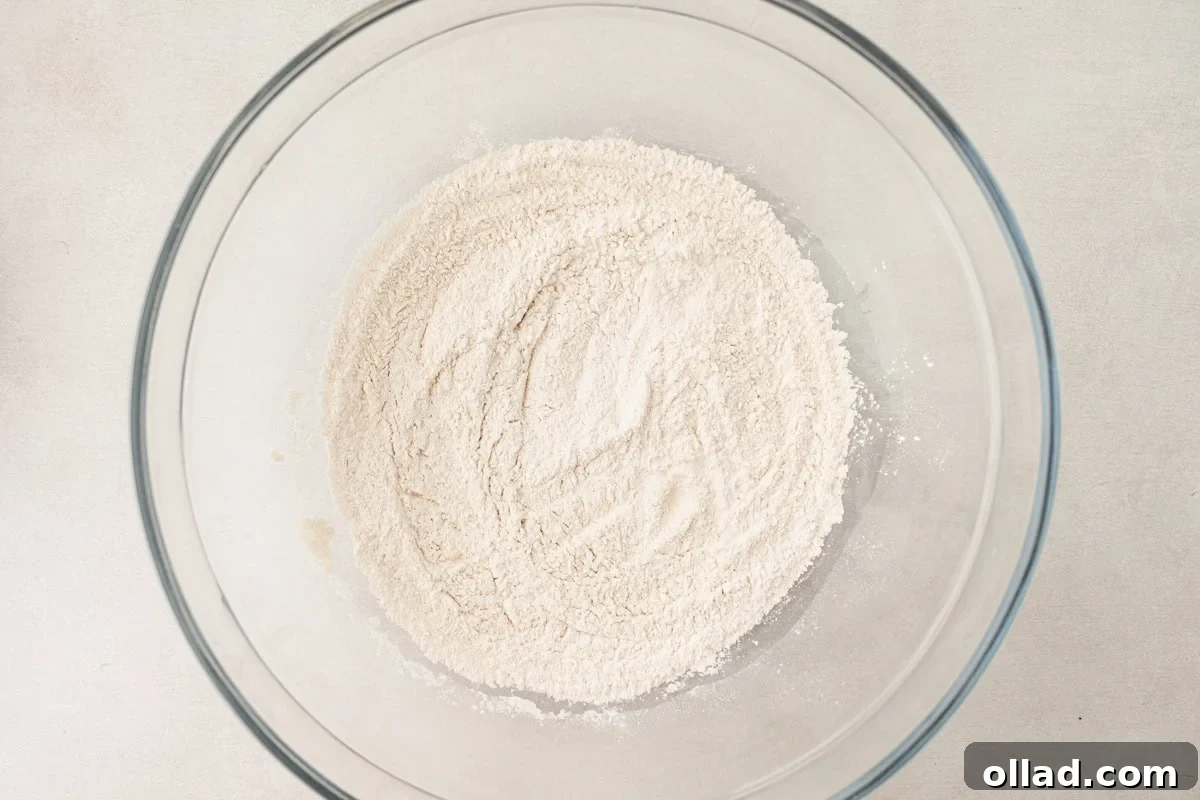
Step 2: Mix the Dry Ingredients. In a spacious medium mixing bowl, whisk together the cassava flour, tapioca flour, kosher salt, and xanthan gum. Ensure these dry components are thoroughly combined and evenly distributed before adding any liquids, as this foundational step directly impacts the final texture of your tortillas.
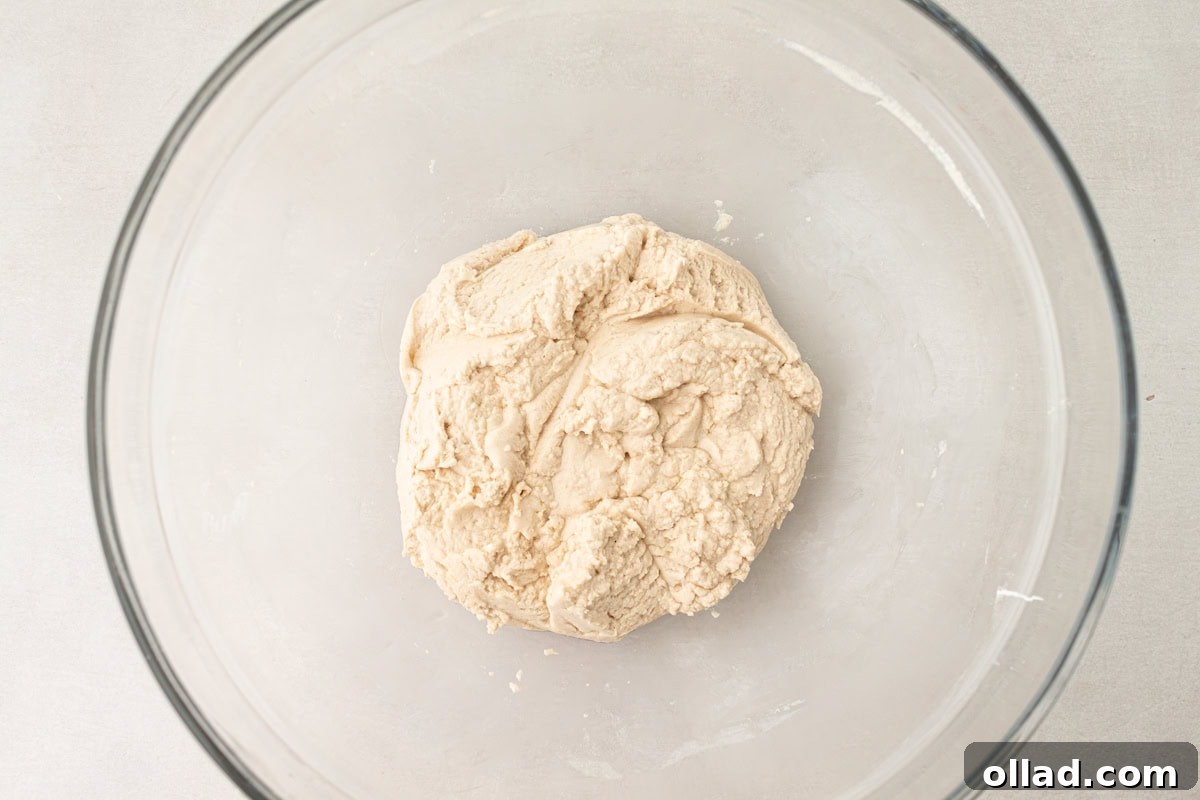
Step 3: Add Wet Ingredients and Form Dough. Pour the melted butter (or coconut oil) and the very hot water into the bowl with your dry ingredients. Stir vigorously for about 1½ to 2 minutes until a uniform dough forms. The dough should be smooth, cohesive, and soft enough to press without leaving any stickiness on your fingers. This thorough mixing ensures no gritty, unmixed flour remains.
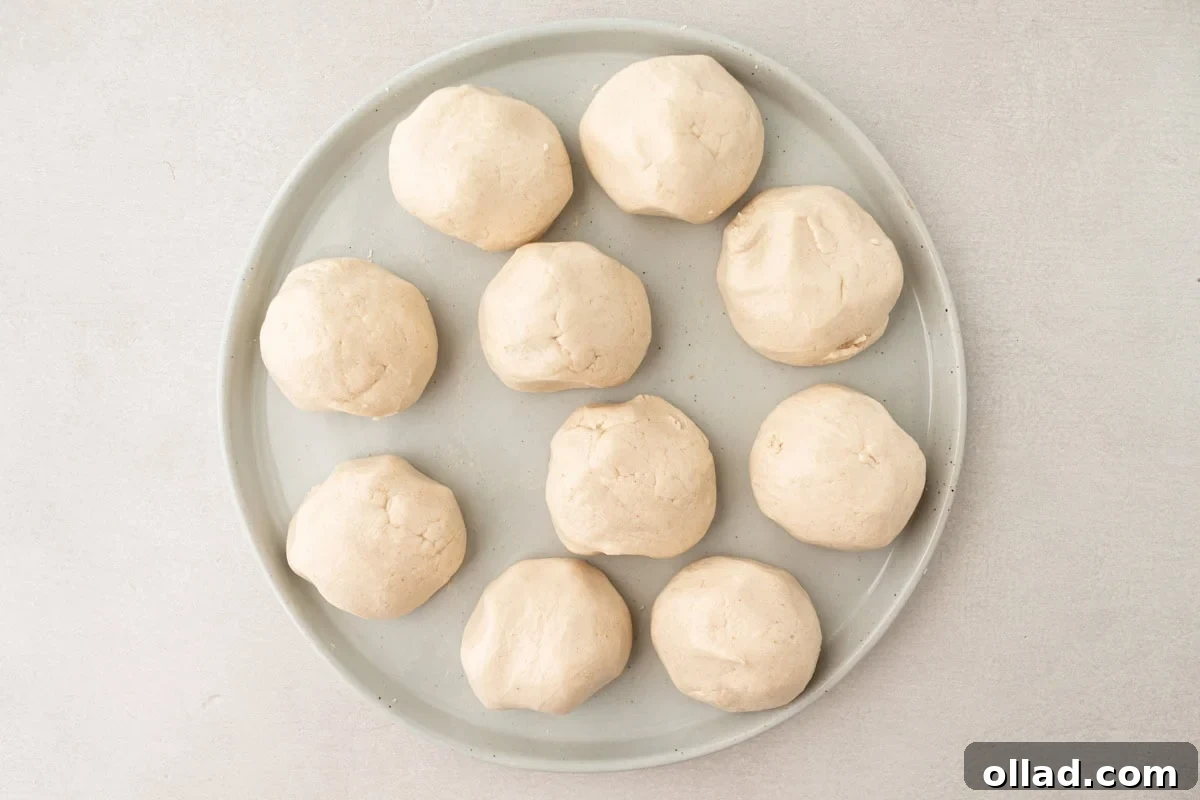
Step 4: Divide and Rest the Dough. Divide the dough into 10 equal portions, aiming for approximately 43 grams per ball. Even though the dough might feel a little soft initially, it will firm up nicely during the resting period. Cover these dough balls with a damp kitchen towel immediately to prevent drying, and let them rest for 3 to 5 minutes. This step is crucial for allowing the cassava flour to fully hydrate and ensuring your tortillas roll out smoothly without cracking.
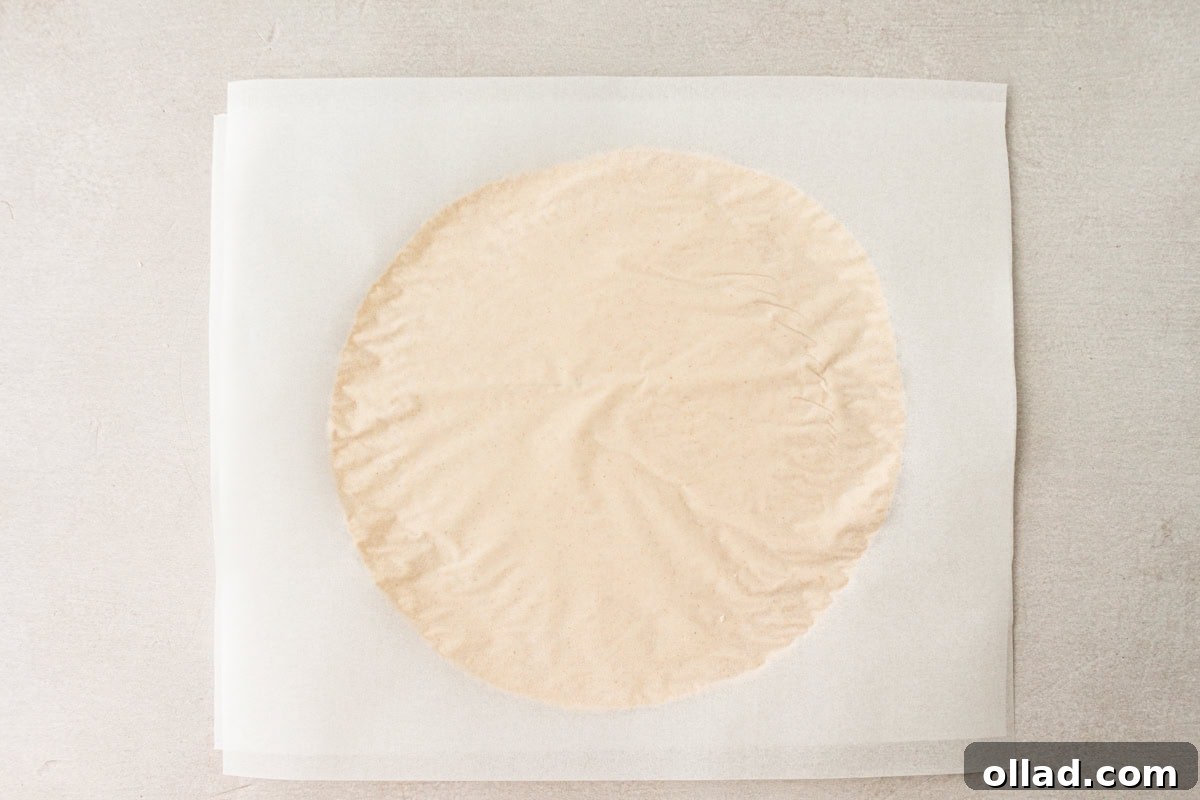
Step 5: Shape the Tortillas. Take one dough ball and place it between two pieces of parchment paper. Gently press it down to form a thick disc. If you own a tortilla press, use it to flatten the disc into a 6-inch circle, approximately 1/8 inch thick. If you’re using a rolling pin, roll the dough consistently to achieve the same diameter and thickness, ensuring even cooking. Repeat this process for all remaining dough balls.
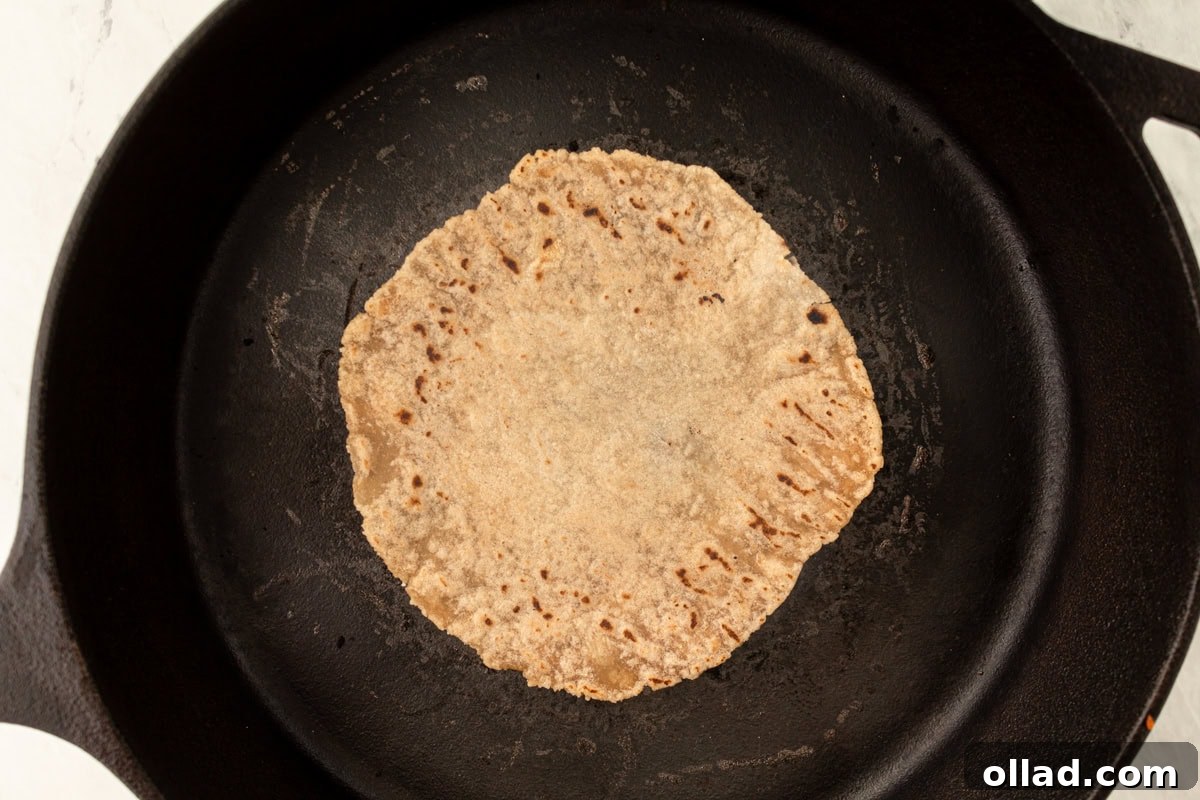
Step 6: Cook the Tortillas. While shaping, preheat a cast-iron skillet over medium-high heat. Once hot, carefully peel one tortilla from its parchment paper and lay it directly onto the skillet. Cook for 45 to 60 seconds until small bubbles appear and the surface begins to show light golden-brown spots. Flip the tortilla with a spatula and cook for an additional 45-60 seconds on the other side until it’s fully cooked and pliable. Continue this process with the rest of your tortillas.

Step 7: Serve and Enjoy. Once cooked, immediately transfer each tortilla to a stack wrapped in a clean kitchen towel. This keeps them warm, soft, and moist. Serve these delightful cassava flour tortillas warm with your favorite fillings and toppings. They are best enjoyed fresh off the skillet, but their pliability makes them perfect for storing and reheating too.

Versatile Serving Suggestions for Every Meal
These incredibly versatile cassava flour tortillas are a blank canvas for a myriad of culinary creations, suitable for any time of day. Their robust yet flexible nature makes them a perfect vehicle for a wide variety of fillings, ensuring they’ll quickly become a staple in your kitchen. Here are some of my favorite ways to enjoy them:
- Breakfast Powerhouses: Start your day strong by wrapping scrambled eggs, cheese, sautéed veggies, and a dash of hot sauce into a hearty breakfast burrito. Or, for a lighter option, a simple avocado and everything bagel seasoning wrap hits the spot.
- Lunchtime Delights: Transform your lunch routine with vibrant wraps. They’re excellent for housing light and refreshing vegan chickpea tuna salad, classic turkey and avocado, or even leftover grilled chicken and fresh greens. For kids’ lunches, these tortillas are perfect for wrapping up their favorite sandwich fillings, offering a soft and gluten-free alternative to bread.
- Taco & Fajita Nights: The ultimate purpose for any tortilla! Load them up with your preferred taco fillings—whether it’s seasoned ground beef, shredded chicken, grilled shrimp, or a flavorful plant-based protein. Their sturdiness ensures they won’t fall apart, while their softness allows for easy folding. They also make fantastic fajita wraps!
- Creative Snacks & Appetizers: Cut them into wedges, lightly brush with oil, sprinkle with salt, and bake or fry them until crispy for homemade tortilla chips to serve with vegan queso, guacamole, or salsa. You can also create quick and easy mini pizzas by spreading a thin layer of sauce, cheese, and toppings on a tortilla and baking until bubbly.
- Burrito Bowls & Beyond: While fantastic for wrapping, don’t limit yourself! Cut these tortillas into thin strips and serve them crispy over a hearty burrito bowl for added texture and crunch, or as a side with your favorite chili or soup.
Storage and Reheating for Optimal Freshness
One of the many benefits of making your own tortillas is having a fresh supply on hand. Proper storage and reheating ensure they maintain their delicious texture and flavor for days to come:
- Refrigeration: Once your tortillas have completely cooled, stack them with a piece of parchment paper between each one. This prevents them from sticking together. Store the stacked tortillas in an airtight container or a large zip-top bag in the refrigerator for up to 4–5 days. Keeping air exposure minimal is key to maintaining their softness and preventing them from drying out.
- Reheating (Stovetop): For the best results when reheating, warm your tortillas in a dry skillet over medium heat for about 30 seconds per side. The gentle heat will re-soften them beautifully, making them pliable and enjoyable just like they were freshly made. Avoid overheating, which can make them stiff.
- Reheating (Microwave): If you’re in a hurry, you can microwave tortillas individually. Wrap a single tortilla in a damp paper towel and microwave for 10–15 seconds. The moisture from the paper towel helps steam the tortilla, bringing back its softness quickly.
- Freezing for Long-Term Storage: For an even longer-lasting supply, these tortillas freeze wonderfully. Stack them with parchment paper in between each tortilla, then place the entire stack into a freezer-safe zip-top bag or airtight container. Freeze them flat to prevent sticking and for easy portioning. When you need a tortilla, simply remove one or more from the freezer. Thaw them at room temperature for a few minutes until they are flexible enough to handle, then reheat them in a skillet as usual. Frozen tortillas can be stored for up to 2-3 months without significant loss of quality.
More Gluten-Free Tortillas and Flatbreads to Explore
If you’ve enjoyed making these cassava flour tortillas, you’re in for a treat with other delicious gluten-free flatbread options. Expanding your repertoire of homemade breads can open up a world of culinary possibilities. Here are some of my other favorite recipes you might love:
- Arepas: Naturally gluten-free corn cakes, perfect for splitting and stuffing.
- Socca (Chickpea Flatbread): A savory, rustic flatbread made from chickpea flour, incredibly easy and versatile.
- Almond Flour Tortillas: A popular low-carb and grain-free alternative, offering a different texture and flavor profile.
- Coconut Flour Tortillas: Another excellent grain-free choice, known for their tender texture and slight sweetness.
- Gluten-Free Flatbread: A broader recipe for a general-purpose flatbread that can be adapted for various uses.
And don’t forget to try my cassava bread recipe for another delightful way to use this amazing flour!
Crafting your own cassava flour tortillas is not just about making food; it’s about reclaiming the joy of homemade goodness, especially for those navigating a gluten-free lifestyle. With their unparalleled softness, flexibility, and neutral taste, these tortillas are truly a staple worth mastering. They are incredibly forgiving, quick to prepare, and endlessly adaptable to your family’s tastes and dietary needs. So, gather your ingredients, follow these simple steps, and prepare to elevate your taco nights, lunch wraps, and snack times with these absolutely essential gluten-free wonders!