
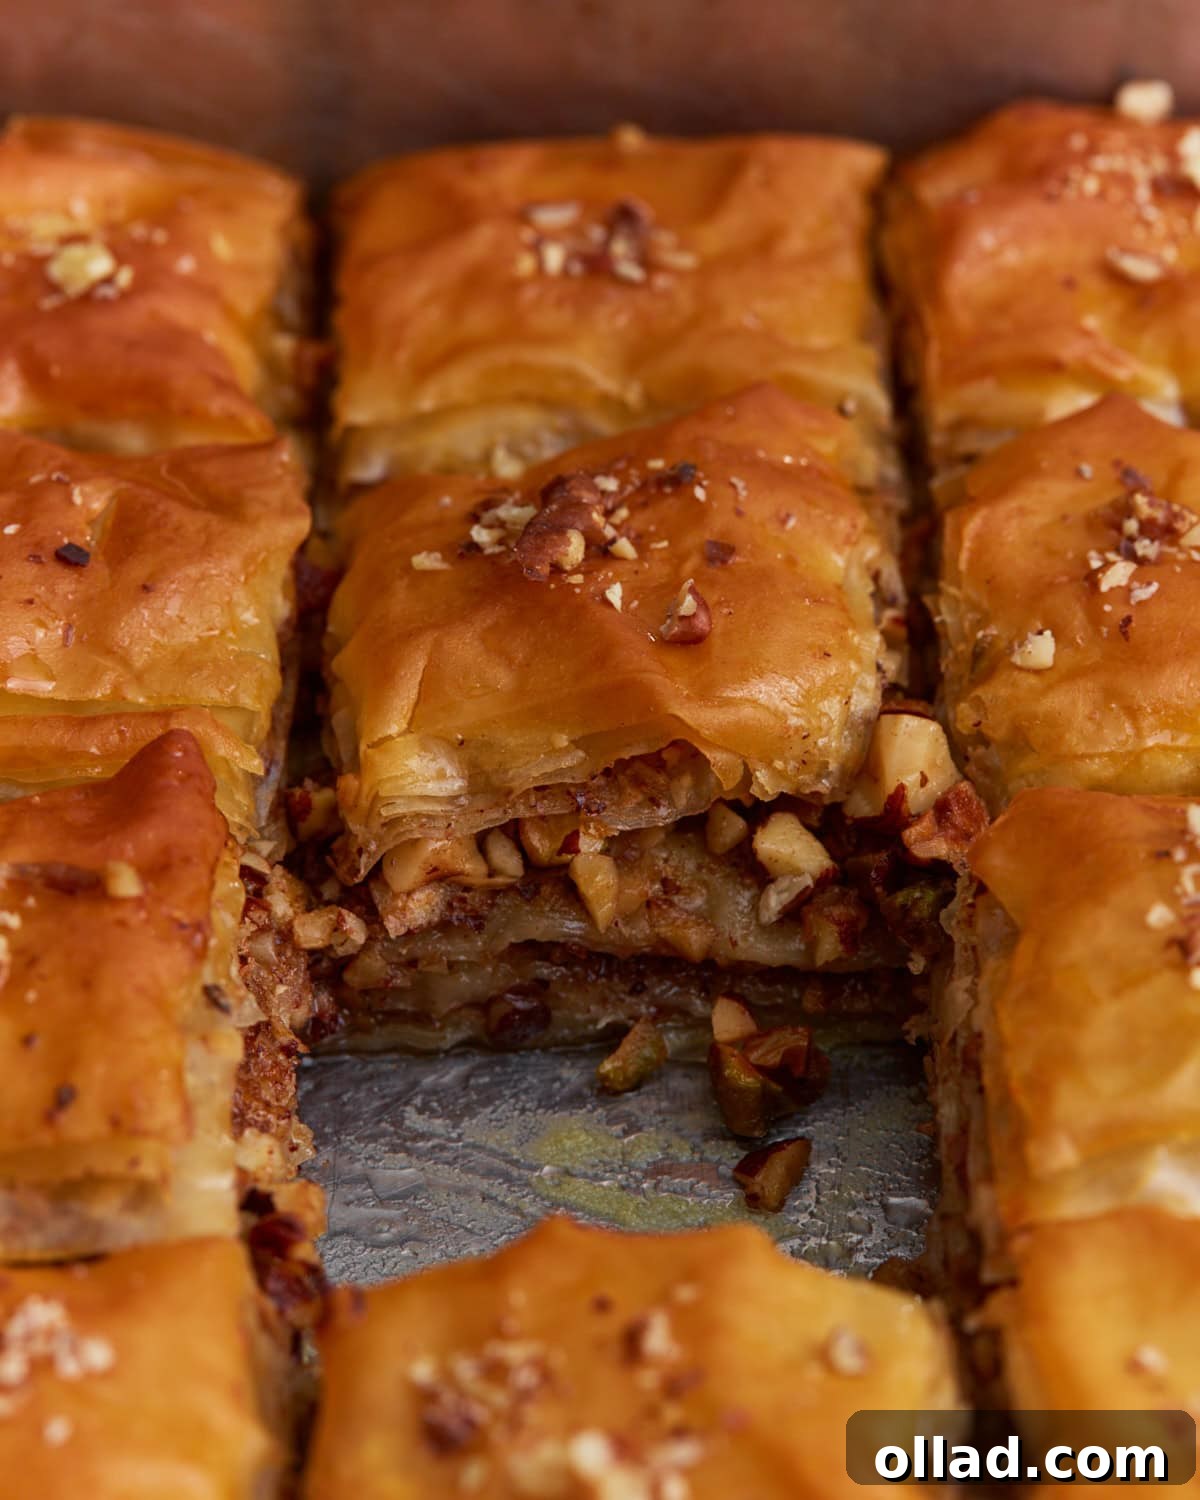
Ultimate Guide to Homemade Gluten-Free Baklava: A Flaky, Nutty, and Sweet Delight
Indulge in the irresistible charm of baklava, a classic Mediterranean and Middle Eastern dessert, now accessible to everyone with a gluten-free diet. This delightful pastry features delicate, flaky layers of gluten-free phyllo dough, generously filled with a rich mixture of spiced chopped nuts, all bathed in a fragrant, sweet honey syrup. Each bite offers a harmonious blend of crisp texture, warm spices, and gooey sweetness. Perfectly suited for festive gatherings, elegant dinner parties, or simply as a comforting homemade treat, this naturally egg-free dessert promises to be a showstopper. Experience the magic of traditional baklava reinvented, ensuring that no one misses out on this iconic culinary pleasure.
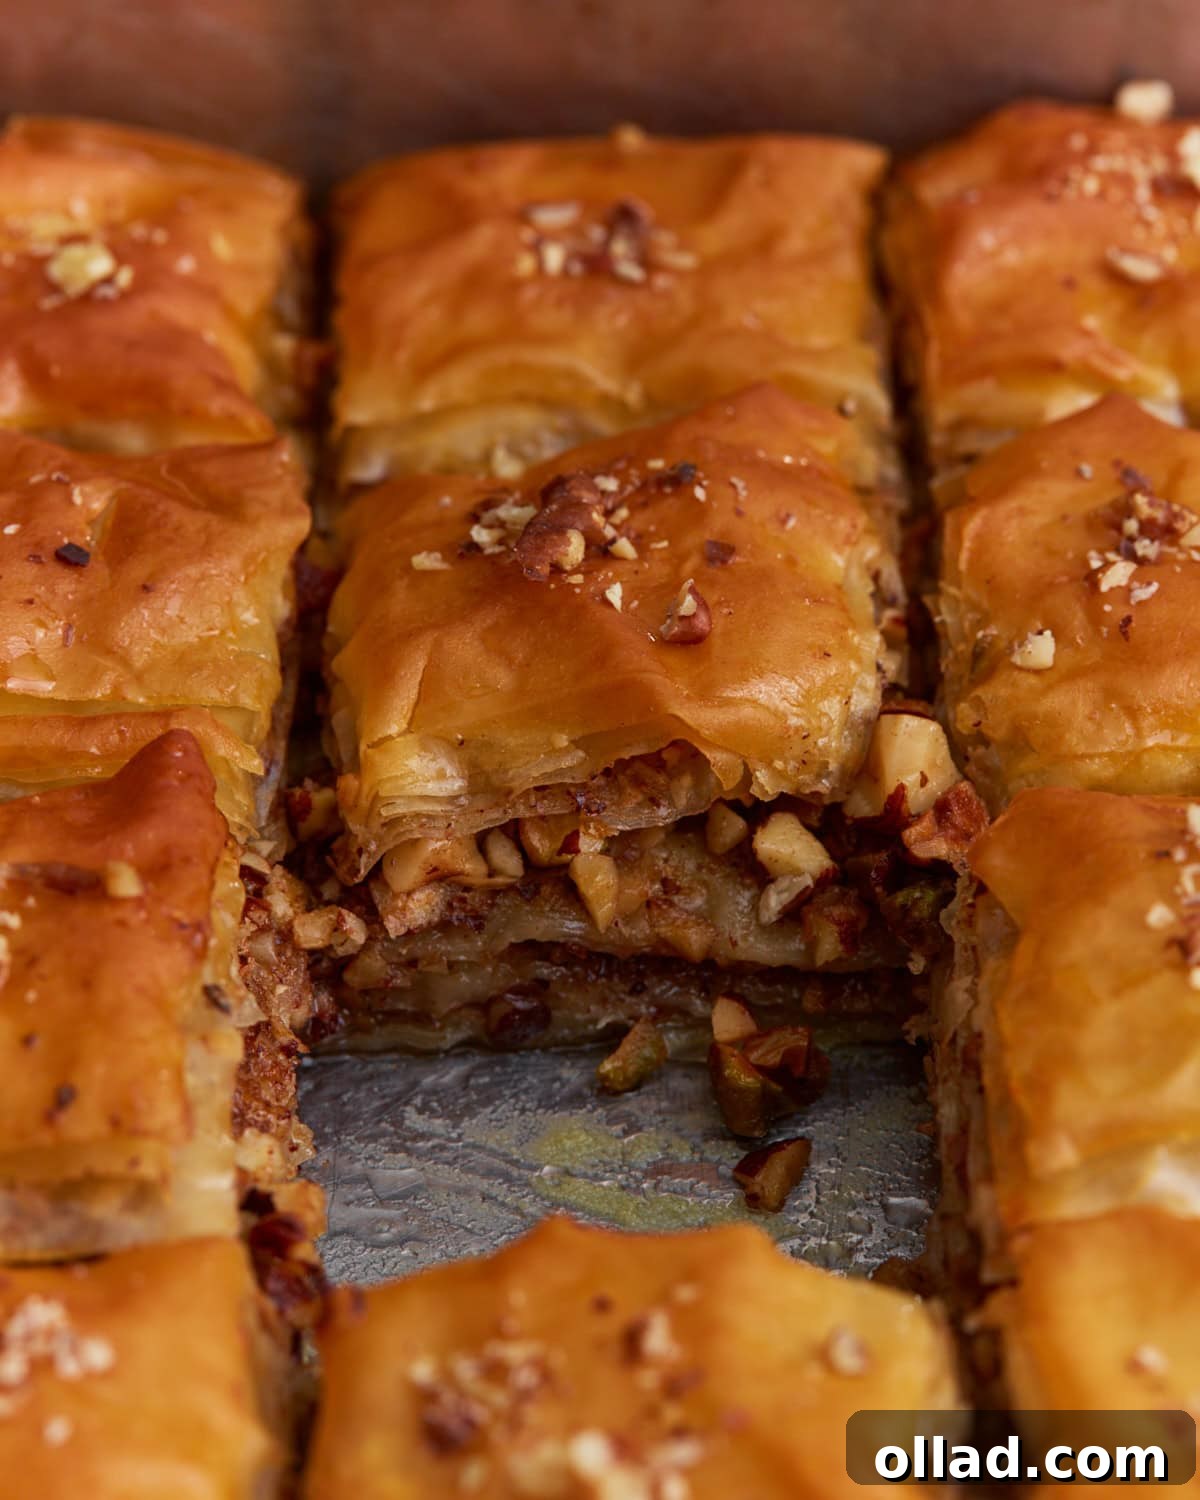
Baklava has always held a special place in my heart, feeling almost magical with its intricate construction and explosion of flavors. The delicate phyllo layers, the aromatic spiced nuts, and the golden honey syrup that permeates every crevice create an experience that is both simple in its ingredients and profound in its execution. Crafting this gluten-free version has been a journey of passion and precision. For this particular recipe, I’ve leveraged my own homemade gluten-free phyllo dough, but don’t fret if you’re short on time—quality store-bought gluten-free phyllo can be used with excellent results. Each thin sheet is lovingly brushed with melted butter, then layered with a finely chopped nut mixture infused with cinnamon and other warm spices. As it bakes, the pastry transforms into a glorious golden-brown, achieving an unparalleled crispness. The final flourish involves drenching the hot baklava with a cool, fragrant honey syrup, subtly flavored with cloves and zesty lemon peel, allowing it to soak deep into the buttery layers. This dessert boasts a rich history, with deep roots stretching across the Mediterranean and Middle East. While regional variations abound, the essence remains consistent: a sweet, satisfying treat perfect for enjoying with a cup of robust coffee or a soothing tea, making it an ideal choice for an Easter dessert, an afternoon indulgence, or an after-dinner delight.
Mastering Gluten-Free Baklava: Key Insights from My Kitchen
Creating truly exceptional gluten-free baklava involves a few strategic techniques. Through extensive testing, I’ve discovered critical steps that ensure a perfectly crisp, flavorful, and beautifully layered pastry every time. These insights will help you navigate the nuances of working with gluten-free phyllo and achieve baklava perfection.
- Achieve Optimal Syrup Absorption: Pour Cool Syrup Over Hot Baklava. This temperature contrast is vital. When the hot baklava meets the cool syrup, the sudden change in temperature helps the pastry absorb the sweet liquid slowly and evenly. This controlled absorption prevents the phyllo from becoming soggy, ensuring that each layer remains distinctly crisp while still being thoroughly infused with flavor. Patience here is key; allow the baklava to rest for several hours, or even overnight, for the syrup to fully permeate and set.
- Preventing Phyllo Cracking: Handle with Care and Speed. Gluten-free phyllo dough, by nature, is more delicate and less elastic than its traditional counterpart. To minimize cracking and tearing, it’s crucial to work swiftly once the dough is unwrapped. Always keep any unused sheets covered with a slightly damp, clean towel. This prevents them from drying out and becoming brittle. Don’t be overly concerned about minor tears; the numerous layers and generous brushing of butter will act as a binding agent, holding the pastry together beautifully as it bakes. Embrace imperfections, as they often add to the rustic charm of homemade baklava.
- The Perfect Nut Texture: Finely Chopped, Not Pulverized. The consistency of your nut filling significantly impacts the final texture of the baklava. Aim for finely chopped nuts, but stop short of turning them into a powder. You want small, distinct pieces that can spread evenly across the delicate phyllo layers. This ensures a light, crisp, and substantial filling that provides a satisfying bite without being overly dense. A food processor can be helpful here, but pulse it carefully to avoid over-processing.
- Pre-Baking Cuts for Flawless Portions: Cut the Baklava Before Baking. Attempting to cut baked baklava can result in shattering the beautifully crisp phyllo layers, leading to crumbly, uneven pieces. By scoring or cutting the baklava into your desired diamond or square shapes before it enters the oven, you allow the layers to expand and crisp up along those pre-defined lines. This technique ensures clean, elegant cuts and minimizes breakage once the pastry is golden brown and fragile. Make sure to cut all the way through to the bottom for the best results.
- Nut Selection for Authentic Flavor: Use All Pistachios or a Balanced Mix. The choice of nuts profoundly influences the baklava’s flavor profile and aesthetic. For a truly traditional Middle Eastern baklava, an all-pistachio filling is often preferred. Pistachios offer a vibrant green color and a naturally rich, slightly sweet taste that is distinct. Alternatively, a mix of walnuts and pistachios provides a wonderful balance. Walnuts contribute a deeper, more robust, and slightly earthy richness, while pistachios add a delicate sweetness and a pop of color, resulting in a complex and well-rounded filling that appeals to a wider palate. You can also experiment with almonds or hazelnuts for unique twists.
The Essential Ingredients for Perfect Gluten-Free Baklava
Crafting this exquisite gluten-free baklava begins with carefully selected ingredients, each playing a crucial role in achieving its signature taste and texture. Understanding these components will help you create a truly memorable dessert.
- Gluten-Free Phyllo Dough: The Foundation of Flakiness. The star of baklava is its paper-thin phyllo dough. For a gluten-free version, selecting a high-quality store-bought option or making your own homemade gluten-free phyllo is paramount. Gluten-free phyllo can be more delicate, so handle it with extra care, keeping unused sheets covered to prevent drying. This will ensure those ethereal, crisp layers.
- Spiced Chopped Nuts: The Heart of the Flavor. The nut filling is what gives baklava its rich, comforting depth. A mixture of walnuts, pistachios, almonds, and hazelnuts offers a complex flavor profile. Finely chopping them allows for even distribution and a pleasant texture. The addition of warm ground cinnamon, and optionally cardamom or orange zest, elevates the flavor with an aromatic warmth that perfectly complements the honey syrup.
- Melted Butter: The Golden Enabler. Abundant melted unsalted butter is crucial for achieving the baklava’s signature golden-brown color and irresistible crispness. Each layer of phyllo is brushed with butter, ensuring separation and a rich, tender crumb once baked. For a slightly nuttier, deeper flavor, clarified butter (ghee) can be used as an excellent alternative.
- Sweet Honey Syrup: The Final Touch of Indulgence. The luscious honey syrup is what transforms the baked pastry into true baklava. A simple blend of granulated sugar, water, and rich honey creates the base. Infusing it with whole cloves and a strip of lemon peel adds a subtle, fragrant complexity that brightens the sweetness. The cooling of the syrup before pouring it over the hot baklava is a vital step, ensuring perfect absorption without sogginess.
Homemade Gluten-Free Baklava
Gluten-free baklava is a flaky layered pastry made with gluten-free phyllo dough, chopped nuts, warm spices, and sweet honey syrup. This classic Mediterranean dessert is naturally egg-free and perfect for holidays, dinner parties, or anytime you want a homemade gluten-free treat.
By: Sabine Venier
Servings: 24 pieces
Prep Time: 30 mins
Cook Time: 45 mins
Cool Time: 4 hrs
Total Time: 5 hrs 15 mins
Equipment
- 1 9″ x 13″ baking dish
Ingredients
For the Syrup
- 1 cup granulated sugar
- 1 cup water
- ½ cup honey
- 3 whole cloves
- 1 strip lemon peel
For the Baklava
- 1 package gluten-free phyllo dough
- 3 cups mixed nuts*, finely chopped (walnuts, pistachios, almonds, hazelnuts)
- ¼ cup granulated sugar
- 2 tsp ground cinnamon
- 1 cup unsalted butter**, melted
Instructions
- Combine sugar, water, honey, cloves, and lemon peel in a saucepan. Bring to a boil, reduce the heat, and simmer for 10 minutes. Remove spices and lemon peel. Let cool completely until the baklava is done.
- Preheat oven to 350°F (180°C). Brush a 9×13-inch baking dish with melted butter to prevent sticking.
- In a medium bowl, combine the finely chopped mixed nuts, ¼ cup granulated sugar, and 2 tsp ground cinnamon. Stir until evenly mixed.
- Unroll the gluten-free phyllo dough. Place 8 sheets of phyllo in the prepared baking dish, brushing each sheet lightly with melted butter before adding the next. Ensure unused sheets are covered with a damp towel to prevent them from drying out.
- Sprinkle approximately one-third of the nut mixture evenly over the buttered phyllo layers. Spread gently to form a thin, even layer.
- Add 6 more sheets of phyllo, brushing each sheet with melted butter before carefully placing it on top of the nut layer.
- Sprinkle another one-third of the nut mixture evenly over this second phyllo layer.
- Repeat the layering process: add 6 additional phyllo sheets, brushing each with butter, then spread the remaining nut mixture evenly across the surface. You will now have three distinct layers of nut filling.
- Top the baklava with the remaining phyllo sheets (about 8 sheets), brushing each generously with melted butter as you layer them. Ensure the very top layer is well-coated with butter for a beautiful golden finish.
- Using a sharp knife, carefully cut the assembled baklava into your desired shapes—traditional diamonds or simple squares work beautifully. Make sure to slice all the way through the layers to the bottom of the baking pan. This step is crucial for clean cuts after baking.
- Bake for 45–50 minutes in the preheated oven, or until the top is a deep golden brown and the pastry is crisp and slightly puffed.
- Immediately upon removing the beautifully baked baklava from the oven, pour the completely cooled honey syrup evenly over the entire hot pastry. Listen for the satisfying sizzle as the syrup begins its journey, slowly seeping into every flaky, buttery layer. This crucial step ensures that the baklava becomes wonderfully moist and sweet without losing its crispness.
- Allow the baklava to sit undisturbed and uncovered at room temperature for a minimum of 4 hours. Ideally, let it rest overnight. This extended resting period is essential for the syrup to fully absorb into all the layers, ensures the flavors deepen and meld, and allows the pastry to properly set, resulting in the perfect balance of crispness and tender, syrupy goodness. This patience is truly rewarded.
Notes
- Flavor Enhancements: Elevate your nut mixture by adding a pinch of cardamom for an exotic, floral note, or a hint of fresh orange zest for a bright, citrusy aroma. Both pair beautifully with the warm spices and honey syrup.
- Butter Alternatives: For a deeper, nuttier flavor and an equally crisp result, consider using ghee (clarified butter) instead of regular unsalted butter. It works wonderfully for achieving flaky layers.
Nutrition Information
Nutrition information is automatically calculated, so should only be used as an approximation. Per 1 piece serving:
- Calories: 286 kcal
- Carbohydrates: 30g
- Protein: 4g
- Fat: 18g
- Saturated Fat: 7g
- Polyunsaturated Fat: 2g
- Monounsaturated Fat: 8g
- Trans Fat: 0.3g
- Cholesterol: 23mg
- Sodium: 109mg
- Potassium: 116mg
- Fiber: 3g
- Sugar: 17g
- Vitamin A: 269 IU
- Vitamin C: 0.2mg
- Calcium: 25mg
- Iron: 1mg
Additional Info
Course: Baking, Dessert
Cuisine: Mediterranean, Middle Eastern
How to Craft Your Gluten-Free Baklava: A Step-by-Step Visual Guide
Follow these detailed steps, accompanied by visual cues, to ensure your homemade gluten-free baklava turns out perfectly layered, golden, and utterly delicious. Precision and patience are your best friends in this baking endeavor.
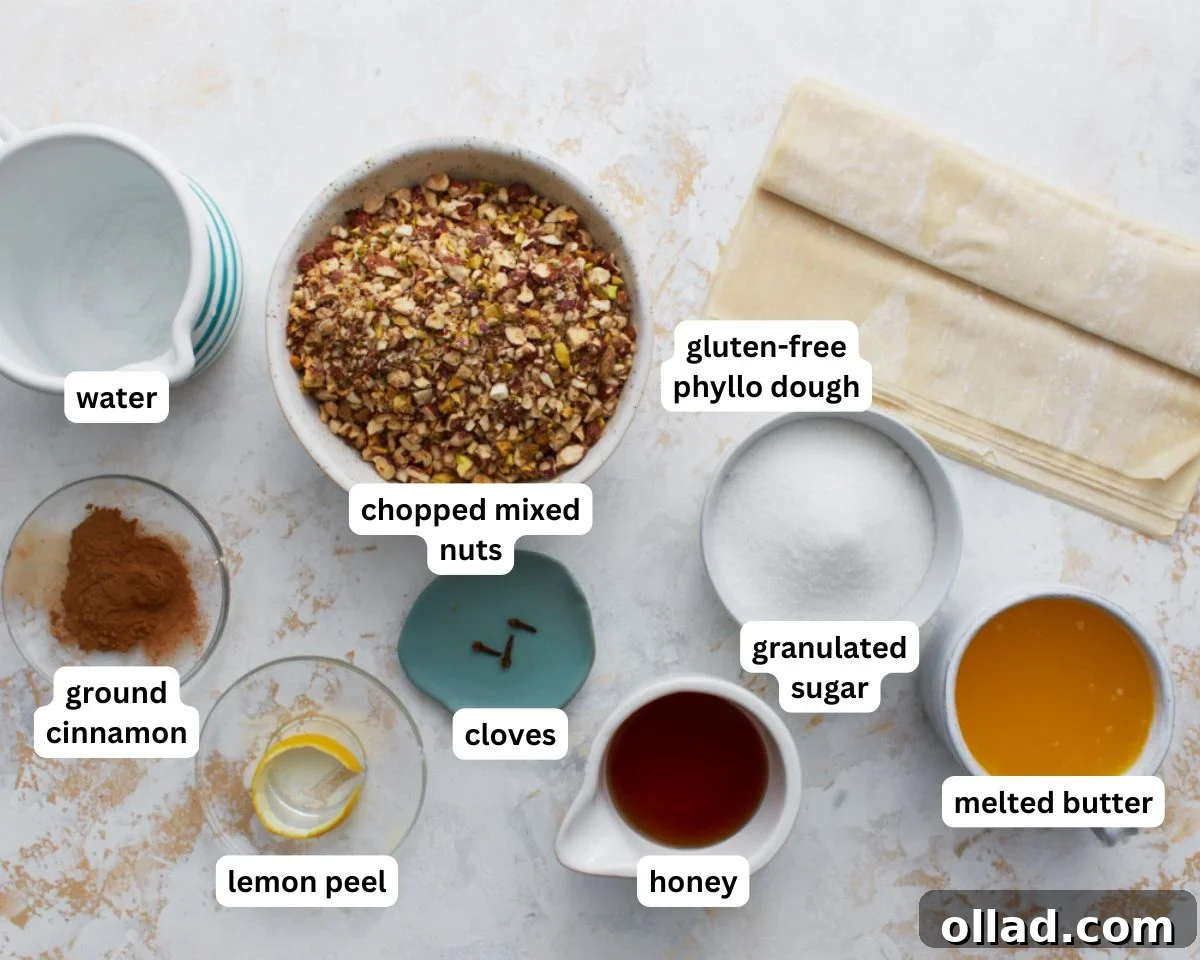
Step 1: Gather and Prepare. Begin by gathering all your ingredients and equipment. Preheat your oven to 350°F (180°C). Take your 9×13-inch baking dish and lightly brush the bottom and sides with a portion of the melted unsalted butter. This initial buttering is crucial for preventing the phyllo from sticking and helping the bottom layers crisp up beautifully during baking.
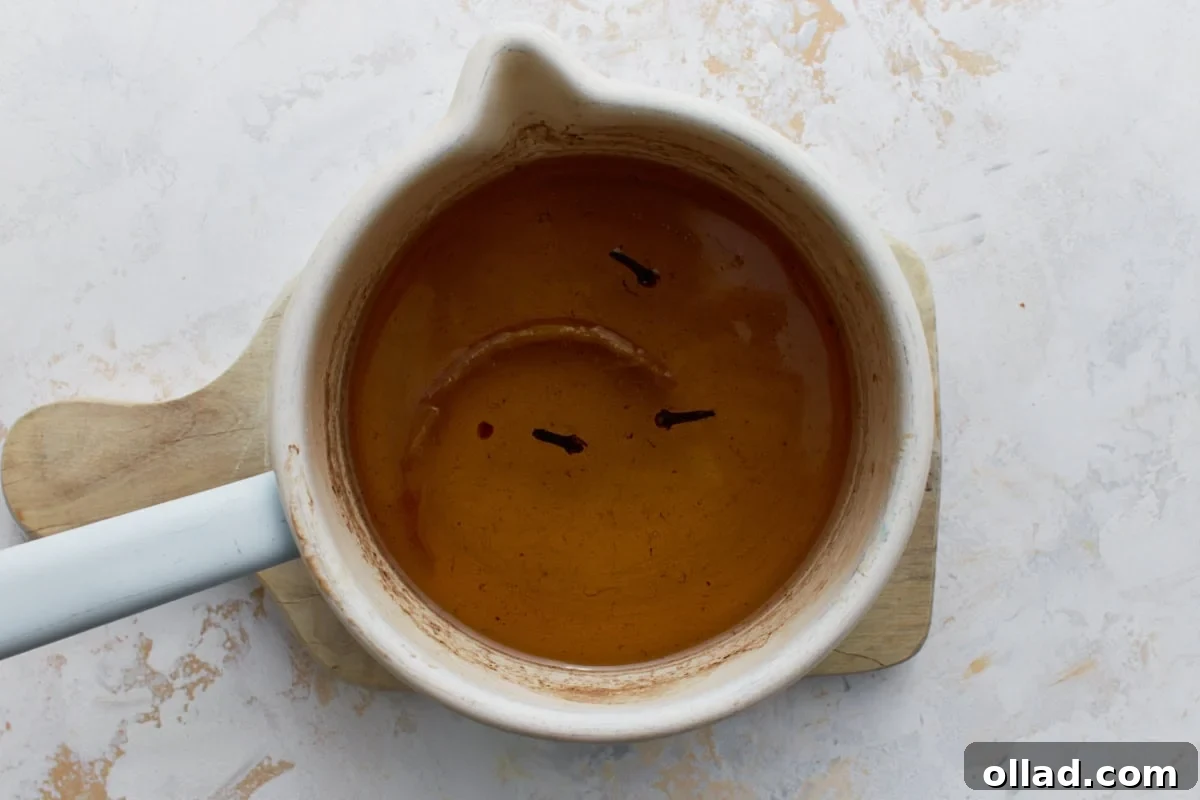
Step 2: Prepare the Fragrant Honey Syrup. In a small saucepan, combine 1 cup of granulated sugar, 1 cup of water, ½ cup of honey, 3 whole cloves, and a strip of lemon peel. Place the saucepan over medium heat and bring the mixture to a boil, stirring continuously until the sugar has completely dissolved. Once boiling, reduce the heat to a gentle simmer and let it cook for about 10 minutes. This allows the syrup to thicken slightly and for the cloves and lemon peel to infuse their delightful aroma. After simmering, carefully remove the cloves and lemon peel. Set the syrup aside to cool completely. It’s imperative that the syrup is cool when it’s poured over the hot baklava later.
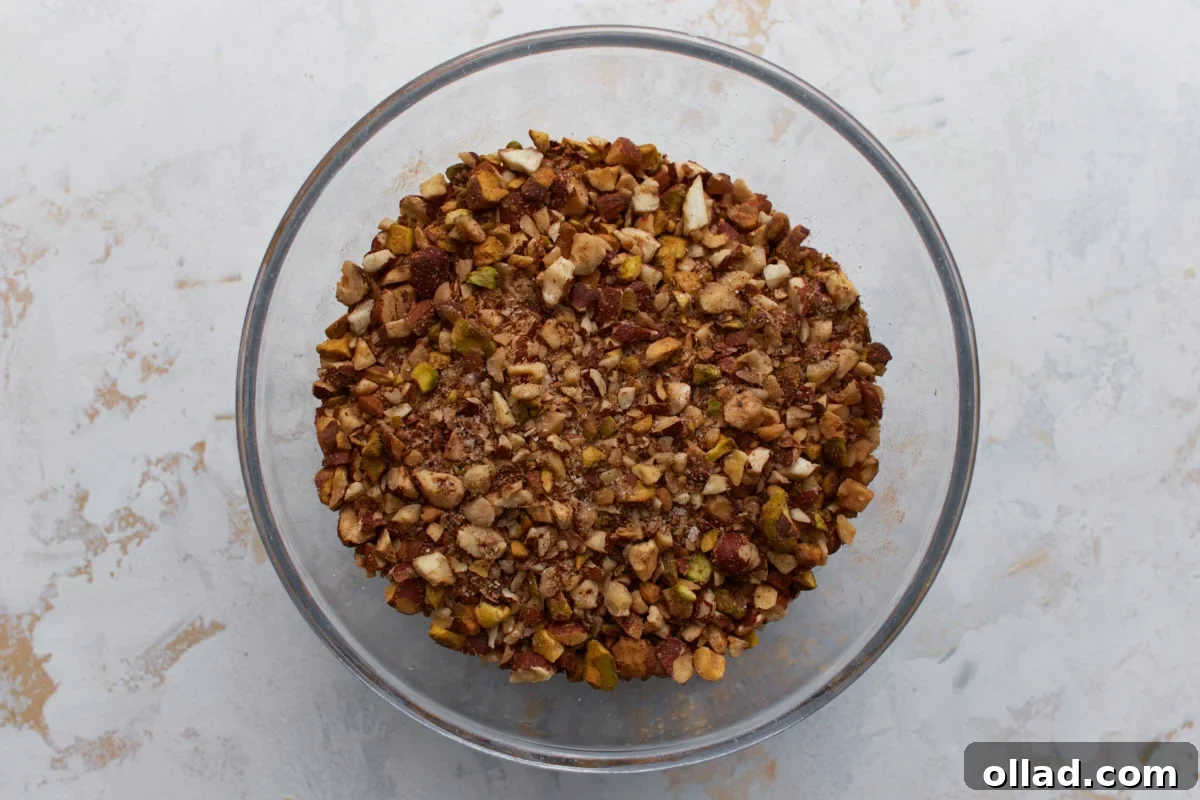
Step 3: Craft the Aromatic Nut Filling. In a medium-sized mixing bowl, combine 3 cups of finely chopped mixed nuts (you can use walnuts, pistachios, almonds, or hazelnuts, or a combination), ¼ cup of granulated sugar, and 2 teaspoons of ground cinnamon. Stir all the ingredients together thoroughly until the nuts are evenly coated with the sugar and spice mixture. Remember, the nuts should be finely chopped but still retain a slight chunkiness; avoid processing them into a fine powder, as a little texture is desirable for the filling.
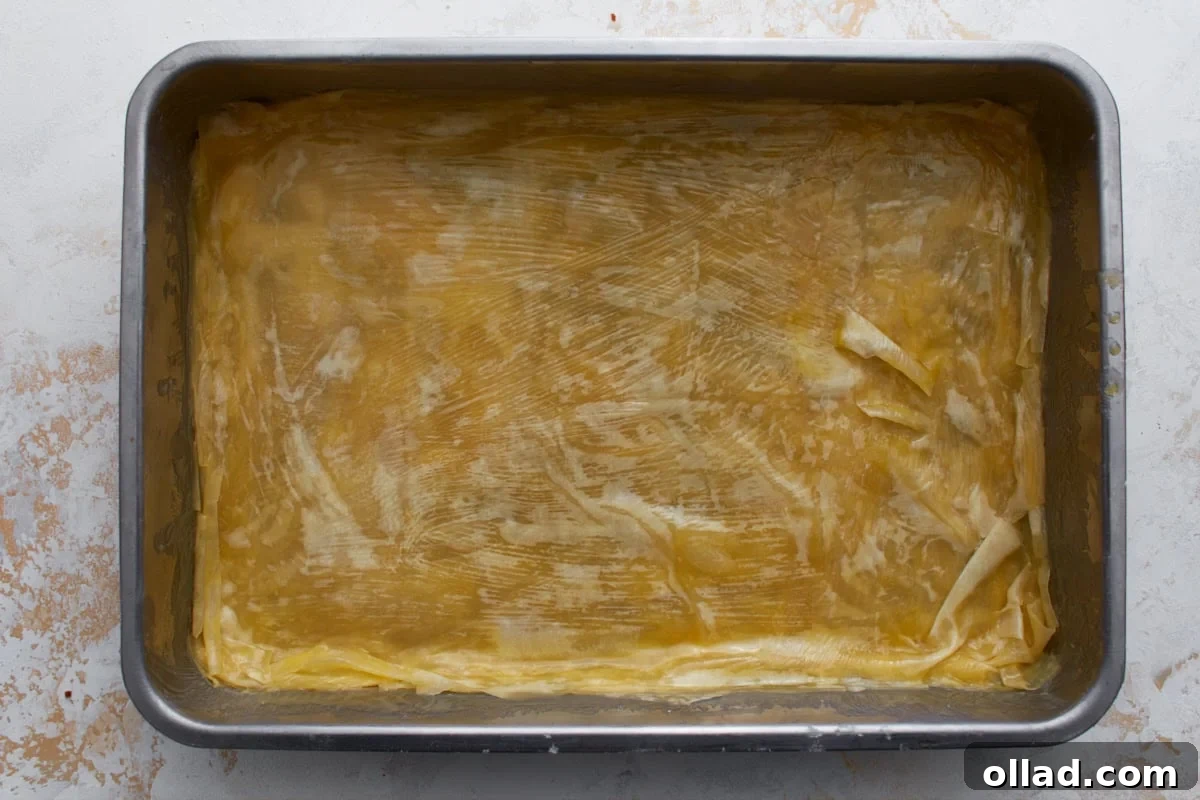
Step 4: Begin Layering the Phyllo. Carefully unroll your 16-oz. package of gluten-free phyllo dough. As you work, always keep any unused sheets covered with a damp, clean towel. This crucial step prevents the delicate phyllo from drying out and becoming brittle, which can lead to cracking. Place 8 individual sheets of phyllo dough into the prepared baking dish. For each sheet, brush it lightly but completely with melted butter before carefully laying the next sheet on top. Don’t worry if the layers wrinkle or tear a little; this is quite normal with gluten-free phyllo and will not affect the final outcome.
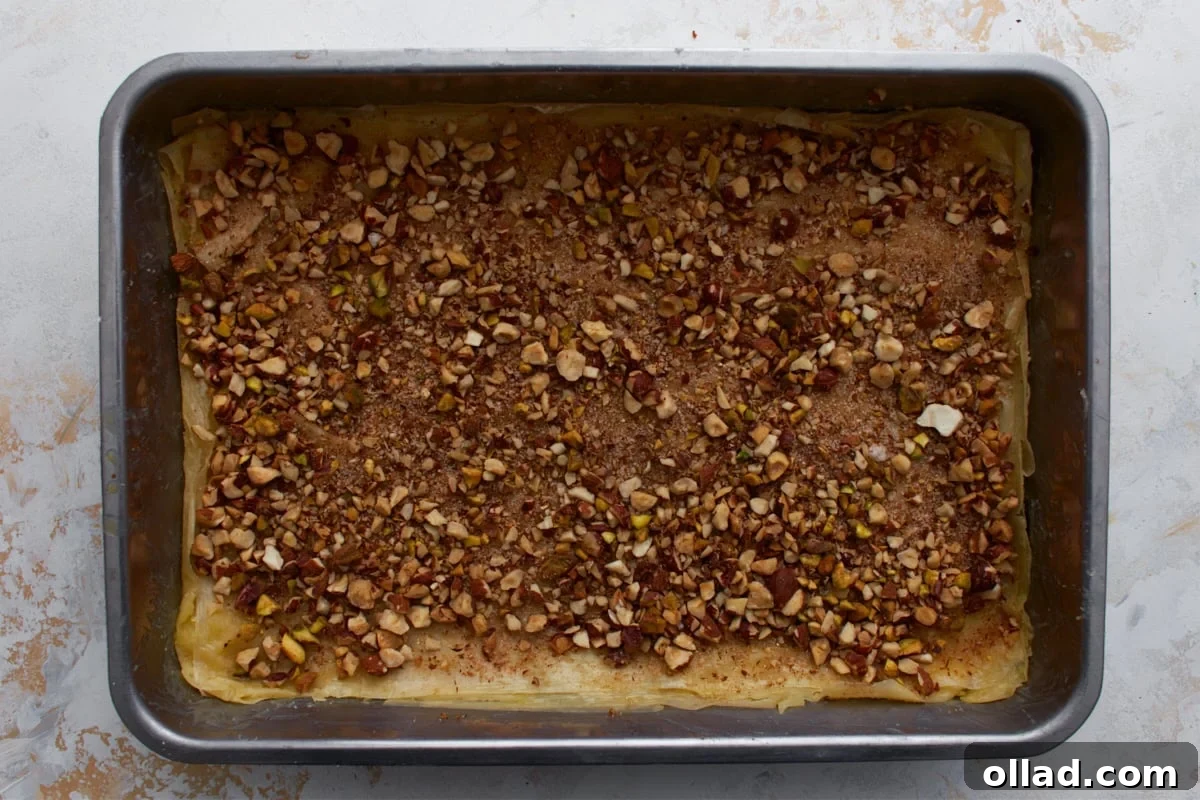
Step 5: Add the First Layer of Nut Filling. Once you have your base of 8 buttered phyllo sheets, take approximately one-third of your prepared nut mixture. Sprinkle it evenly over the entire surface of the phyllo layers in the baking dish. Gently spread the nuts with your hands or a spoon to form a thin, consistent layer. Avoid pressing down too firmly, as you want the filling to remain light and airy between the delicate phyllo sheets.
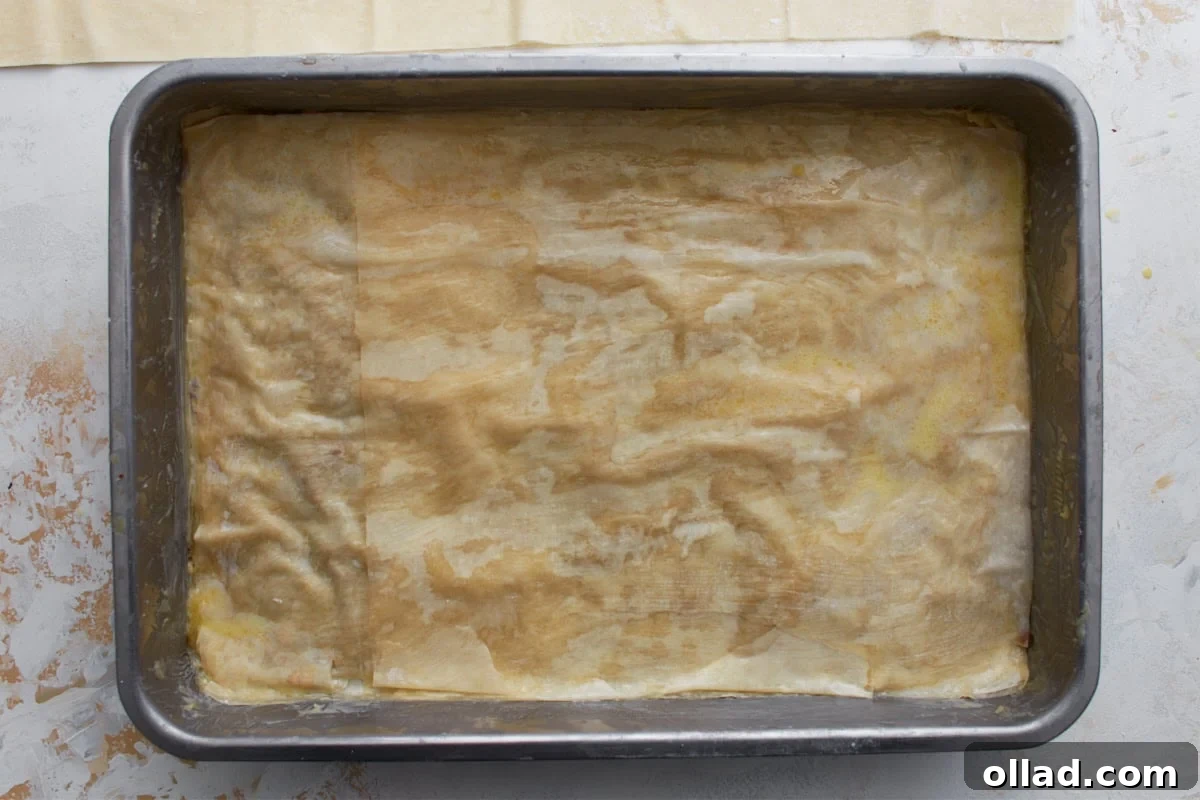
Step 6: Continue with Second Phyllo Layer. After the first nut layer, add 6 more individual sheets of gluten-free phyllo dough. Just like before, ensure each sheet is brushed generously with melted butter before carefully placing the next one directly on top. This meticulous buttering helps create the distinct, flaky separation that is characteristic of perfect baklava.
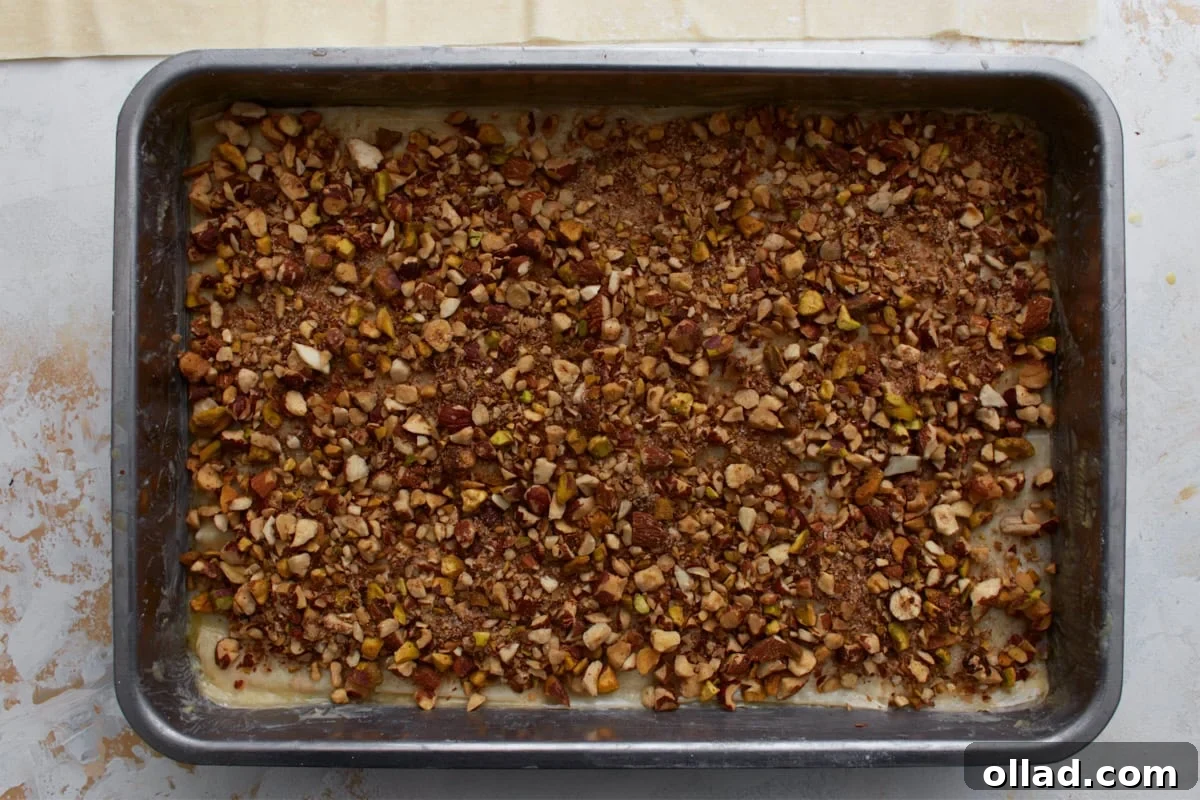
Step 7: Distribute Second Nut Layer. Following the second stack of buttered phyllo, sprinkle another one-third of the nut mixture evenly over the surface. Maintain an even spread to ensure a balanced flavor and texture throughout your baklava. Again, avoid compressing the nuts too much.
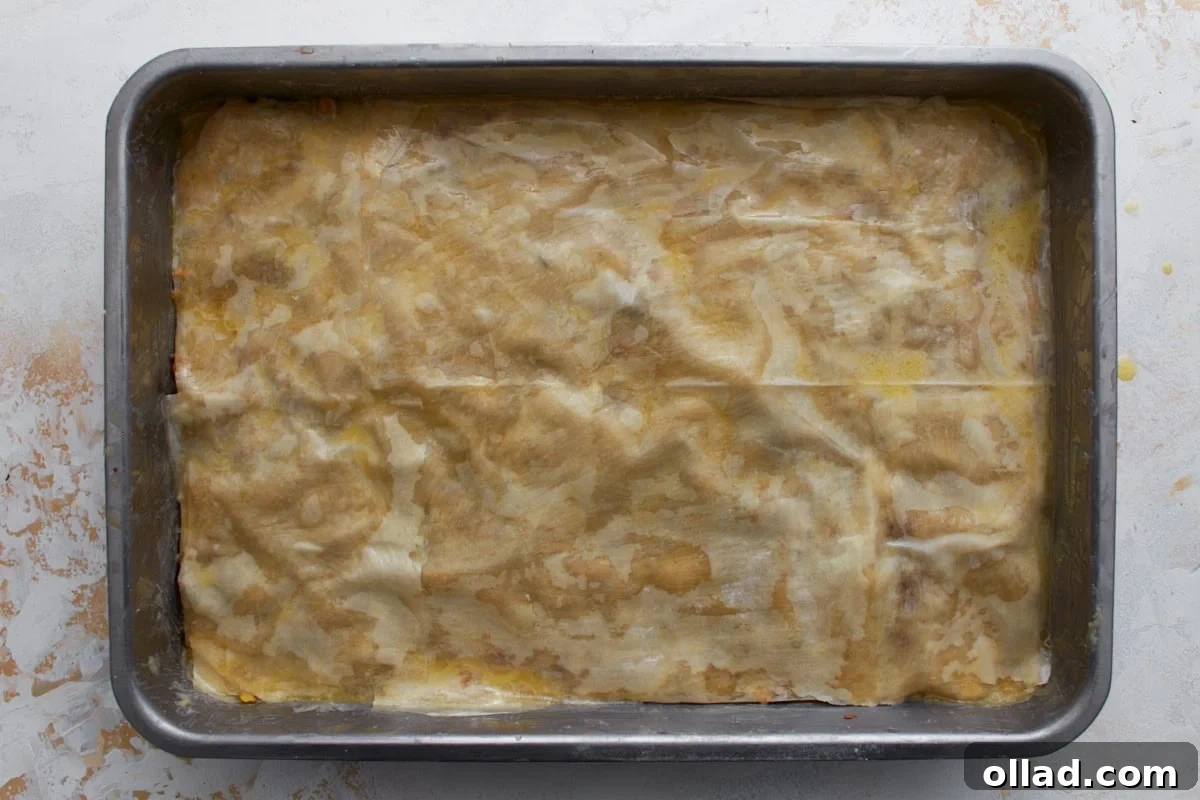
Step 8: Final Layers of Phyllo and Nuts. Repeat the layering process once more. Place 6 additional phyllo sheets, brushing each with melted butter. Then, spread the remaining one-third of the nut mixture evenly across this phyllo layer. This completes your three luscious layers of nuts. Finally, top the entire pastry with the remaining phyllo sheets (you should have approximately 8 sheets left). Remember to brush each of these final sheets generously with melted butter as you layer them, and be extra sure to butter the very top layer thoroughly. This ensures a beautifully golden-brown and delightfully crisp top crust once baked.
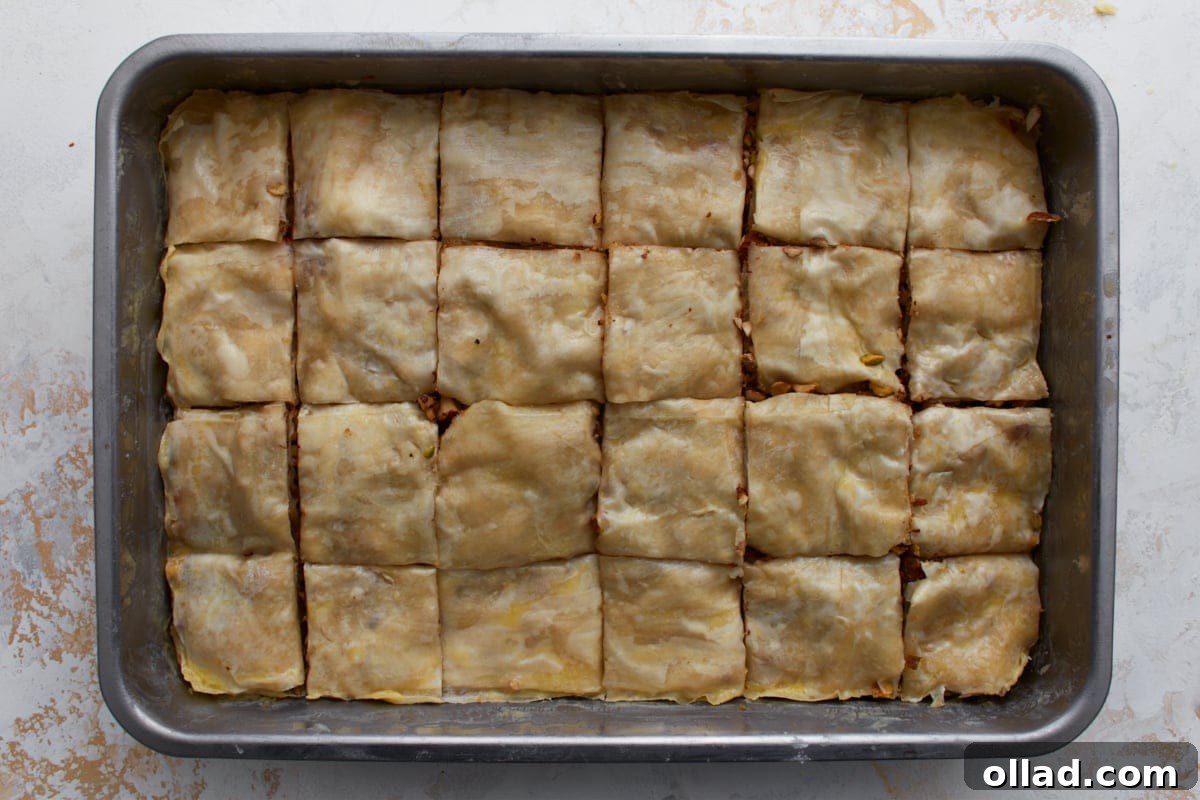
Step 9: Pre-Bake Scoring for Perfect Portions. This step is essential for achieving neat, uniform pieces of baklava. Using a very sharp knife, carefully cut the assembled baklava into your desired shapes—traditional diamonds or simple squares work beautifully. Make sure to slice all the way through the layers to the bottom of the baking pan. Cutting the baklava before baking prevents the delicate, crisp layers from shattering once the pastry is baked and cooled, ensuring elegant servings.
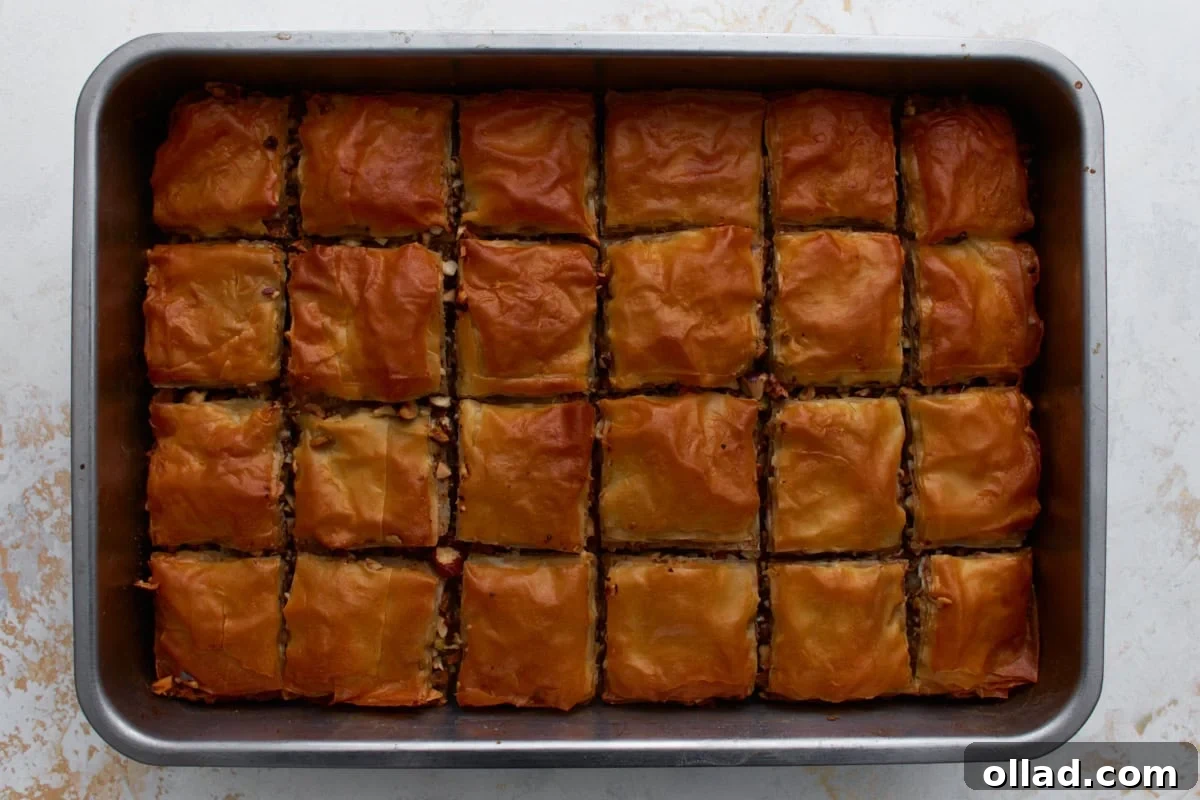
Step 10: Bake to Golden Perfection. Place the baklava in your preheated oven and bake for approximately 45–50 minutes. Keep a close eye on it; you’re looking for a deep golden-brown color and a visibly crisp, slightly puffed texture on top. The intoxicating aroma filling your kitchen will be another good indicator that it’s nearly ready.
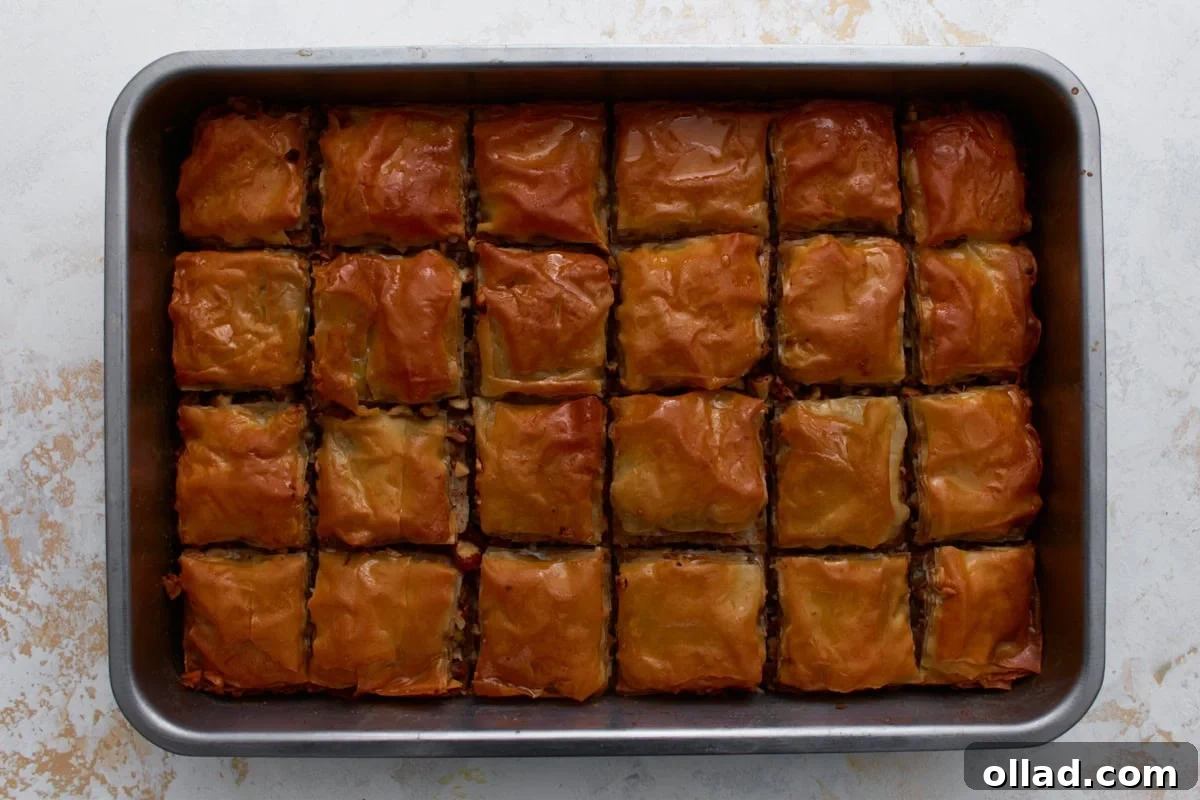
Step 11: The Syrupy Embrace. As soon as you remove the beautifully baked baklava from the oven, immediately and evenly pour the completely cooled honey syrup over the entire hot pastry. This is a magical moment; you should hear a gentle sizzling sound as the syrup begins its journey, slowly seeping into every flaky, buttery layer. This crucial step ensures that the baklava becomes wonderfully moist and sweet without losing its crispness.
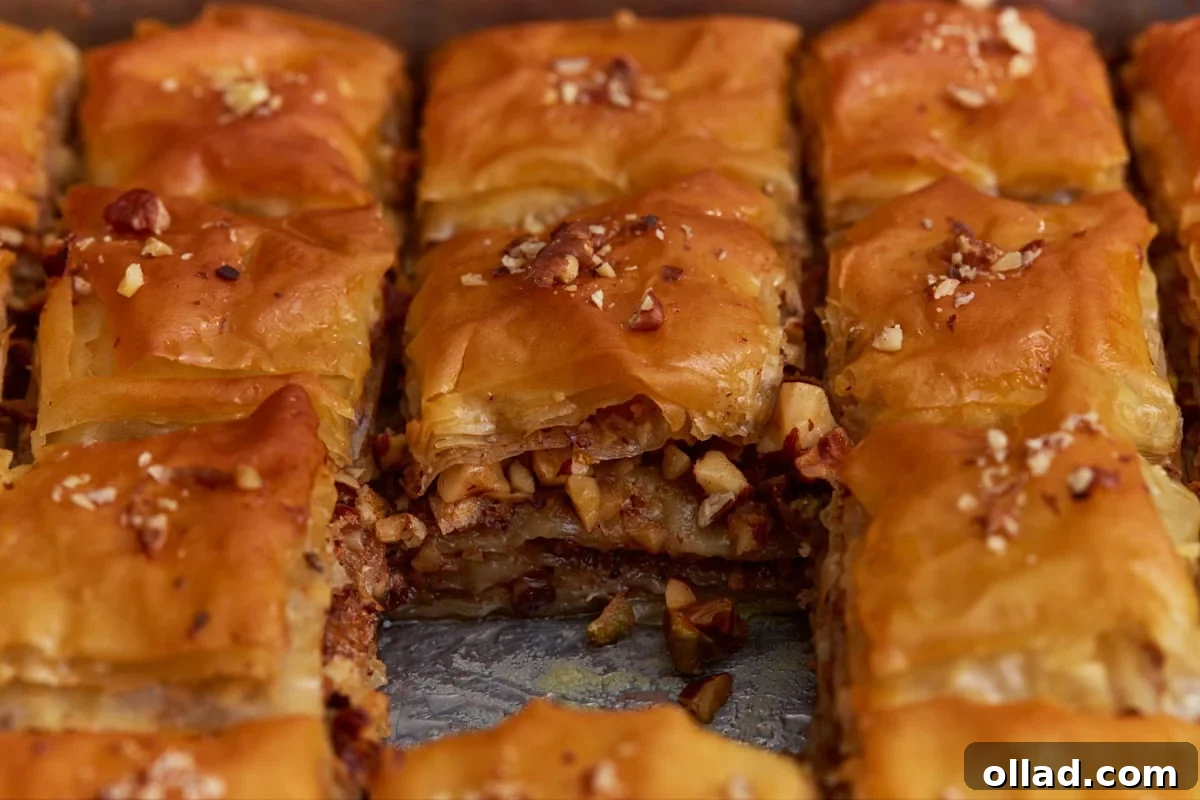
Step 12: The Essential Rest. After pouring the syrup, resist the urge to immediately dig in! It is vital to allow the baklava to sit undisturbed and uncovered at room temperature for a minimum of 4 hours. Ideally, let it rest overnight. This extended resting period is essential for the syrup to fully absorb into all the layers, ensures the flavors deepen and meld, and allows the pastry to properly set, resulting in the perfect balance of crispness and tender, syrupy goodness. This patience is truly rewarded.
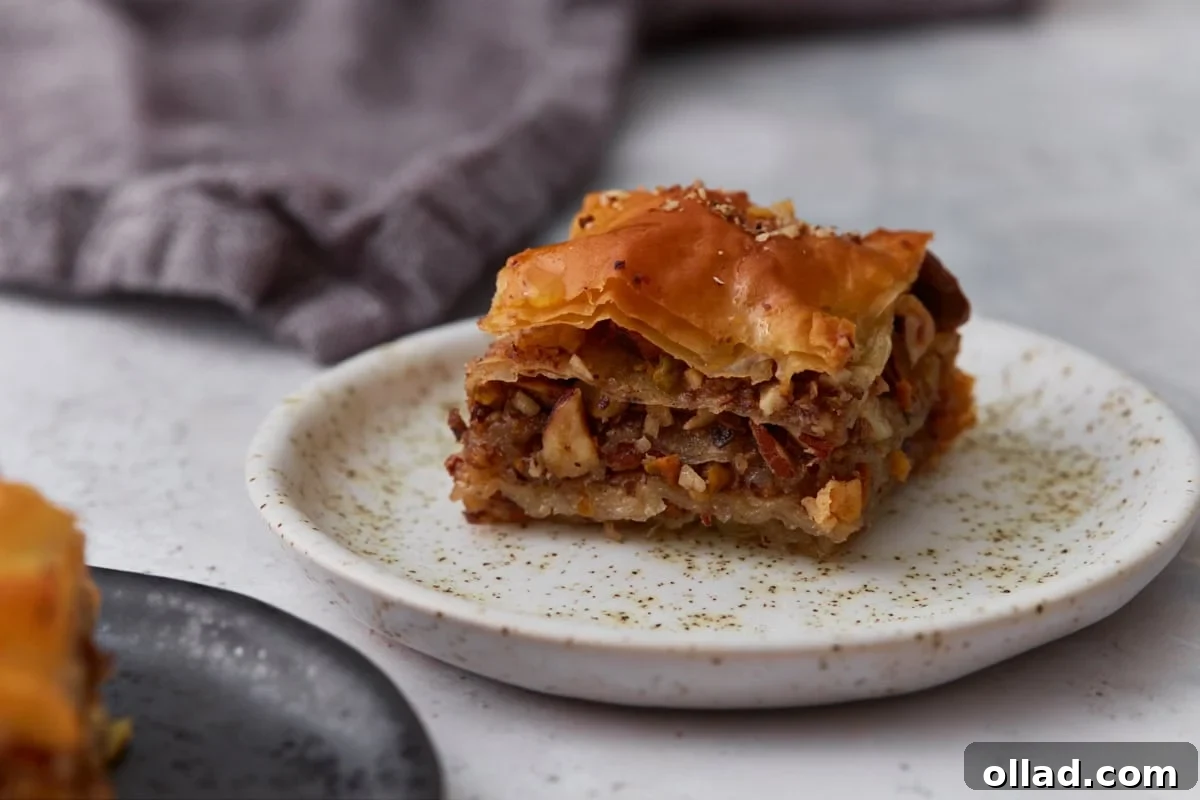
Serving Suggestions: Pairing Your Baklava Perfection
Baklava is an intensely rich and sweet dessert, so the key to serving it perfectly lies in balance. Due to its decadent nature, small portions are often ideal, allowing guests to savor every bite without being overwhelmed. One of the most classic pairings is with a strong, aromatic beverage. A robust cup of Turkish coffee, a rich espresso, or even a strong black tea provides a wonderful counterpoint to the sweetness of the honey syrup. The bitterness and warmth of these drinks cleanse the palate and enhance the baklava’s complex flavors. Mint tea is another excellent choice, offering a refreshing contrast.
For a delightful brunch spread, consider balancing the baklava’s sweetness with savory elements. My crustless ham and cheese quiche would make a fantastic accompaniment, offering a hearty and savory anchor to the meal. If you’re hosting a special occasion or a holiday gathering, elevate the experience by serving baklava alongside a basket of warm, freshly baked gluten-free croissants. The buttery, airy texture of the croissants complements the baklava beautifully, creating an indulgent breakfast or dessert platter. Additionally, a lightly sweet and tangy option like my gluten-free lemon poppy seed muffins can provide a refreshing contrast, making your dessert table truly diverse and appealing for any cozy brunch or festive holiday breakfast.
Storing Your Gluten-Free Baklava for Lasting Freshness
Proper storage is essential to maintain the exquisite crispness and delightful texture of your homemade gluten-free baklava. This dessert holds up beautifully at room temperature, making it a convenient treat to prepare in advance. For optimal freshness and to keep those delicate phyllo layers wonderfully crisp, store your baklava loosely covered on the counter. An airtight container might trap too much moisture, leading to a softer, less desirable texture. When stored this way, your baklava will remain delicious for up to one week.
It’s important to avoid refrigerating baklava. The cold, damp air in a refrigerator can not only soften the phyllo pastry, diminishing its signature crunch, but it can also cause the honey syrup to crystallize, resulting in a grainy texture. For longer storage, freezing is an option, but it requires a specific approach. If you plan to freeze your baklava, do so before adding the honey syrup. Once baked and cut, wrap the cooled baklava tightly in plastic wrap, followed by a layer of aluminum foil, to prevent freezer burn. It can be frozen for up to 3 months. When you’re ready to enjoy it, thaw the baklava, bake it briefly until hot and crisp again, and then immediately pour freshly prepared, cooled syrup over the top. Allow it to soak as usual.
Baklava truly shines as a make-ahead dessert. I frequently prepare it a day in advance, allowing it to sit uncovered overnight after the syrup has been poured. This extended resting period ensures that the syrup fully permeates every layer, allowing the flavors to deepen and meld beautifully, making for an even more exquisite dessert when served.
Explore More Gluten-Free Mediterranean & Middle Eastern Delights
If you’ve fallen in love with the flavors and textures of this gluten-free baklava, you’ll be thrilled to discover a world of other delicious gluten-free Mediterranean and Middle Eastern inspired desserts. These recipes bring the vibrant culinary traditions of the region right into your home, all while being completely gluten-free.
- Gluten-Free Biscotti: These crisp Italian cookies are a delight, crafted with almond flour and studded with sliced almonds. They undergo a double-baking process to achieve their characteristic crunchy texture, making them an ideal companion for dipping into coffee or tea. They also pair wonderfully with baklava on a diverse dessert platter.
- Gluten-Free Tiramisu: Experience the decadence of this classic Italian dessert, featuring layers of espresso-soaked gluten-free ladyfingers intertwined with a rich, silky mascarpone cream. This tiramisu is a truly elegant and indulgent treat, perfect for holidays or sophisticated dinner parties, and conveniently, it’s a fantastic make-ahead option.
- Gluten-Free French Macarons: Master the art of these delicate French confections. Our gluten-free macarons boast crisp outer shells and soft, delightfully chewy centers, brought together with a luscious creamy filling. Their light texture, vibrant colors, and elegant appearance make them an exquisite addition to any special occasion or dessert tray.
- Dairy-Free Crème Brûlée: Indulge in a dairy-free take on crème brûlée, featuring a luxuriously silky custard base crowned with a perfectly caramelized sugar crust that cracks with a satisfying tap of a spoon. This impressive dessert is surprisingly simple to prepare and is naturally gluten-free, offering a sophisticated finish to any meal.
Embark on your gluten-free baking adventure and bring these delightful Mediterranean and Middle Eastern inspired treats to your table. Each recipe is designed to deliver maximum flavor and enjoyment, ensuring your dessert spread is both inclusive and unforgettable.