
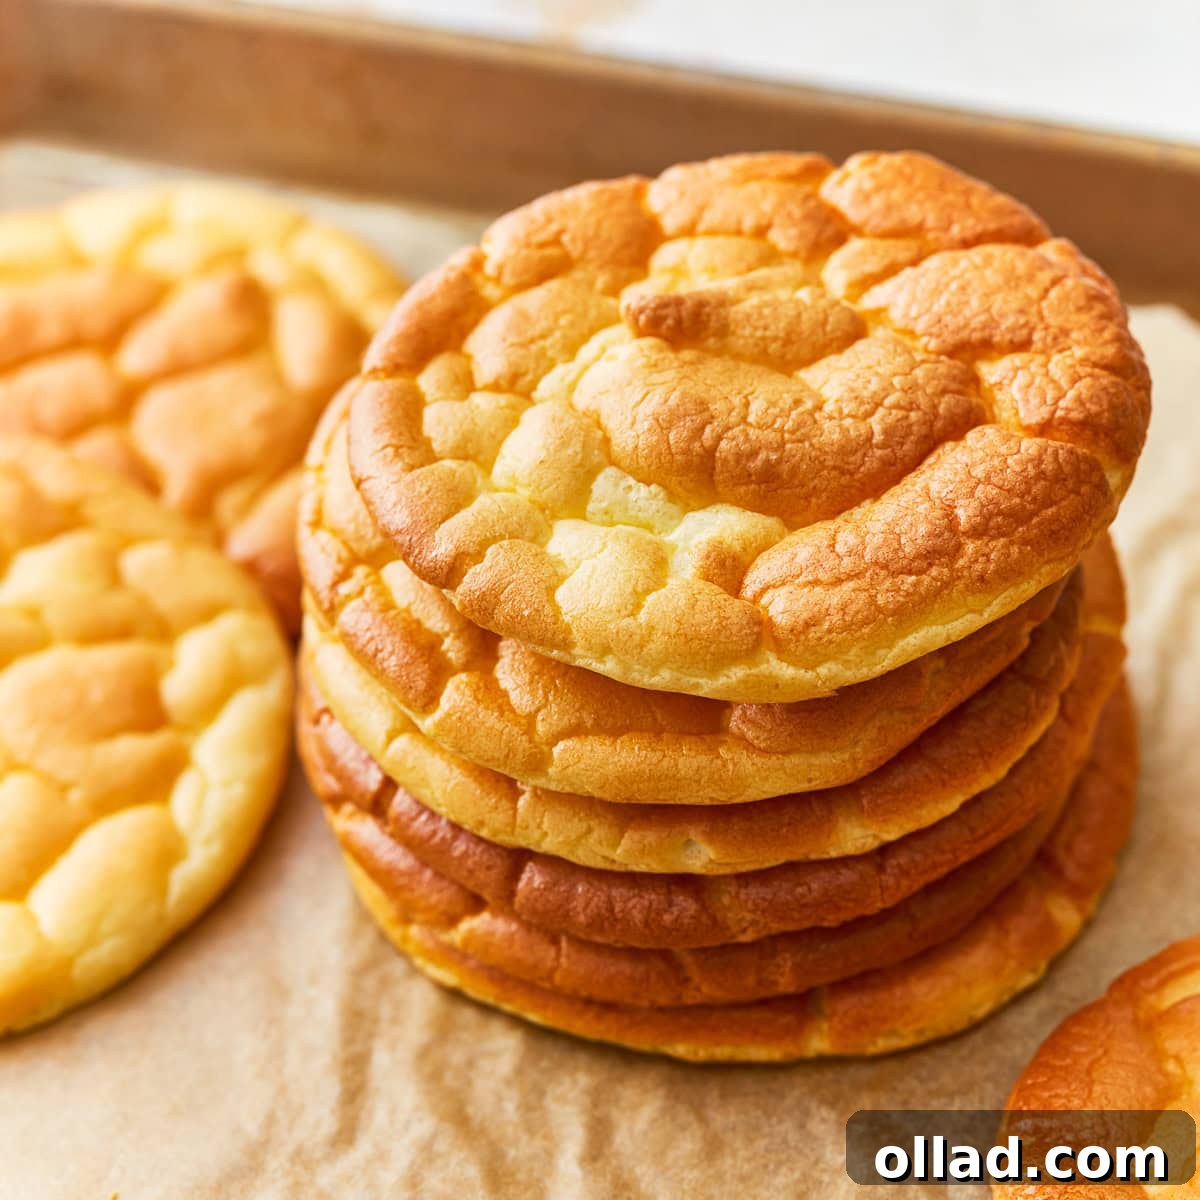
Discover the ultimate guilt-free bread substitute that is revolutionizing kitchens everywhere! This incredibly simple Cloud Bread recipe delivers the lightest, fluffiest texture with just a handful of ingredients. Perfectly suited for those following a gluten-free, low-carb, or keto lifestyle, this grain-free marvel offers all the versatility of traditional bread without the carbs or allergens. Whether you’re assembling a quick sandwich, crafting a personal pizza base, or simply seeking a delightful, high-protein snack, Cloud Bread is a game-changer. My family absolutely adores its airy consistency and how easily it adapts to any meal, making healthy eating both effortless and delicious. Prepare to transform your approach to everyday meals with this brilliant, easy-to-make alternative.
The Wonder of Cloud Bread: A Gluten-Free Delight
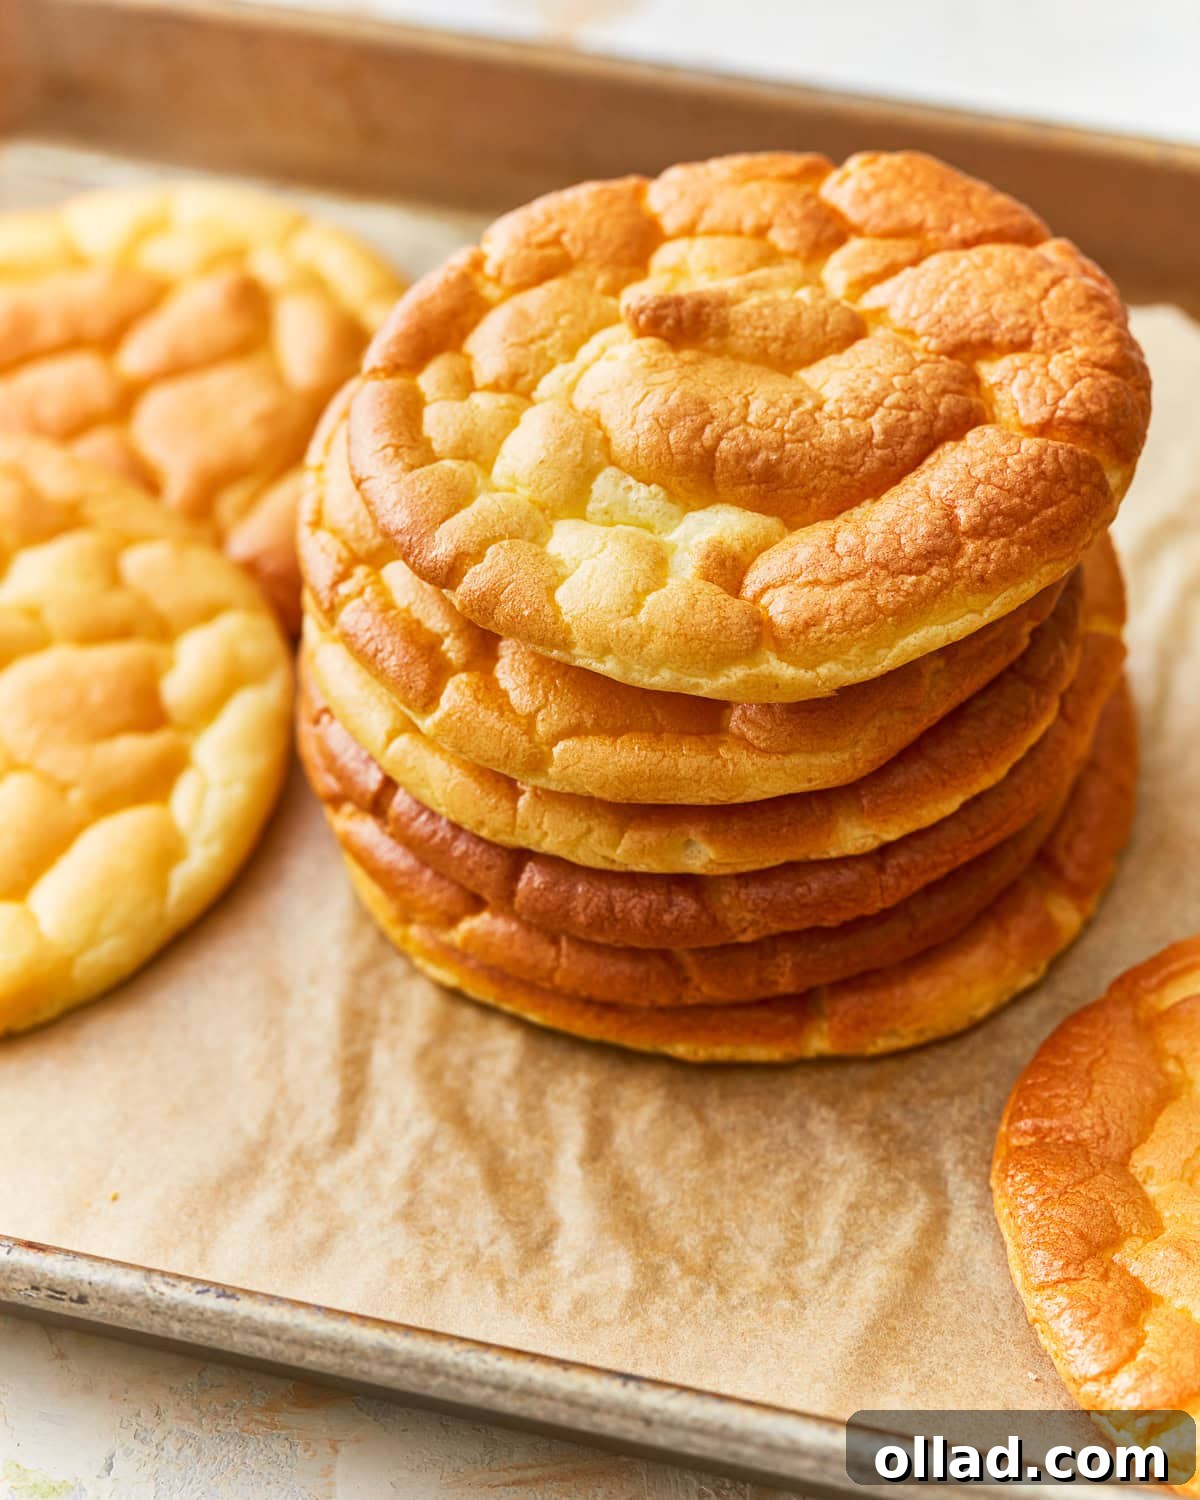
Cloud Bread, often affectionately known as “Oopsie Bread,” is not bread in the conventional sense, as it contains no flour, yeast, or grains. Instead, it’s a culinary innovation that achieves a remarkably bread-like texture using a clever combination of whipped egg whites, cream cheese, and cream of tartar. This ingenious recipe surged in popularity with the rise of low-carb and keto diets, and its recent resurgence on platforms like TikTok has cemented its status as a must-try for anyone seeking a versatile and healthy bread alternative. Its unique composition makes it naturally gluten-free, grain-free, and an excellent source of protein and healthy fats. For years, I’ve relied on this recipe as a go-to alternative to traditional gluten-free bread, crafting everything from hearty sandwiches to crispy pizza bases. It’s so light and satisfying that even my kids enjoy it plain as a quick, nutritious snack!
What Exactly is Cloud Bread?
At its core, Cloud Bread is a fluffy, airy creation that brilliantly mimics the texture of bread without relying on any traditional baking ingredients like flour or yeast. Think of it more as a savory meringue, where carefully whipped egg whites form the structural foundation, yielding an incredibly light and delicate crumb. The addition of cream cheese provides richness and a subtle tang that balances the eggy notes, while cream of tartar acts as a crucial stabilizer for the egg whites, ensuring they achieve maximum volume and maintain their airy structure during baking. This innovative approach makes Cloud Bread an ideal choice for those managing celiac disease, gluten sensitivities, or anyone adhering to a low-carb, keto, or grain-free diet. It’s a versatile canvas for both sweet and savory applications, proving that dietary restrictions don’t have to mean sacrificing deliciousness.
The Simple Ingredients for Your Fluffy Cloud Bread
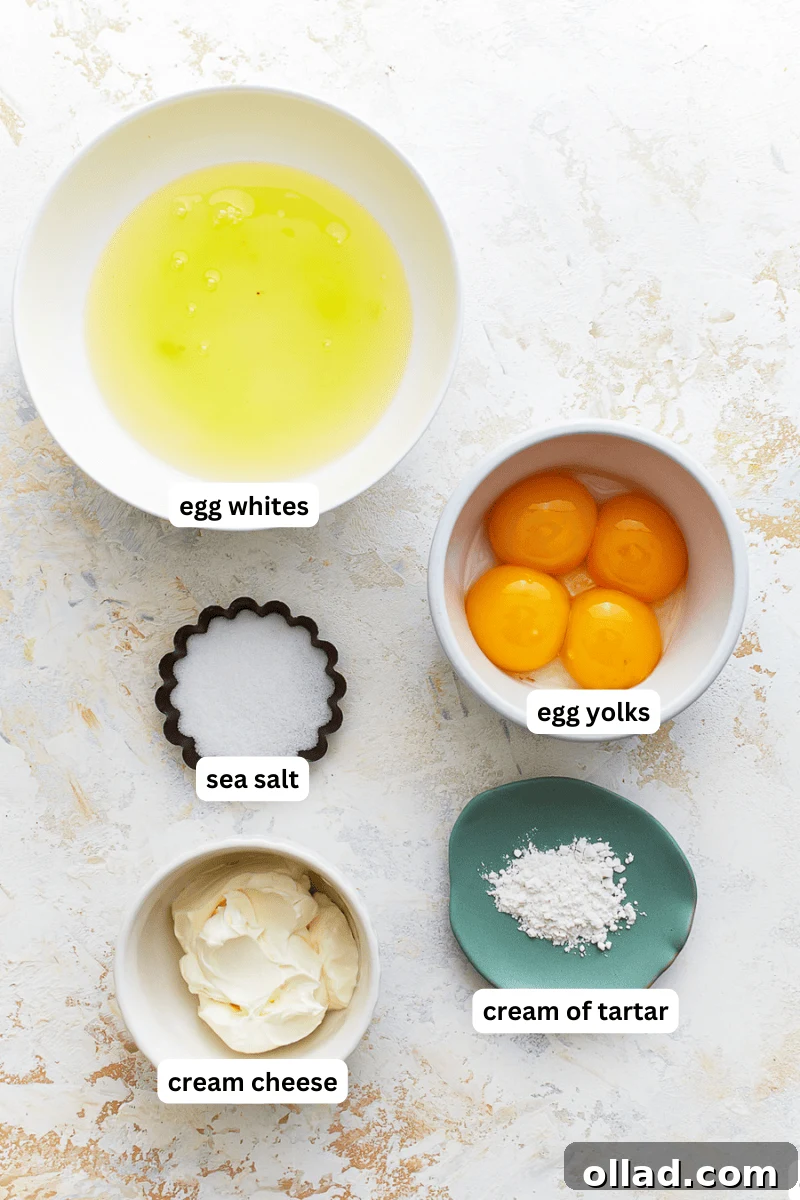
One of the most appealing aspects of Cloud Bread is its incredibly short ingredient list, typically requiring just three core items. Each plays a vital role in creating its signature airy texture and subtle flavor profile. Here’s a closer look at what you’ll need:
- Large Eggs: The foundation of Cloud Bread, eggs provide both structure and the light, airy fluffiness. You’ll need to separate the egg whites from the yolks carefully. It’s crucial that no trace of yolk mixes with the whites, as even a tiny amount of fat can prevent the egg whites from whipping up properly into stiff peaks. Using room-temperature egg whites will help them achieve maximum volume faster.
- Cream of Tartar: This essential ingredient is a dry, acidic powder that acts as a stabilizer for the egg whites. It helps them whip up faster, achieve a greater volume, and hold their stiff peaks during the mixing and baking process. If you don’t have cream of tartar on hand, you can substitute it with a teaspoon of white vinegar or lemon juice, which serve a similar purpose due to their acidity. Always check labels to ensure your cream of tartar is certified gluten-free if cross-contamination is a concern.
- Cream Cheese: Adding a delightful richness and a subtle tangy flavor, cream cheese is key to neutralizing any potential “eggy” taste in the finished product. It also contributes to the bread’s soft, moist texture. For best results, ensure your cream cheese is softened to room temperature for at least an hour before use, making it easier to blend smoothly with the egg yolks.
- Sea Salt: A pinch of sea salt enhances all the flavors, balancing the richness of the cream cheese and the subtle notes of the egg. It’s a small addition that makes a big difference in the overall taste of your Cloud Bread.
Mastering Your Cloud Bread: Essential Tips for Success
While the Cloud Bread recipe is wonderfully simple, a few key tips can elevate your results from good to absolutely perfect. Paying attention to these details will ensure you achieve that signature light, airy, and fluffy texture every time:
- **Prepare Your Baking Surface:** Always line your baking tray with parchment paper. Cloud bread can be quite delicate and prone to sticking, making removal difficult without it. A silicone baking mat can also work effectively, but parchment paper is my preferred choice for easy cleanup and guaranteed non-stick release.
- **The Importance of Egg Temperature and Separation:** Use large eggs for the best yield and structure. It’s easiest to separate eggs when they are cold, as the yolk is firmer and less likely to break. However, once separated, allow the egg whites to come to room temperature for about 30 minutes before whipping. Room-temperature egg whites whip up faster and achieve a much higher volume and stable foam compared to cold whites. Be meticulously careful to prevent any egg yolk from contaminating the whites, as even a tiny speck of fat can completely inhibit them from whipping into stiff peaks.
- **Ensuring Gluten-Free Cream of Tartar:** While cream of tartar is a natural byproduct of fermented grapes and inherently gluten-free, some brands process it in facilities that also handle wheat products. If you have severe gluten sensitivity or celiac disease, always check the label for cross-contamination warnings and opt for a brand that is certified gluten-free.
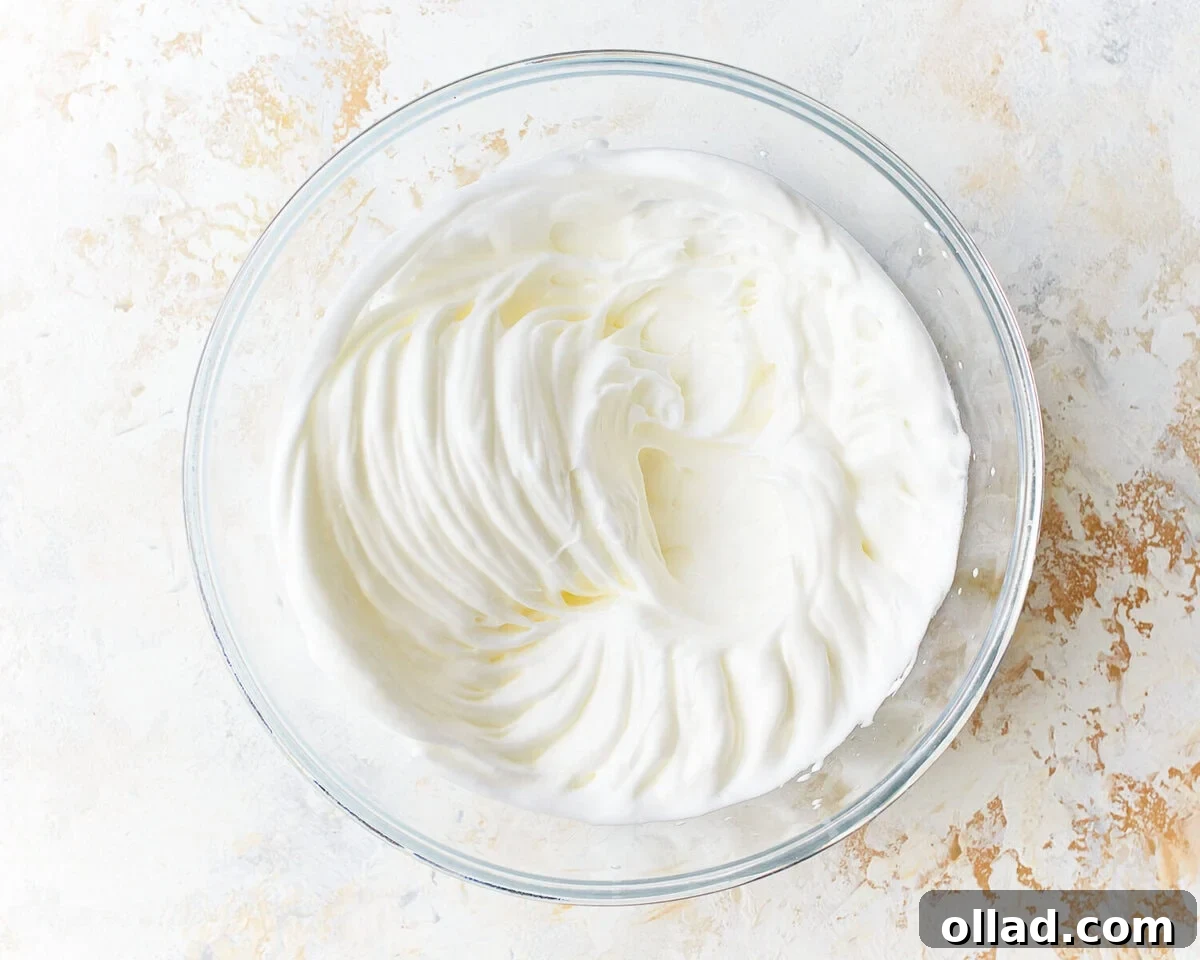
- **Achieving Perfect Stiff Peaks:** Whipping egg whites to stiff peaks is perhaps the most crucial step. Stiff peaks mean that when you lift the whisk, the egg whites hold their shape firmly, pointing straight up without collapsing. A classic test is to carefully tilt or even invert the bowl – if the whites remain perfectly still, they are ready. They should appear glossy and smooth.
- **Avoid Over-Whipping:** While stiff peaks are the goal, be careful not to overwhip the egg whites. Overwhipped egg whites can become dry, grainy, and lose their smooth, stable texture, which will negatively impact the final bread’s fluffiness. Stop whisking as soon as the stiff, shiny peaks are achieved.
- **Gentle Folding is Key:** After separately mixing the egg yolks, softened cream cheese, and salt, the most delicate part is folding this mixture into the whipped egg whites. Use a spatula and a gentle, upward motion to combine them. The goal is to incorporate the yolk mixture thoroughly while deflating the egg whites as little as possible, preserving all that precious air you worked hard to incorporate.
- **Evenly Sized Rounds:** When spooning the batter onto the baking sheet, try to create rounds that are roughly the same size and thickness, typically about 3 inches in diameter. This ensures even baking, preventing some pieces from overcooking while others are still underdone.
- **Reheating Instructions:** If you have leftovers, Cloud Bread can be reheated. Place it in a preheated oven or air fryer until warmed through for the best texture. Alternatively, a quick zap in the microwave for a few seconds can work, but be cautious not to overheat, as this can make the bread dry and rubbery.
Crafting Your Perfect Cloud Bread: A Step-by-Step Guide
Making Cloud Bread is surprisingly straightforward, and with these detailed steps, you’ll be enjoying your fluffy creations in no time. Precision in technique, especially with the egg whites, is key to success.
Step 1: Prepare Your Workspace. Begin by preheating your oven to a moderate 300°F (150°C). While the oven heats, line a large baking sheet with parchment paper. This vital step prevents your delicate Cloud Bread from sticking and makes for easy transfer after baking. Set this prepared sheet aside.
Step 2: Whip the Egg Whites. In a large, impeccably clean mixing bowl, combine the separated egg whites from 4 large eggs with ½ teaspoon of cream of tartar. Using an electric mixer, beat the mixture on high speed until it transforms into stiff, glossy peaks. This means the whites should hold their shape firmly when you lift the beaters, standing tall and proud. This process typically takes about 5-7 minutes, depending on your mixer.

Step 3: Prepare the Yolk Mixture. In a separate medium-sized bowl, combine the 4 egg yolks, 3 ounces of softened cream cheese, and ½ teaspoon of sea salt. Beat these ingredients together until the mixture is completely smooth and creamy, with no lumps of cream cheese remaining. Ensure the cream cheese is at room temperature to achieve this consistency easily.
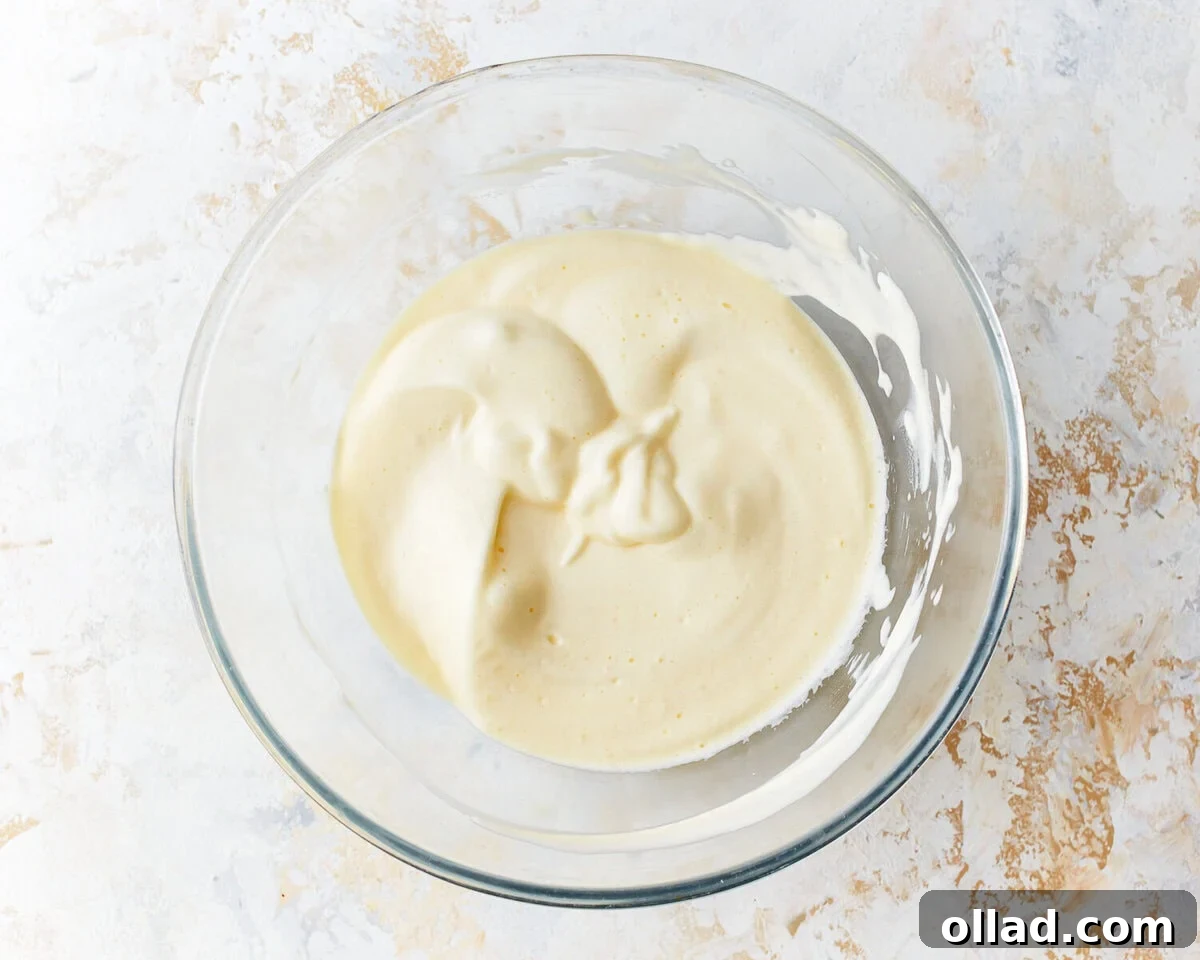
Step 4: Gently Fold the Mixtures. With the egg whites perfectly whipped and the yolk mixture creamy, it’s time to combine them. Carefully add the egg yolk mixture to the bowl of whipped egg whites. Using a spatula, gently fold the two together with a light, lifting motion. The key here is not to overmix and to preserve as much air in the egg whites as possible, as this air is what gives Cloud Bread its signature lightness. Stop folding as soon as the ingredients are just combined and no streaks of yolk remain.
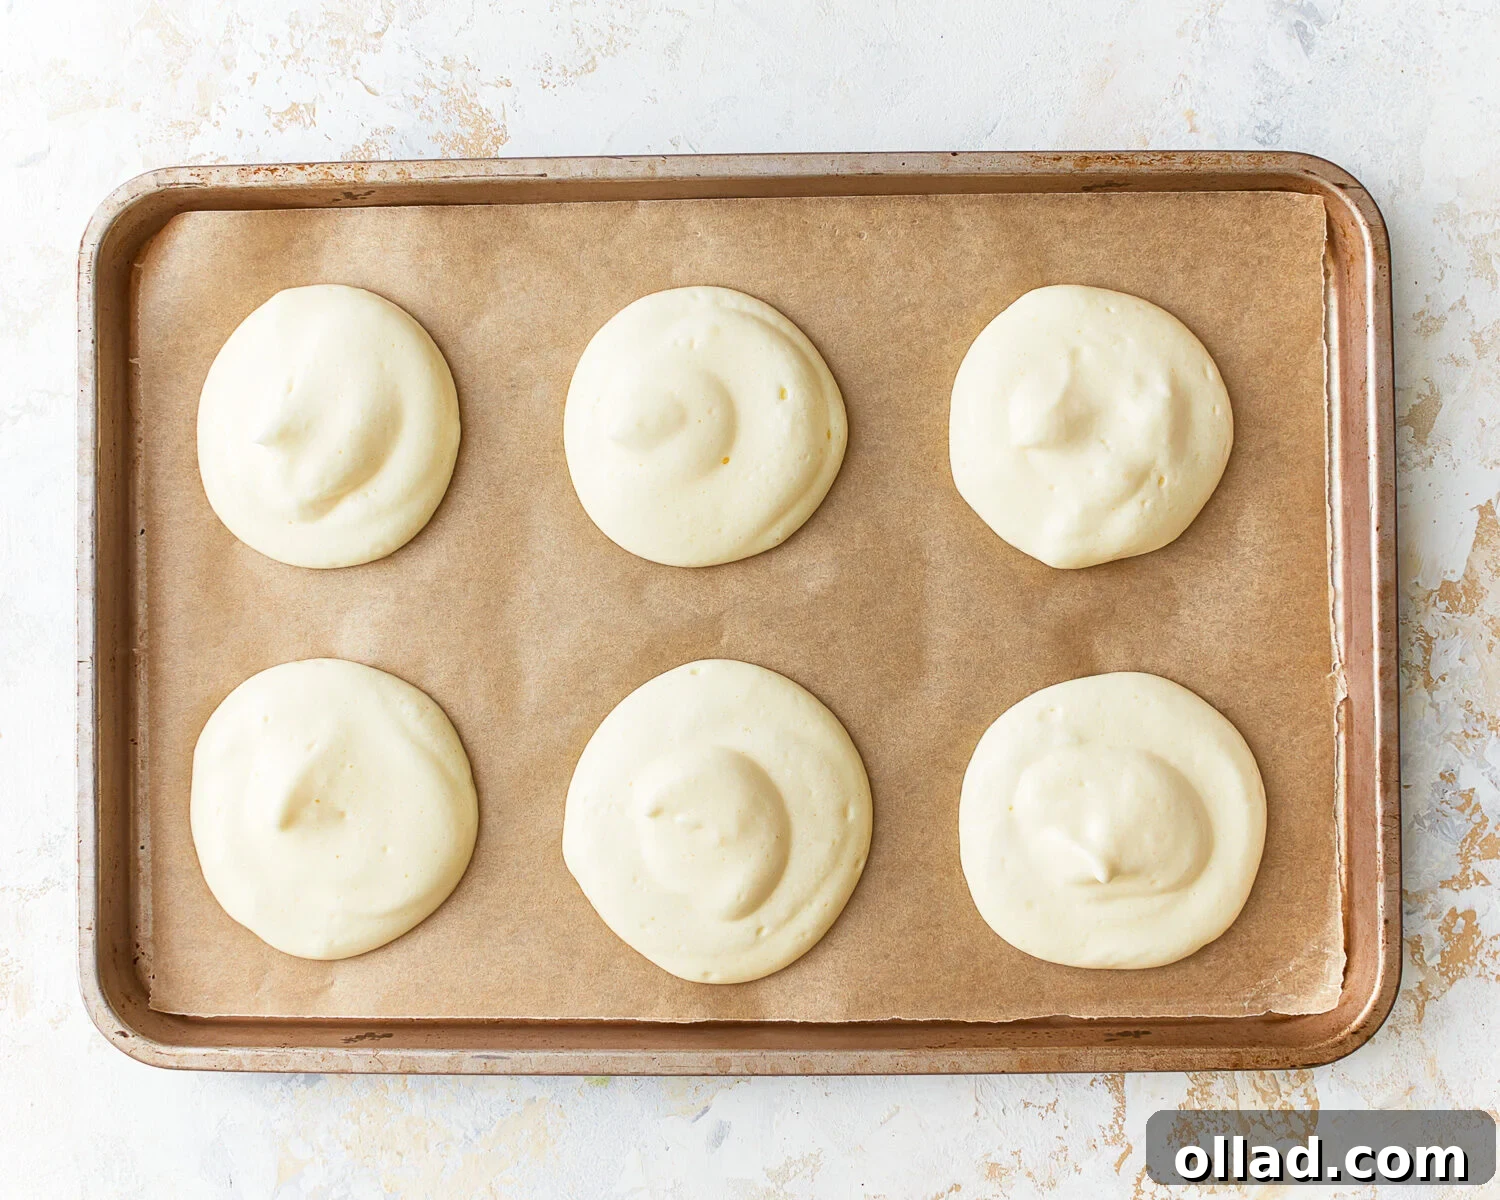
Step 5: Form and Bake. Spoon the delicate batter onto your prepared baking sheet, forming individual rounds approximately 3 inches in diameter. Aim for uniform size to ensure even baking. Bake in your preheated oven for 20-25 minutes. The Cloud Bread is ready when it turns a beautiful golden brown and feels set to the touch. The cooking time may vary slightly depending on your oven and the size of your rounds.
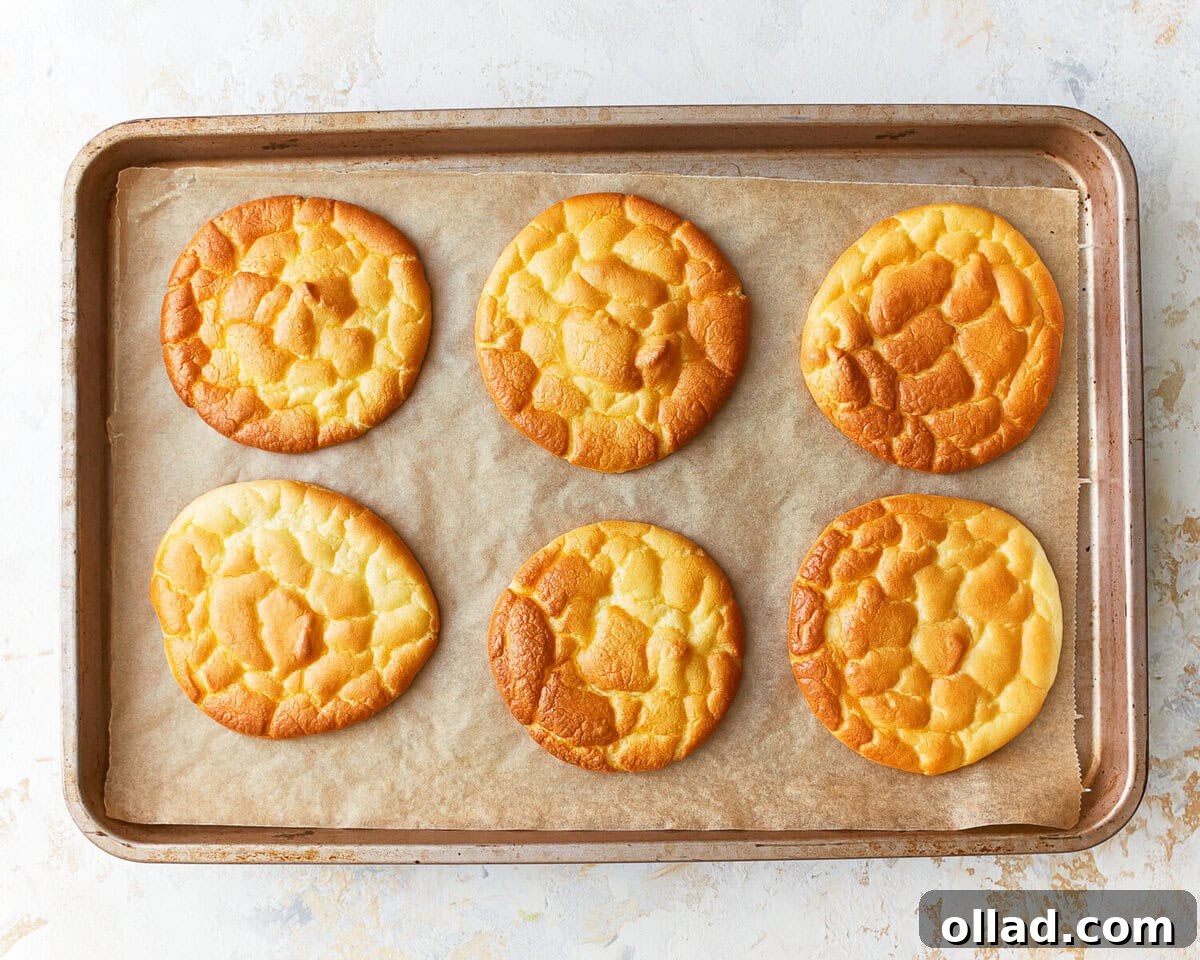
Step 6: Cool and Serve. Once baked, remove the baking sheet from the oven and let the Cloud Bread cool on the sheet for a few minutes. This allows them to firm up slightly. Then, carefully transfer them to a wire rack to cool completely. Cooling on a rack prevents the bottoms from becoming soggy. Once fully cooled, your delicious, fluffy Cloud Bread is ready to be enjoyed! Serve it plain, as a versatile base for sandwiches, or topped with your favorite savory or sweet spreads.
Unleash Your Creativity: Customizing Cloud Bread Flavors
One of the many joys of Cloud Bread is its adaptability. While delicious on its own, it serves as an excellent canvas for a myriad of flavor customizations, allowing you to tailor it perfectly to your cravings or meal plan. The best time to incorporate these additions is usually during Step 3, when you’re mixing the egg yolks, cream cheese, and salt, ensuring even distribution without deflating the egg whites.
- Savory Delights: For a more savory profile, ideal for sandwiches or as a side with dinner, consider adding:
- Garlic powder or onion powder (¼ – ½ teaspoon for a subtle hint).
- Dried herbs like Italian seasoning, oregano, rosemary, or thyme (½ – 1 teaspoon).
- A sprinkle of black pepper or a pinch of red pepper flakes for a kick.
- Grated Parmesan, cheddar, or your favorite cheese (1-2 tablespoons) for a cheesy dimension.
- “Everything Bagel” seasoning for a burst of sesame, poppy, garlic, and onion flavor.
- Sweet Indulgences: To transform your Cloud Bread into a dessert-like treat or a sweet breakfast option, try adding:
- Vanilla extract or almond extract (½ teaspoon) for aromatic notes.
- A dash of cinnamon or nutmeg (¼ teaspoon) for warmth.
- Keto-friendly sweeteners like stevia, erythritol, or monk fruit sweetener (to taste) to satisfy your sweet tooth without the sugar.
- A tiny amount of cocoa powder for a chocolatey twist (great with a touch of sweetener!).
Experimentation is encouraged! Start with small amounts and adjust to your preference. These simple additions can dramatically change the character of your Cloud Bread, making it a perfect accompaniment for any dish or a delightful stand-alone treat.
Serving Suggestions for Your Versatile Cloud Bread
The beauty of Cloud Bread lies not only in its simple preparation but also in its incredible versatility. Once cooled, these light, airy rounds can be used in countless ways, making them a fantastic staple for any meal of the day. Here are some popular and creative serving suggestions:
- Classic Sandwiches and Wraps: Cloud Bread makes an excellent low-carb and gluten-free alternative to traditional sandwich bread. Fill it with your favorite deli meats, cheese, fresh lettuce, tomato, avocado, or a spread like hummus or mustard. It’s perfect for a quick lunch or picnic.
- Mini Pizzas: Use the Cloud Bread rounds as individual pizza bases. Spread a thin layer of sugar-free marinara sauce, sprinkle with mozzarella, and add your preferred toppings (pepperoni, mushrooms, bell peppers, olives). Bake until the cheese is melted and bubbly for a quick and satisfying low-carb pizza night.
- Breakfast Delights: Pair Cloud Bread with scrambled eggs, bacon, or sausage for a hearty breakfast. It can also be spread with cream cheese and topped with berries or a sugar-free jam for a sweeter start to your day.
- Savory Sides: Serve plain Cloud Bread alongside soups, salads, or stews. Its neutral flavor makes it a wonderful accompaniment to soak up sauces and broths without adding heavy carbs. Try adding garlic powder or Italian herbs to the batter for a more pronounced savory profile.
- Quick & Healthy Snacks: Enjoy Cloud Bread on its own as a light, protein-packed snack. It’s surprisingly satisfying and can curb those mid-day cravings. You can also dip it in olive oil and balsamic vinegar, or a creamy dip.
- Dessert Bases: For sweetened versions, use them as a base for fruit tarts or mini dessert cups. Top with fresh berries, a dollop of whipped cream, or a drizzle of sugar-free chocolate sauce for a guilt-free treat.
With Cloud Bread, your culinary imagination is the only limit!
Storage and Reheating Best Practices
Proper storage is essential to maintain the delicate texture and freshness of your homemade Cloud Bread. Here’s how to ensure it stays delicious for as long as possible:
- **Refrigeration:** Store any leftover Cloud Bread in an airtight container in the refrigerator for up to 3 days. To prevent the rounds from sticking together and making them easier to grab, I always recommend placing a small square of parchment paper between each slice before stacking them.
- **Freezing for Longer Storage:** Cloud Bread freezes beautifully, making it an excellent option for meal prepping or having a quick bread substitute on hand. Once the bread has completely cooled, wrap each slice individually in plastic wrap or aluminum foil. Then, place the wrapped pieces in a freezer-safe container or a heavy-duty freezer bag. They can be frozen for 1 to 2 months.
- **Thawing Frozen Cloud Bread:** When you’re ready to enjoy frozen Cloud Bread, simply transfer it from the freezer to the refrigerator and let it thaw overnight. This gentle thawing process helps maintain its texture.
- **Reheating:** To bring your Cloud Bread back to its optimal fluffiness, reheating is recommended. You can place it in a preheated oven at a low temperature (around 250°F / 120°C) or in an air fryer for a few minutes until it’s heated through. If you’re in a hurry, you can microwave it for just a few seconds, but be careful not to overheat, as microwaving for too long can make it dry and chewy.

Explore More Gluten-Free Bread Recipes!
If you love the versatility and deliciousness of gluten-free alternatives like Cloud Bread, you’ll be thrilled to discover a world of other amazing bread recipes that cater to your dietary needs without compromising on flavor or texture. Here are some of my favorite gluten-free bread creations to inspire your next baking adventure:
- Gluten-Free Pita Bread
- Gluten-Free Naan Bread
- Gluten-Free Flatbread
- Gluten-Free Focaccia
- Gluten-Free Hot Dog Buns
Cloud Bread Recipe

This cloud bread recipe creates the lightest and fluffiest bread with just 3 ingredients. It’s also gluten-free, low-carb, and keto-friendly!
Ingredients
- 4 large eggs, separated
- ½ teaspoon cream of tartar
- 3 ounces cream cheese, softened
- ½ teaspoon sea salt
Instructions
- Preheat your oven to 300°F (150°C) and line a baking sheet with parchment paper.
- In a large mixing bowl, beat the egg whites with cream of tartar until stiff peaks form.
- In another bowl, mix together the egg yolks, softened cream cheese, and sea salt until smooth.
- Gently fold the beaten egg whites into the egg yolks mixture until just combined. Be careful not to deflate the egg whites too much.
- Spoon the batter onto the prepared baking sheet, forming small rounds about 3 inches in diameter.
- Bake in the preheated oven for 20-25 minutes, or until the cloud bread is golden brown and set.
- Remove from the oven and let cool on the baking sheet for a few minutes before transferring to a wire rack to cool completely.
- Serve the cloud bread as desired. It can be enjoyed plain, as a sandwich bread, or topped with your favorite spreads and toppings.
Notes
- I recommend lining the baking tray with parchment paper; otherwise, the cloud bread will stick and be difficult to remove. A silicone baking mat also works if you have one, but parchment paper is preferred.
- Use large eggs for the best results. Separate the eggs carefully, making sure no yolk gets into the whites. Even a small amount of yolk can stop the egg whites from whipping up properly.
- Cream of tartar is naturally gluten-free. However, some brands do manufacture it in facilities that also process wheat products. Check the label for this information and choose a certified gluten-free brand.
- Whip egg whites until stiff peaks form, meaning they hold their shape when the whisk is lifted. You can also test this by turning the bowl upside down – if the whites stay in place, then they’re ready.
- Be careful not to overwhip the egg whites as they can become dry and grainy. Stop once they reach stiff peaks and have a shiny, smooth texture.
- Mix the cream cheese and egg yolks together in a separate bowl before gently folding them into the egg whites. Take care not to deflate the egg whites too much during this step.
- To Store: Place parchment paper between each slice and store in an airtight container in the refrigerator for up to 3 days.
- To Freeze: Wrap individually in plastic wrap and place in a freezer-safe container for 1-2 months. Let it thaw in the fridge before serving.
- To Reheat: Warm in an oven or air fryer until heated through. Alternatively, microwave the cloud bread for a few seconds, being careful not to overheat to avoid dryness.
Nutrition
Calories: 69 kcal
Carbohydrates: 1 g
Protein: 3 g
Fat: 6 g
Saturated Fat: 3 g
Polyunsaturated Fat: 1 g
Monounsaturated Fat: 2 g
Trans Fat: 0.01 g
Cholesterol: 93 mg
Sodium: 210 mg
Potassium: 75 mg
Sugar: 0.5 g
Vitamin A: 262 IU
Calcium: 23 mg
Iron: 0.4 mg
Nutrition information is automatically calculated, so should only be used as an approximation.