
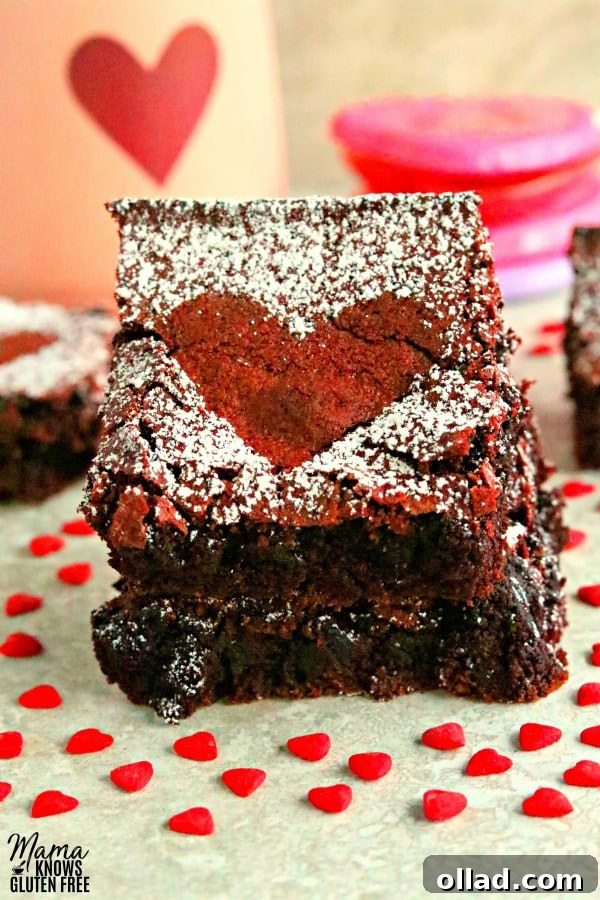
Indulge in the luscious world of homemade Gluten-Free Red Velvet Brownies. These thick, sumptuously chocolatey, and delightfully chewy brownies offer a perfect blend of classic red velvet flavor with a satisfyingly rich texture. What’s more, we’ve included a convenient dairy-free option so everyone can enjoy this beloved treat.
Gluten-Free Red Velvet Brownies: Irresistible and Easy
There’s an undeniable allure to red velvet treats, a unique flavor profile that marries a gentle cocoa essence with a subtle tang, all wrapped in a visually striking vibrant red hue. It’s a flavor that evokes warmth, celebration, and pure decadence, making it a perennial favorite, especially around holidays like Valentine’s Day.
These gluten-free red velvet brownies are not just beautiful; they are incredibly easy to make. This recipe is a sophisticated spin on our popular Gluten-Free Brownies, elevated with the distinctive red velvet charm. Whether you’re a seasoned baker or new to gluten-free cooking, you’ll find this recipe straightforward and rewarding, producing brownies that are every bit as delicious as their traditional counterparts.
What Makes Red Velvet Brownies So Special?
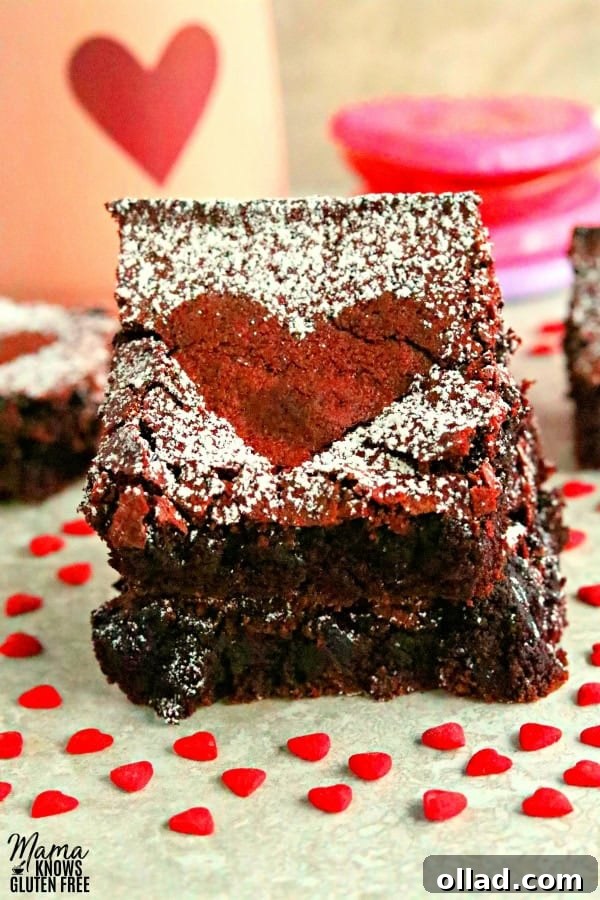
Red velvet is more than just a cake or brownie with red food coloring; it’s a symphony of flavors and textures. The traditional red velvet profile includes a mild chocolate taste, often enhanced by a touch of vinegar and buttermilk, which react with cocoa powder to create a subtle tang and sometimes, a reddish tint (though modern recipes rely on food coloring for the vibrant hue). In brownie form, this translates to a rich, dense, and chewy bar with a moist crumb, offering a sophisticated twist on the classic chocolate brownie.
Our gluten-free version captures all these beloved characteristics. The slight cocoa undertone, combined with the sweetness of granulated and brown sugars, creates a perfectly balanced flavor that’s both familiar and uniquely red velvet. The addition of gluten-free flour, carefully chosen, ensures a texture that’s thick and satisfyingly chewy, without any grittiness or dryness often associated with gluten-free baked goods. These brownies are a testament to the fact that dietary restrictions don’t mean compromising on flavor or enjoyment.
Why Choose Gluten-Free Baking?
For many, gluten-free baking isn’t just a trend; it’s a necessity for health and well-being. Individuals with celiac disease must strictly avoid gluten, a protein found in wheat, barley, and rye, to prevent intestinal damage. Others may experience gluten sensitivity, leading to digestive discomfort, fatigue, or other symptoms. Offering delicious gluten-free options ensures that everyone can partake in the joy of shared meals and desserts.
Beyond dietary restrictions, gluten-free recipes can also introduce bakers to new ingredients and techniques, expanding their culinary repertoire. This recipe is designed to be accessible and enjoyable for all, proving that gluten-free treats can be just as delicious, if not more so, than their gluten-containing counterparts. By opting for gluten-free, you’re not just making a health-conscious choice, but also opening the door to a world of delightful flavors and textures.
Mastering the Gluten-Free Red Velvet Brownie Recipe
Creating these exquisite brownies is simpler than you might think. With a few key ingredients and easy-to-follow steps, you’ll have a batch of these delectable treats ready to impress.
Ingredients You’ll Need
To craft your perfect batch of gluten-free red velvet brownies, gather these essential ingredients:
- 1/2 cup (1 stick) Butter, melted: You can use unsalted butter for classic flavor, or for a dairy-free option, opt for Smart Balance or Earth Balance butter substitutes. Butter provides richness and helps with the chewy texture.
- 3/4 cup Granulated Sugar: For sweetness and a crisp top crust.
- 1/2 cup Brown Sugar, packed: Adds moisture, depth of flavor, and contributes to the signature chewiness of brownies.
- 2 large Eggs, room temperature: Eggs act as a binder, provide structure, and add richness. Room temperature eggs emulsify better with other ingredients.
- 1 tablespoon Pure Vanilla Extract: A crucial flavor enhancer that complements the cocoa and brings out the red velvet essence.
- 3/4 cup All-Purpose Gluten-Free Flour Blend: The foundation of our gluten-free brownies. Please note: Not all gluten-free flour blends are created equal. Different blends can yield varying results. I personally favor Pillsbury gluten-free flour for its consistent performance in baking.
- 1/4 teaspoon Xanthan Gum: Essential for gluten-free baking, xanthan gum acts as a binder, providing elasticity and structure that gluten typically offers. If your chosen gluten-free flour blend already contains xanthan gum, you can omit this.
- 1/2 cup Unsweetened Cocoa Powder: Gives the brownies their subtle chocolate flavor. For a more intense chocolate flavor, you can use Dutch-processed cocoa.
- 1/2 teaspoon Baking Soda: A leavening agent that helps the brownies rise slightly and reacts with the acidic components to enhance color.
- 1/2 teaspoon Salt: Balances the sweetness and deepens the overall flavor profile. Don’t skip it!
- 1 tablespoon Gluten-Free Red Food Coloring: This is what gives red velvet its iconic color. I’ve had great success with Red Velvet Bakery Emulsion for a rich, deep hue. Ensure your food coloring is certified gluten-free.
Step-by-Step Baking Guide
Follow these simple instructions to bake your perfect batch of gluten-free red velvet brownies:
- Prepare Your Oven and Pan: Preheat your oven to 350º F (175º C). Line an 8×8-inch square baking pan with parchment paper, leaving an overhang on two sides to easily lift the brownies out later. Lightly coat the bottom and sides with gluten-free non-stick cooking spray or butter. This ensures easy removal and clean cuts.
- Combine Wet Ingredients: In a large mixing bowl, thoroughly combine the melted butter, pure vanilla extract, granulated sugar, and brown sugar. Mix until the mixture is smooth and well-incorporated. This forms the flavorful base of your brownies.
- Add Eggs: Incorporate the eggs one at a time, mixing well after each addition until fully combined. This step helps create a smooth batter and contributes to the brownies’ chewy texture.
- Whisk Dry Ingredients: In a separate medium-sized bowl, whisk together the gluten-free flour blend, xanthan gum (if not already in your flour blend), cocoa powder, baking soda, and salt. Whisking ensures these ingredients are evenly distributed, which is crucial for uniform baking.
- Combine Wet and Dry: Gradually add the dry flour mixture to the wet ingredients. Mix on low speed or by hand until just combined and smooth. Be careful not to overmix, as this can lead to tough brownies.
- Add Red Food Coloring: Stir in the tablespoon of gluten-free red food coloring. Continue mixing until the color is vibrant and evenly distributed throughout the batter. This is where the magic of red velvet truly comes to life!
- Bake to Perfection: Pour the prepared brownie batter evenly into your greased 8×8-inch baking pan. Bake for 30-35 minutes, or until a toothpick inserted into the center comes out with moist crumbs, but not wet batter. The edges of the brownies will begin to pull away slightly from the sides of the pan. Remember, oven temperatures can vary, so keep a close eye on your brownies, especially during the last few minutes of baking, to avoid overbaking.
- Cool Completely: This step is critical for perfectly set brownies. Allow the brownies to cool completely in the pan on a wire rack before attempting to cut them. Warm brownies are notoriously difficult to cut neatly and can be overly gooey. Patience here will be rewarded!
- Serve and Store: Once cooled, lift the brownies out of the pan using the parchment paper overhang. Slice into 9 squares and enjoy! Store any leftovers in an airtight container at room temperature for up to 3-4 days, or refrigerate for longer freshness.
Essential Tips for Perfect Gluten-Free Brownies
Baking gluten-free doesn’t have to be daunting. With these expert tips, your red velvet brownies will turn out perfect every time.
The Importance of Gluten-Free Flour and Measuring
The choice and measurement of your gluten-free flour blend are paramount to successful gluten-free baking. As mentioned, not all gluten-free flours are created equal. Some blends are rice-based, others rely on a mix of starches and alternative flours, and their protein and starch content can vary significantly. This can affect the liquid absorption and structure of your baked goods. For this recipe, a good quality all-purpose gluten-free flour blend, like Pillsbury, works wonderfully.
Equally important is how you measure your flour. The best method for measuring gluten-free flour is the “spoon & level” technique. Here’s how to do it:
- Use a spoon to scoop the gluten-free flour from its container into your measuring cup. Do not pack it down.
- Once the measuring cup is overflowing, use the flat back of a knife or a straight edge to level off the top. This ensures you have the precise amount of flour without over-packing, which can lead to dense, dry brownies.
Friends, please do not scoop the flour directly out of the bag with your measuring cup! This compresses the flour, resulting in too much flour and a dry, crumbly end product. Precision in measuring is key for the ideal brownie texture.
Achieving That Vibrant Red Hue
The “red” in red velvet is iconic. While some recipes suggest that the reaction between cocoa and acid creates a slight reddish tint, modern red velvet relies heavily on good quality red food coloring. For the best results and a truly vibrant color, a gel-based food coloring or a bakery emulsion (like Red Velvet Bakery Emulsion) is recommended over liquid food coloring. These concentrated options deliver a rich, deep red without adding excessive liquid to your batter. Always ensure your chosen food coloring is gluten-free if you have sensitivities.
Don’t Overbake!
The difference between a perfectly chewy, moist brownie and a dry, crumbly one often comes down to baking time. Brownies continue to cook slightly after they are removed from the oven (this is called carry-over baking). For a truly fudgy texture, you want to take your brownies out when a toothpick inserted into the center comes out with moist crumbs attached, but no wet batter. The edges should be set, but the center might still look a little soft. Trust the process, and resist the urge to bake them until the toothpick comes out perfectly clean.
Dairy-Free Baking for All to Enjoy
Living dairy-free doesn’t mean you have to miss out on decadent treats. This red velvet brownie recipe is easily adaptable to be completely dairy-free, ensuring that everyone, including those with lactose intolerance or dairy allergies, can savor every bite. My family, including my husband and youngest son, also follows a dairy-free diet, so I understand the importance of delicious alternatives.
For the dairy-free version of this recipe, I highly recommend using Smart Balance butter or Earth Balance butter sticks. These plant-based butter alternatives perform exceptionally well in baking, providing the same richness and texture as traditional butter without any dairy. Other excellent dairy-free alternatives I frequently bake with include:
- Almond milk, cashew milk, or coconut milk: These are great liquid substitutes in recipes.
- Coconut oil: A versatile fat that can be used in place of butter in many recipes, adding a subtle coconut flavor.
With these simple swaps, you can confidently create a batch of gluten-free *and* dairy-free red velvet brownies that are indistinguishable from their traditional counterparts. Everyone deserves a taste of this glorious dessert!
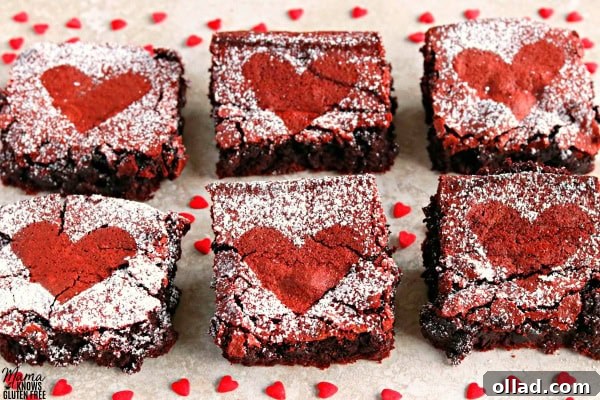
Serving and Storage Suggestions
These gluten-free red velvet brownies are delightful on their own, but here are some suggestions to elevate your experience:
- Plain Perfection: Enjoy them as is, allowing their rich, chewy texture and subtle red velvet flavor to shine.
- Frosted Fun: For an extra layer of decadence, top them with a classic cream cheese frosting. Ensure your frosting is also gluten-free and dairy-free if needed.
- A La Mode: Serve a warm brownie with a scoop of vanilla bean ice cream (dairy-free if preferred) for an irresistible dessert experience.
- Coffee Companion: Pair a brownie with your favorite coffee or tea for a comforting afternoon treat.
To keep your brownies fresh, store them in an airtight container at room temperature for up to 3-4 days. If you’ve added frosting, refrigeration is recommended. For longer storage, you can freeze individual brownies wrapped tightly in plastic wrap and then placed in a freezer-safe bag for up to 2-3 months. Thaw at room temperature or gently warm in the microwave for a quick indulgence.
Frequently Asked Questions (FAQs) About Gluten-Free Red Velvet Brownies
Here are answers to some common questions you might have about making these delicious gluten-free red velvet brownies:
- Can I use a different gluten-free flour blend?
- While I recommend Pillsbury gluten-free flour for consistent results, you can certainly try other all-purpose gluten-free blends. Just be aware that different blends have varying compositions, which might slightly alter the texture and moisture content of your brownies. Some blends may require a tiny adjustment in liquid (e.g., adding a tablespoon more milk if the batter seems too thick).
- Is the red food coloring absolutely necessary?
- For the iconic “red velvet” appearance, red food coloring is essential. Without it, you’ll still have a delicious chocolatey brownie with a hint of red velvet flavor, but it won’t have the striking visual appeal. If you prefer natural coloring, you could try beet powder, but the vibrant red might not be as intense.
- Can I add chocolate chips to these brownies?
- Absolutely! For an extra chocolate boost, fold in about 1/2 to 3/4 cup of gluten-free chocolate chips (dairy-free if needed) into the batter before pouring it into the pan. This will make them even more indulgent!
- How do I know when the brownies are done baking?
- The best way is the toothpick test. Insert a toothpick into the center of the brownies. If it comes out with moist crumbs clinging to it, they are perfect. If it comes out wet with batter, they need more time. If it comes out completely clean, they might be slightly overbaked, but still delicious.
- Why is cooling the brownies completely so important?
- Cooling allows the brownies to finish setting and firm up. If you cut them while warm, they will be very gooey, fall apart easily, and be difficult to portion neatly. Patience will give you perfectly structured, chewy squares.
- What if my brownies are too crumbly?
- Crumbliness can often be a sign of too much flour or overbaking. Ensure you’re using the “spoon & level” method for measuring flour, and watch your oven carefully. Also, make sure your gluten-free flour blend includes xanthan gum, or that you’ve added it separately, as it helps with binding.
More Gluten-Free Dessert Inspirations Perfect for Any Occasion!
If you loved these red velvet brownies, you’re in for a treat! Explore more delightful gluten-free recipes that are perfect for celebrations, holidays, or simply satisfying your sweet tooth:
- Chocolate Lasagna {Gluten-Free}: Layers of rich chocolate and creamy goodness.
- Almond Flour Brownies: A nutty, rich alternative to our classic brownies.
- Gluten-Free Red Velvet Chocolate Chip Cookies: Another way to enjoy the classic red velvet flavor.
- Easy Gluten-Free Chocolate Cake: A moist and decadent cake that’s surprisingly simple to make.
- Gluten-Free Chocolate Kiss Cookies: A festive and fun cookie, perfect for sharing.
- See all our Gluten-Free Valentine’s Day Desserts for more romantic treats.
Join our community! You can FOLLOW US on Facebook, Instagram, or Pinterest to stay updated with new recipes and baking tips!
★ If you made this recipe, please consider leaving a star rating and comment below! Your feedback helps other bakers! ★
Gluten-Free Red Velvet Brownies
Email Recipe
Print Recipe
Ingredients
- 1/2 cup butter, melted (dairy-free use Smart Balance Butter)
- 3/4 cup granulated sugar
- 1/2 cup brown sugar, packed
- 2 eggs, room temperature
- 1 tablespoon pure vanilla extract
- 3/4 cup all-purpose gluten-free flour (I like Pillsbury gluten-free. Not all gluten-free flours are created equal. You may experience different baking results depending on the gluten-free flour blend you choose.)
- 1/4 teaspoon xanthan gum (leave out if your flour already has it)
- 1/2 cup cocoa powder
- 1/2 teaspoon baking soda
- 1/2 teaspoon salt
- 1 tablespoon gluten-free red food coloring (I used Red Velvet Bakery Emulsion)
Instructions
- Preheat oven to 350º F.
- Spray the 8×8 square baking pan with gluten-free non-stick cooking spray or line the baking pan with parchment paper and coat the bottom and sides with gluten-free nonstick cooking spray or butter.
- In a large bowl, add melted butter, pure vanilla extract, granulated sugar and brown sugar and mix until fully combined.
- Add in eggs one at a time and mix until fully combined.
- In a medium-sized bowl combine gluten-free flour, xanthan gum (leave out if your flour already has it), cocoa powder, baking soda and salt and whisk together.
- Slowly add the gluten-free flour mixture to the wet ingredients and mix until fully combined and smooth.
- Add the tablespoon of the red food coloring and mixed until fully combined.
- Pour the brownie batter into the greased 8×8 sized baking pan.
- Bake for 30-35 minutes, or until a toothpick inserted into the center comes out just barely clean. The sides of the brownies will start to pull away from the pan. Please watch your brownies because all ovens are different.
- Allow the brownies to completely cool before cutting them. Enjoy!
- Store leftovers in an airtight container.
Notes
- I like Pillsbury gluten-free. Not all gluten-free flours are created equal. You may experience different baking results depending on the gluten-free flour blend you choose.
- The best way to measure gluten-free flour is the “spoon & level” method. Using a spoon, scoop the flour into the measuring cup. After you’ve spooned the flour into the measuring cup, use the back of a knife to level off the top of the measuring cup.
- For the dairy-free option I used Smart Balance butter.
- Store in an air-tight container.
- Mama says, “Please check all of your labels!”
Nutrition
Calories: 264kcal
Carbohydrates: 38g
Protein: 3g
Fat: 12g
Saturated Fat: 7g
Cholesterol: 63mg
Sodium: 301mg
Potassium: 102mg
Fiber: 2g
Sugar: 29g
Vitamin A: 370IU
Calcium: 31mg
Iron: 1.3mg
Nutrition information is automatically calculated, so should only be used as an approximation.
Additional Info
Tried this recipe?
Mention @mamaknowsglutenfree or tag #mamaknowsglutenfree!