
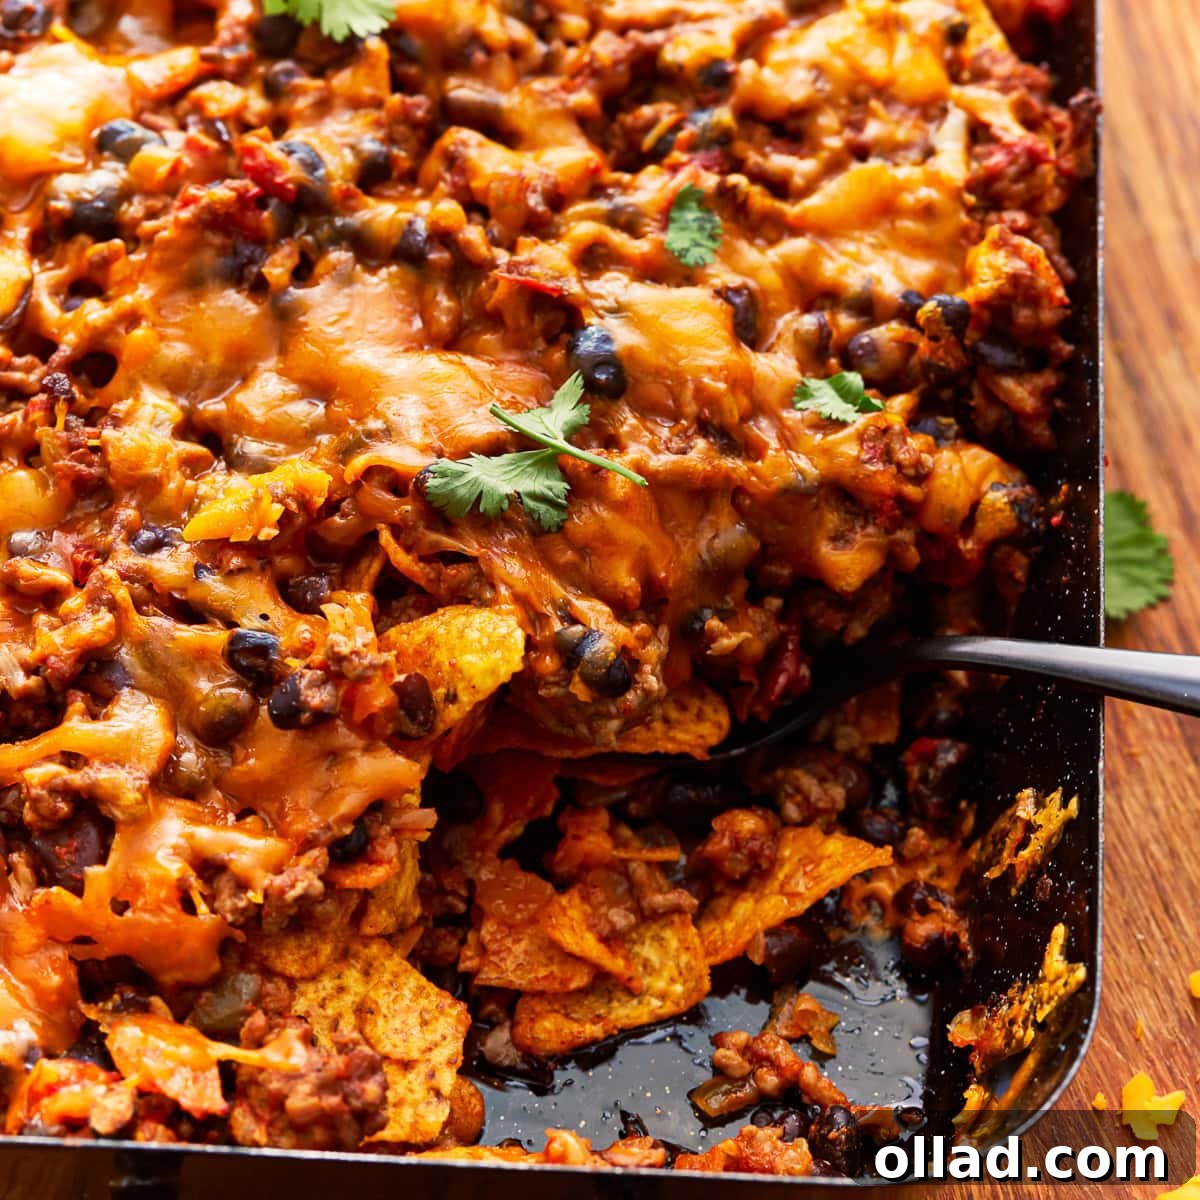
Tacos are a beloved classic, but sometimes the craving hits when you’re looking for something a little less hands-on, more comforting, and perfect for feeding a hungry crowd. That’s where the Walking Taco Casserole steps in. This incredible dish takes all the vibrant, zesty flavors and delightful textures of a traditional walking taco – the kind you enjoy on the go from a chip bag – and transforms them into an effortlessly assembled, naturally gluten-free casserole. It’s a game-changer for busy weeknights, casual gatherings, or any time you need a hearty, flavorful meal that practically makes itself. Get ready to experience your favorite taco flavors in a fun, family-friendly bake!
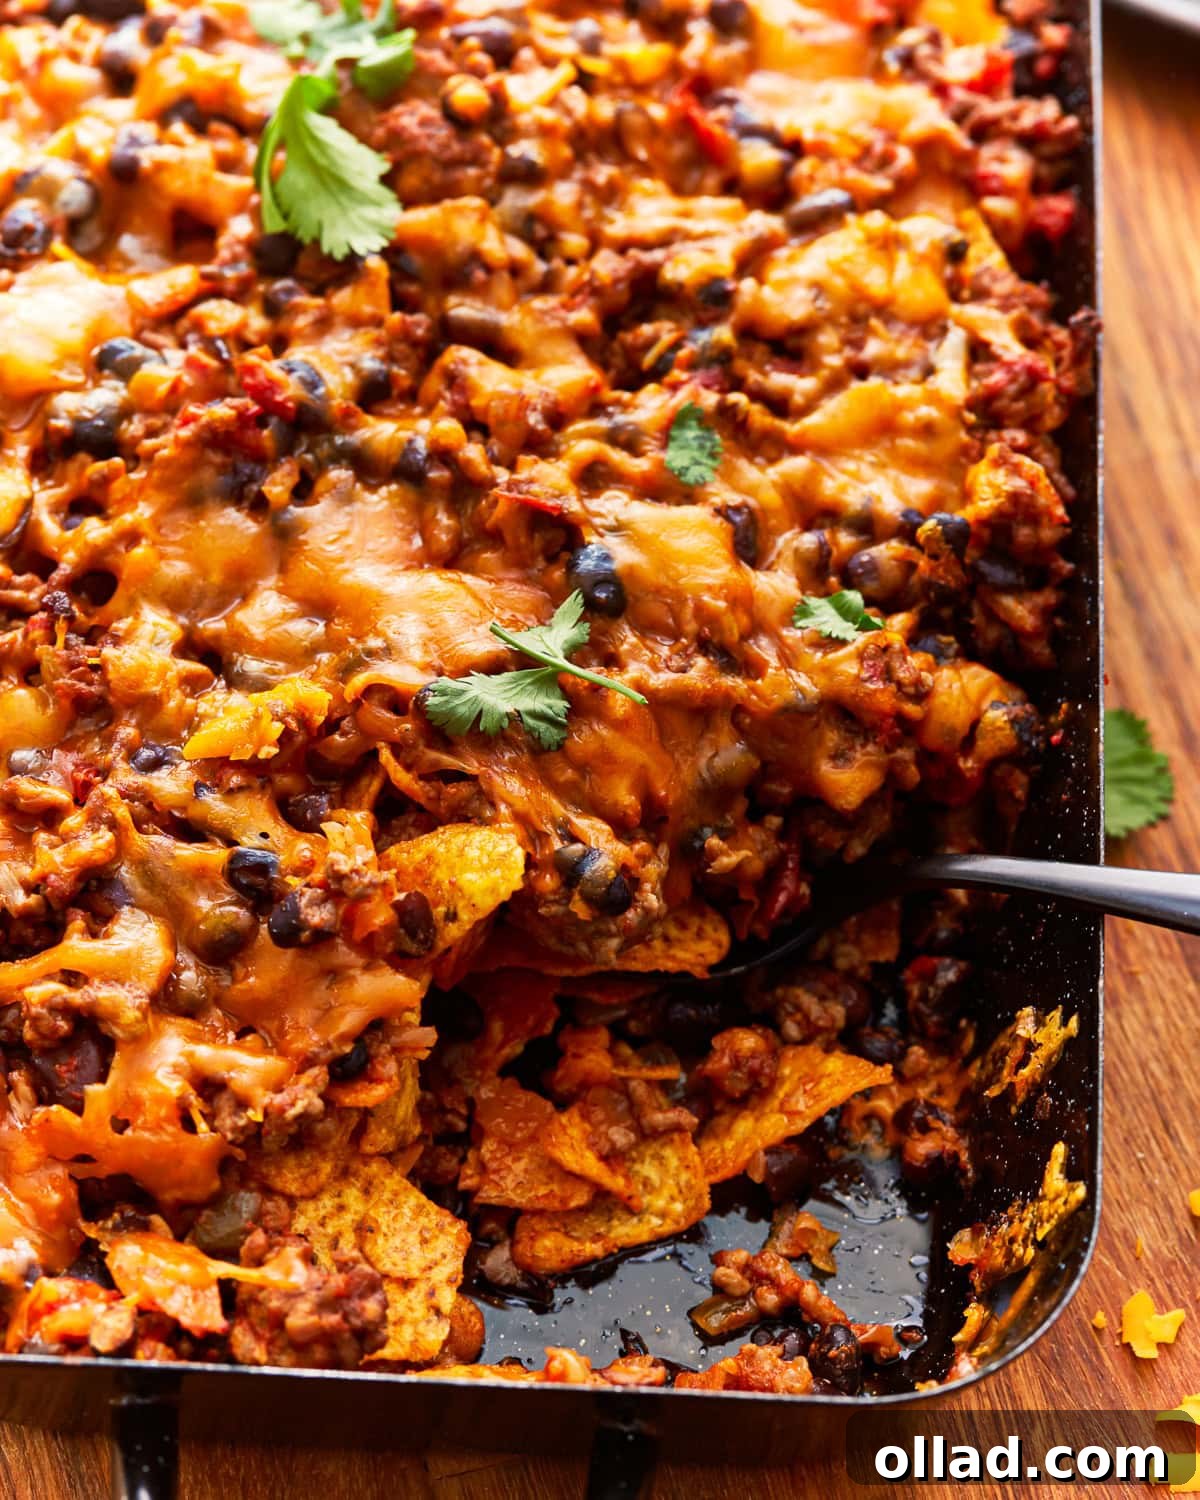
The Ultimate Walking Taco Casserole: A Family Favorite
While I’m always ready for a delicious taco, I’m not always in the mood for “walking” with one! This Walking Taco Casserole brings the irresistible taste of your favorite on-the-go snack right to your dinner table, offering comfort and convenience in every bite. It’s an ideal solution for those who love the bold flavors of Mexican cuisine but prefer a fuss-free, hearty meal that satisfies everyone. What makes this recipe even better is its inherent adaptability. It’s naturally gluten-free (just be sure to carefully check your taco seasoning and tortilla chip labels!), egg-free, and can easily be tailored to be dairy-free, ensuring it fits a variety of dietary needs without sacrificing flavor.
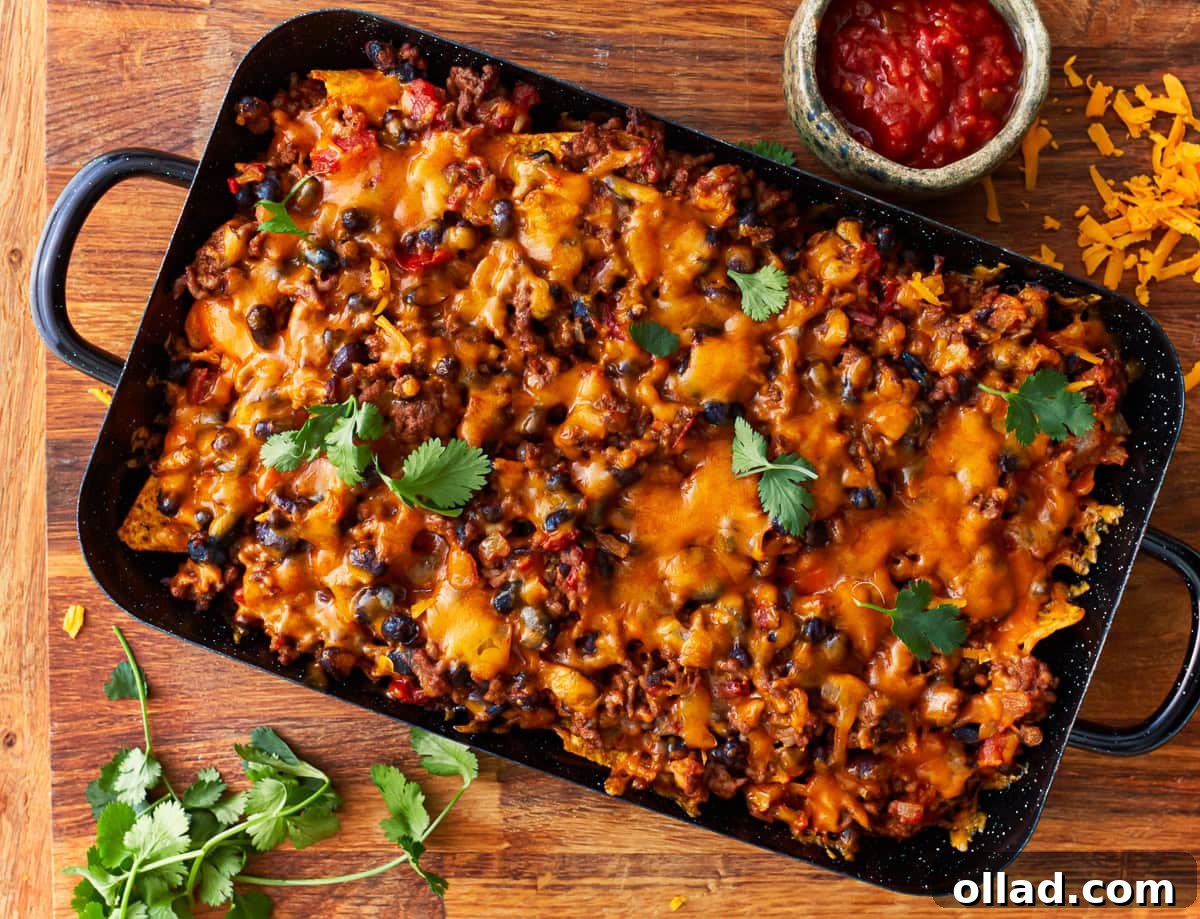
Imagine layers of seasoned ground beef, tender black beans, vibrant salsa, and crunchy corn chips, all baked under a blanket of melty cheese. This casserole is not just a meal; it’s an experience. It delivers a perfect symphony of textures and tastes – savory, slightly spicy, crunchy, and creamy – making it an instant hit with both kids and adults. It’s the kind of dish that disappears quickly from the baking dish, leaving happy, full tummies all around. Whether you’re hosting a casual get-together, need a potluck standout, or simply want an easy weeknight dinner, this Walking Taco Casserole is your go-to recipe.
Essential Ingredients for Your Walking Taco Casserole
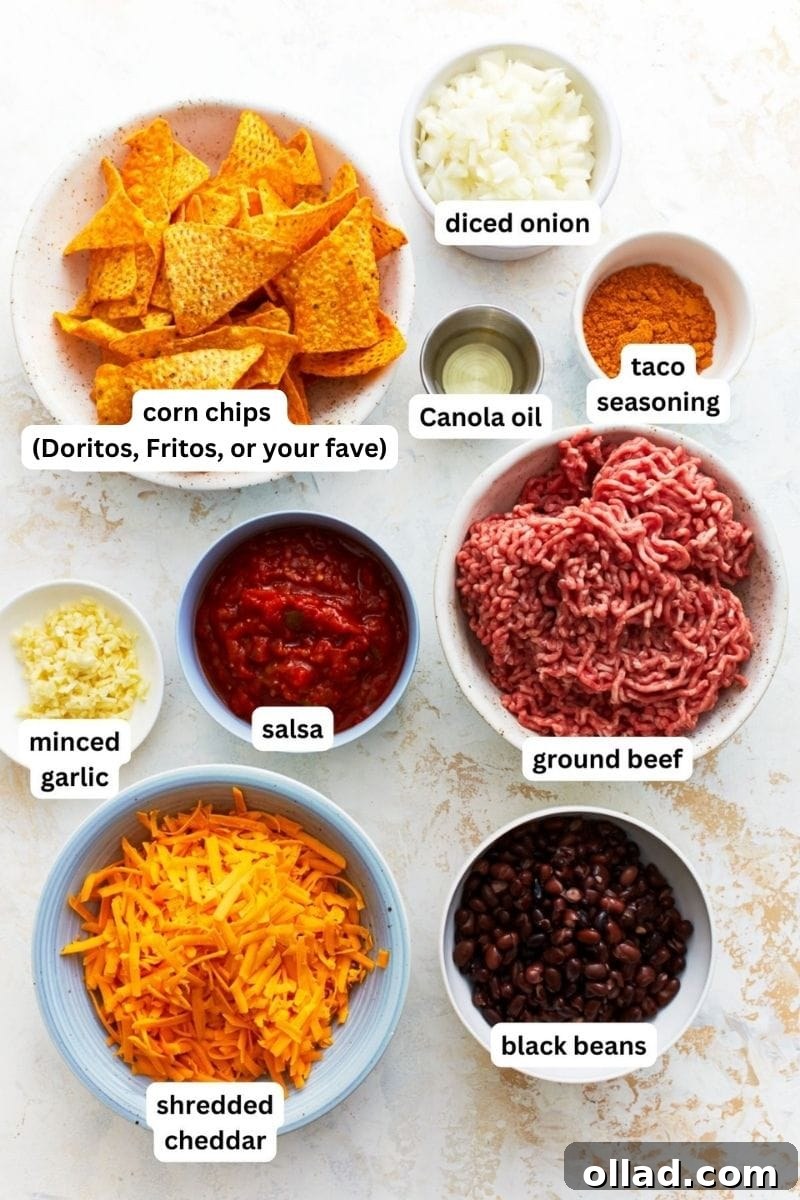
Crafting the perfect Walking Taco Casserole starts with a selection of simple yet flavorful ingredients. Each component plays a vital role in building the layered taste and texture that makes this dish so irresistible. Here’s a breakdown of what you’ll need and why:
- Canola Oil: A neutral oil perfect for sautéing, it helps cook the aromatics without imparting its own flavor, creating a perfect foundation for the meat mixture. Vegetable oil or olive oil can also be used as alternatives.
- Onion and Garlic: These aromatic powerhouses form the savory base of the casserole. Diced onion and minced garlic infuse the ground beef with incredible depth of flavor. Always opt for fresh onion and garlic for the best taste, but in a pinch, a teaspoon of garlic powder and a tablespoon of onion powder can be substituted, though fresh is always preferred.
- Ground Beef: We recommend using lean ground beef, specifically 90% lean, to minimize excess fat. Leaner meat means less draining and a less greasy final product. If you opt for ground beef with a higher fat content, ensure you thoroughly drain off any accumulated grease after browning to prevent a soggy casserole. For a lighter version, ground turkey or chicken can be excellent substitutes, or even plant-based crumbles for a vegetarian option.
- Taco Seasoning: This is where the classic Mexican flavor truly shines! A good quality taco seasoning blend provides that unmistakable zesty, savory, and slightly spicy kick. Remember to check labels carefully to ensure your chosen seasoning is gluten-free, as some brands may contain wheat-based fillers. You can also make your own blend from common pantry spices like chili powder, cumin, paprika, oregano, and garlic powder for a homemade touch.
- Black Beans: Canned black beans are an effortless way to add bulk, fiber, and a wonderfully creamy texture to the casserole. Make sure to drain and rinse them thoroughly before adding to remove excess sodium and any canning liquid. Pinto beans or kidney beans would also work well if you prefer.
- Salsa: Your favorite store-bought salsa adds essential moisture, tang, and a burst of fresh flavor to the beef and bean mixture. Choose a mild, medium, or hot salsa based on your family’s preference. This ingredient binds everything together and keeps the casserole from drying out during baking. A chunky salsa also adds nice texture.
- Corn Chips: These are the star of the “walking taco” concept, providing crucial crunchy layers. Classic Fritos are a popular choice, but plain tortilla chips also work beautifully. For a flavorful twist, try the toasted corn flavor of Doritos – just double-check that they are gluten-free if needed, as some Doritos flavors contain gluten. Slightly stale chips actually work well here as they tend to hold their structure better during baking.
- Cheddar Cheese: Shredded cheddar cheese melts beautifully to create a gooey, irresistible topping. Its sharp, savory flavor complements the taco mixture perfectly. For those who are dairy-free, simply swap in your favorite dairy-free shredded cheese blend. Other great cheese options include Monterey Jack, Pepper Jack for a bit of heat, or a Mexican blend for a diverse flavor profile.
Easy Step-by-Step Instructions to Assemble Your Casserole
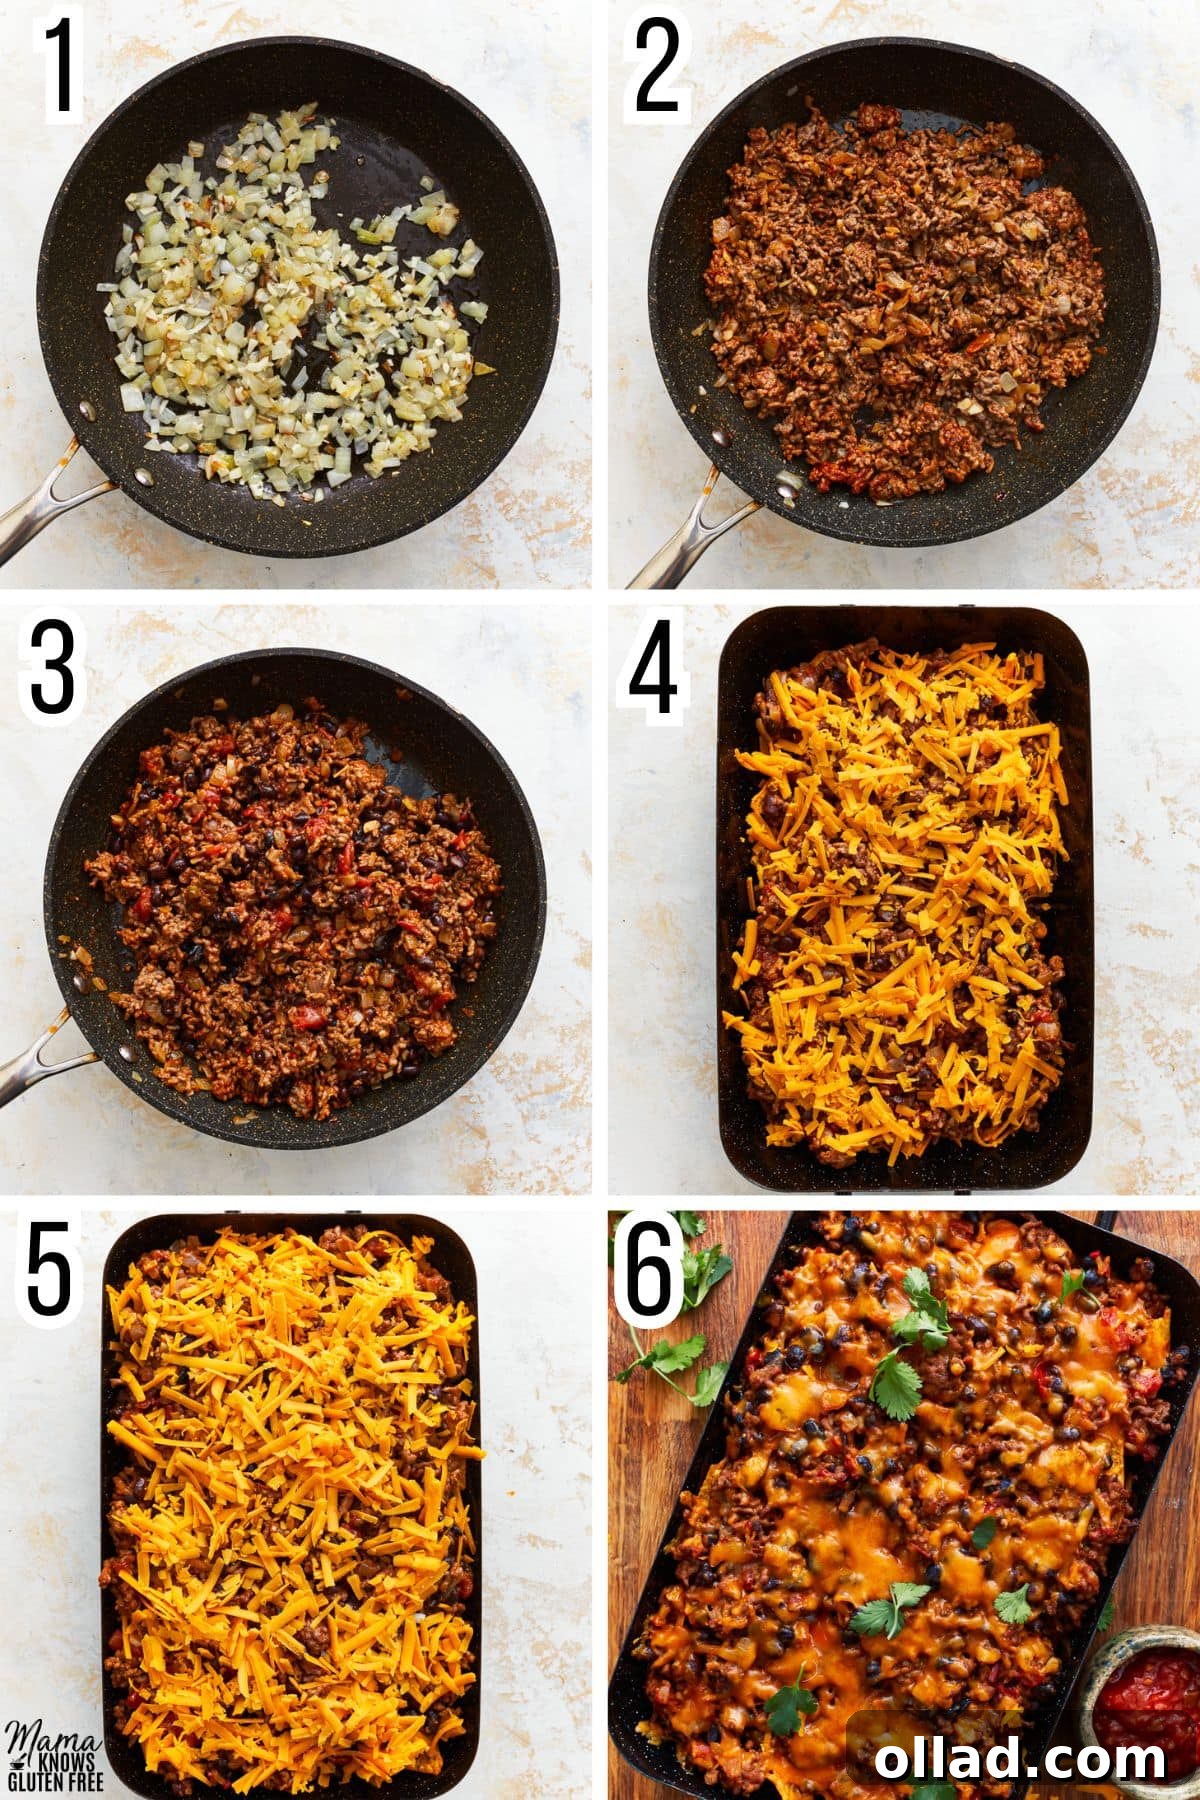
Creating this Walking Taco Casserole is incredibly straightforward, making it perfect for even novice cooks. Follow these simple steps for a delicious meal:
- Prepare Your Oven: Begin by preheating your oven to a steady 350°F (177°C). This ensures the oven is at the correct temperature when you place the casserole inside, allowing for even cooking and perfectly melted cheese.
- Sauté Aromatics: In a large, sturdy skillet, heat the canola oil over medium heat. Add the diced onion and sauté it gently until it softens and becomes translucent, which usually takes about 5 minutes. Next, add the minced garlic and continue cooking for just one more minute. The garlic should be fragrant but not browned, as burnt garlic can taste bitter. This step builds the aromatic foundation of your meat mixture.
- Brown the Beef: Add the ground beef to the skillet with the softened onions and garlic. Break up the beef with a spoon or spatula and cook it until it’s thoroughly browned, ensuring no pink remains. If you used a higher-fat ground beef, carefully drain off any excess grease from the skillet before proceeding. Sprinkle the taco seasoning evenly over the browned beef and stir it well, ensuring every piece of meat is coated with that delicious spice blend.
- Combine with Beans and Salsa: Stir in the drained and rinsed black beans and your favorite salsa into the seasoned ground beef mixture. Mix everything until it’s well combined and heated through. Allow it to simmer gently for an additional 2-3 minutes, letting the flavors meld together beautifully. This creates a rich, savory filling for your casserole.
- Layer the Casserole: Lightly grease a baking dish (a 9×13 inch dish works perfectly for this recipe). Spread half of your chosen corn chips evenly across the bottom of the dish, forming the first crunchy layer. Spoon half of the beef and bean mixture over the chips, spreading it out evenly. Then, sprinkle half of the shredded cheddar cheese over the meat layer. Repeat this layering process: add the remaining corn chips, followed by the rest of the beef and bean mixture, and finally, top with the remaining shredded cheddar cheese. This creates a visually appealing and texturally satisfying casserole.
- Bake to Perfection: Place the layered casserole in your preheated oven and bake for 15-20 minutes. The casserole is ready when the cheese is completely melted, bubbly, and slightly golden on top, and the chips are slightly softened but still retain some crunch. Be careful not to overbake, as this can lead to soggy chips.
- Serve and Enjoy: Once out of the oven, let the casserole rest for a few minutes before serving. This allows the layers to set slightly. Then, generously sprinkle your favorite taco toppings over the warm casserole. Slice and serve this comforting, flavor-packed dish to your eager family and friends!
Expert Tips for a Flawless Walking Taco Casserole
Achieving casserole perfection is easy with a few simple tips. These suggestions will help ensure your Walking Taco Casserole turns out delicious, with perfect textures and maximum flavor every time:
- Avoid Overcrowding the Pan When Browning Beef: When you’re browning the ground beef, resist the urge to pack too much meat into the skillet at once. Overcrowding can lower the pan’s temperature, causing the meat to steam rather than sear and brown. This results in less flavorful beef. If necessary, cook the ground beef in two batches to ensure optimal browning and a rich, savory taste. Proper browning is key to developing deep flavor.
- Embrace Stale Chips: This recipe is surprisingly forgiving and actually benefits from slightly stale corn chips! Chips that aren’t perfectly fresh tend to hold their shape and crunch better during baking, preventing them from becoming too mushy. If your chips are super fresh, don’t worry, they’ll still be delicious, but a day-old bag can be an unexpected advantage.
- Watch Your Baking Time: The goal is to bake the casserole just long enough for the cheese to melt into a bubbly, golden blanket and for the chips to slightly soften while still retaining some textural integrity. Overbaking can lead to overly soggy chips, diminishing that delightful crunch that defines a walking taco. Keep an eye on it after the 15-minute mark.
- Consider Your Baking Dish Size: A standard 9×13 inch baking dish is ideal for this recipe, allowing for even layers and proper baking. If your dish is too small, it might overflow; if it’s too large, the layers will be too thin, potentially drying out the casserole.
- Customize the Spice Level: Adjust the amount of taco seasoning to your family’s preference. For extra heat, add a pinch of cayenne pepper, a dash of hot sauce to the beef mixture, or top with sliced jalapeños (fresh or pickled). For a milder flavor, use less seasoning or opt for a mild taco blend.
- Boost with Veggies: Feel free to sneak in some extra vegetables! Diced bell peppers (any color), corn kernels, or even finely diced zucchini can be added to the beef mixture along with the onions and garlic for added nutrition and flavor.
- Prep Ahead for Convenience: The ground beef and bean mixture can be prepared a day or two in advance and stored in an airtight container in the refrigerator. When you’re ready to bake, simply assemble the casserole with fresh chips and cheese, then bake as directed. This makes weeknight dinners even faster!
Understanding the Charm: Why “Walking Taco”?
The name “Walking Taco” itself evokes a sense of casual fun and portability, perfectly encapsulating the spirit of this delightful dish. Traditionally, a walking taco is a brilliant concept born from convenience: it consists of a single-serving bag of corn chips (like Fritos or Doritos) that’s opened, crushed slightly, and then filled with warm taco meat, shredded cheese, and all your favorite taco toppings. The genius lies in its design – it’s a self-contained meal, eaten directly from the bag with a fork, making it incredibly easy to “walk” around with while you enjoy it. It’s a staple at fairs, sporting events, and casual gatherings where a plate and cutlery might be impractical.
Our casserole takes this ingenious concept and elevates it to a comforting, family-style meal. Instead of individual bags, we layer the same beloved components – seasoned ground beef, beans, salsa, chips, and cheese – into a large baking dish. This transformation allows you to enjoy the same vibrant, zesty flavors and satisfying textures of a walking taco from the comfort of your home, without the individual assembly. It feeds a crowd effortlessly, makes for an easy clean-up, and brings that same nostalgic, festive vibe to your dinner table. It’s the ultimate “un-walking” walking taco, designed for cozy enjoyment rather than on-the-go snacking.
Cheese Choices: Can I Use a Different Kind of Cheese?
Absolutely! While shredded cheddar cheese offers a classic, comforting flavor and fantastic melt, this casserole is highly versatile, and you can certainly experiment with other types of cheese to suit your preference or to add a different dimension of flavor. Mexican-inspired dishes often pair beautifully with a variety of cheeses, so don’t hesitate to get creative.
Here are some excellent alternatives that would work wonderfully in this Walking Taco Casserole:
- Monterey Jack: Known for its mild flavor and excellent melting properties, Monterey Jack will give you a super gooey, creamy cheese layer. It’s a fantastic choice if you prefer a less sharp cheese than cheddar.
- Pepper Jack: If you enjoy a bit of a kick, Pepper Jack cheese is a superb option. Infused with spicy jalapeños, it will add a subtle but noticeable warmth to your casserole, complementing the taco seasoning perfectly.
- Mexican Blend: Many grocery stores offer pre-shredded “Mexican Blend” cheeses, which typically include a combination of Monterey Jack, cheddar, asadero, and/or queso blanco. These blends are specifically designed for dishes like tacos and casseroles, offering a balanced flavor and superb melt.
- Colby Jack: A delightful combination of Colby and Monterey Jack cheeses, Colby Jack offers a mild, buttery flavor and a semi-firm texture that melts beautifully.
- Asadero or Queso Fresco (crumbled): While Asadero melts similarly to Monterey Jack, Queso Fresco will soften but won’t fully melt, offering a different texture and a fresh, tangy flavor if crumbled on top after baking.
No matter which cheese you choose, ensure it’s shredded for the best melt and even distribution throughout the casserole. For dairy-free versions, use a high-quality dairy-free shredded cheese that melts well.
Reheating Your Walking Taco Casserole
One of the many joys of a good casserole is its potential for delicious leftovers. Reheating your Walking Taco Casserole is simple, whether you’re warming up the whole dish or just a single serving. The key is to reheat it gently to prevent drying out and to maintain the best possible texture.
For Oven Reheating (Recommended for best texture):
- Preheat your oven to 350°F (177°C). This moderate temperature helps to warm the casserole through without overcooking or burning the chips.
- If your casserole is not already in an oven-safe dish, transfer the desired portion to one.
- Cover the dish loosely with aluminum foil. This helps to trap moisture, preventing the casserole from drying out, and ensures the cheese gets warm and melty again without becoming tough.
- Bake for 10-20 minutes, or until the casserole is heated through and the cheese is bubbly again. The exact time will depend on the size of the portion you are reheating.
For Microwave Reheating (Best for individual portions):
- Transfer an individual serving of the casserole to a microwave-safe plate.
- Cover the plate with a microwave-safe lid or a damp paper towel. This helps to retain moisture and prevent splattering.
- Heat on high for 1-2 minutes, or until hot. You may need to stir the meat and bean mixture halfway through to ensure even heating. Keep in mind that microwave reheating might make the chips a bit softer than oven reheating.
Storage & Freezing Instructions for Meal Prep
This Walking Taco Casserole makes fantastic leftovers, and it’s also a great candidate for meal prepping. Proper storage ensures you can enjoy its deliciousness for days to come.
Refrigerator Storage:
Allow the Walking Taco Casserole to cool completely to room temperature before storing. This is crucial to prevent condensation, which can lead to sogginess and bacterial growth. Once cooled, transfer the casserole to an airtight container. Alternatively, if keeping it in the baking dish, cover it tightly with plastic wrap and then with aluminum foil. Store it in the refrigerator for up to 3-4 days. This makes it perfect for delicious lunches or quick dinners throughout the week.
Freezing Instructions:
For longer storage, this casserole freezes beautifully. Again, ensure the casserole has cooled completely. You can freeze it as a whole in a freezer-safe baking dish (if it’s suitable for both baking and freezing) or divide it into individual portions for convenience. Transfer the casserole or portions to airtight, freezer-safe containers or heavy-duty freezer bags. If freezing in a baking dish, cover it tightly with a layer of plastic wrap directly on the surface of the casserole, followed by a layer of aluminum foil to prevent freezer burn.
The casserole can be stored in the freezer for up to 2 months. When you’re ready to enjoy it, thaw it overnight in the refrigerator. Then, reheat using the oven instructions above, adding a few extra minutes to ensure it’s heated through. Freezing and reheating are excellent ways to enjoy this comforting meal with minimal effort later on!
Serving Suggestions and Topping Ideas
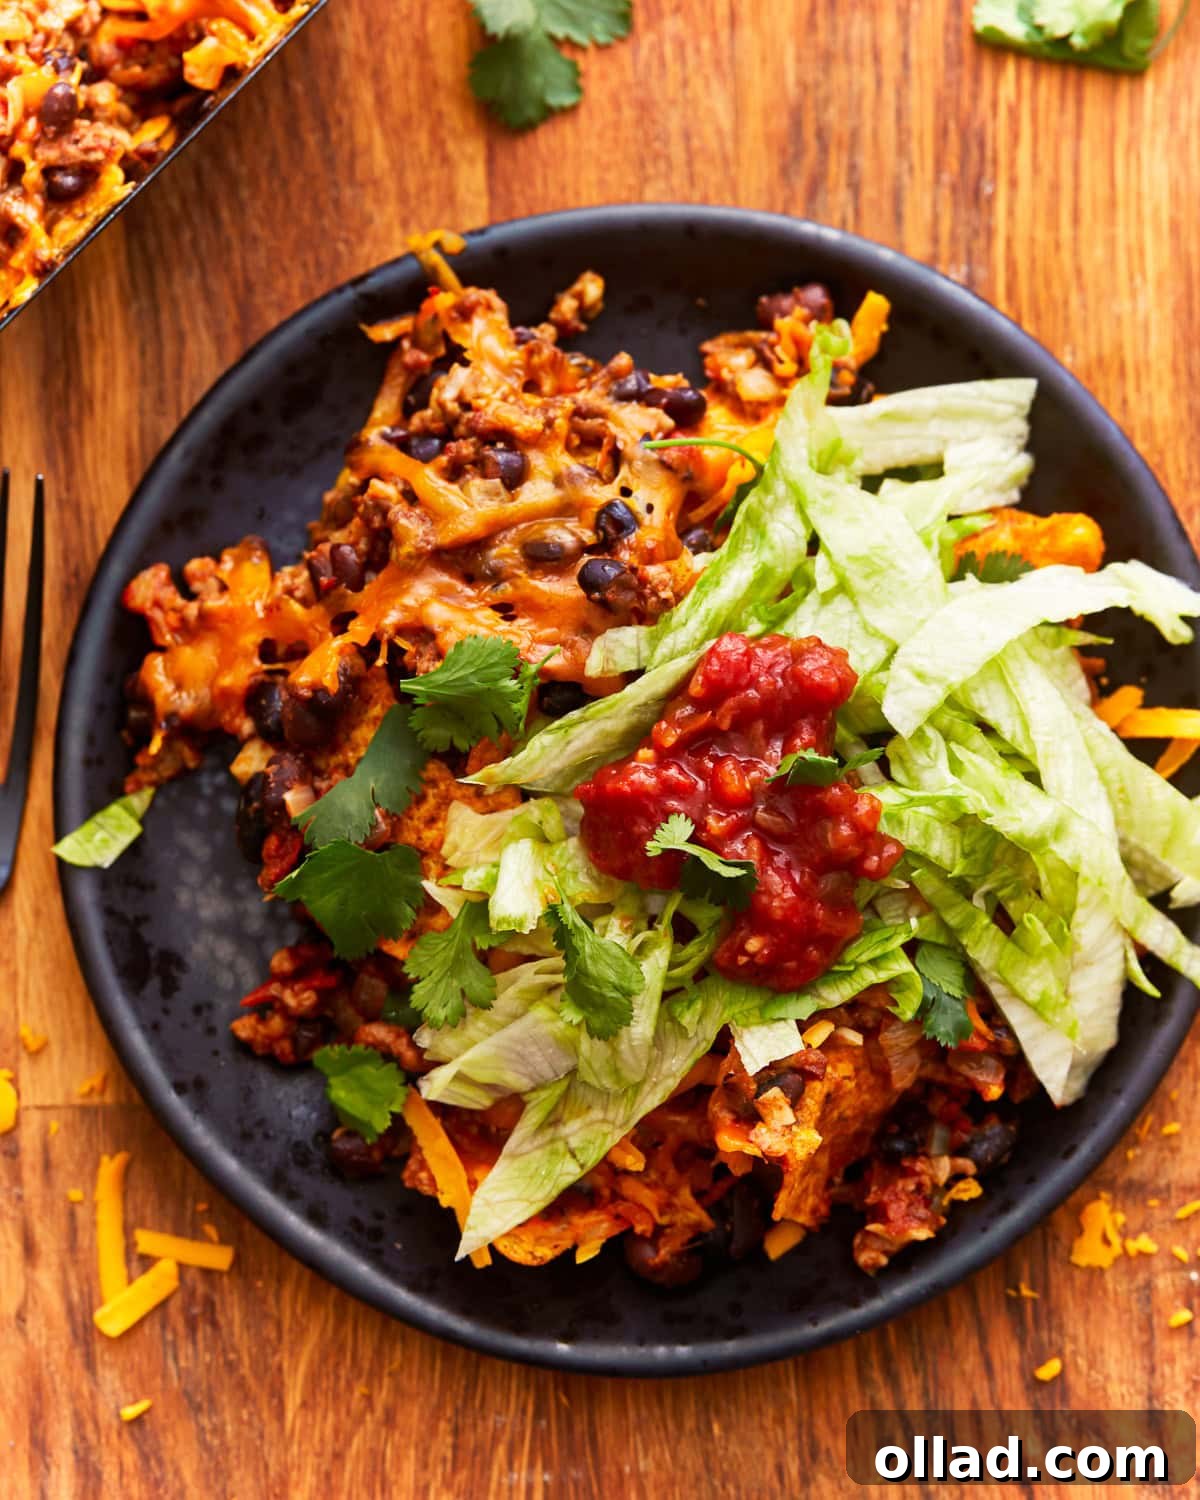
The beauty of a Walking Taco Casserole lies not just in its ease of preparation but also in its incredible versatility when it comes to serving. While delicious on its own, it truly shines when adorned with a variety of fresh and flavorful toppings, allowing everyone to customize their plate to perfection. Think of your favorite taco bar, but in casserole form!
Classic Topping Ideas:
- Shredded Lettuce: Adds a crisp, fresh contrast to the warm, savory casserole.
- Diced Tomatoes: Provides a burst of juicy freshness and a touch of acidity.
- Fresh Cilantro: Chopped fresh cilantro offers a bright, herbaceous note that perfectly complements Mexican flavors.
- Sour Cream or Greek Yogurt: A dollop of cool sour cream or a healthier Greek yogurt adds a creamy tang that balances the rich flavors.
- Extra Salsa: Keep a bowl of your favorite salsa on the side for those who want an extra boost of flavor and moisture.
- Sliced Jalapeños: For a spicy kick, add fresh or pickled jalapeño slices.
- Avocado or Guacamole: Creamy avocado slices or a scoop of homemade guacamole add healthy fats and a luxurious texture.
- Black Olives: Sliced black olives offer a mild, briny taste that many enjoy.
Pairing with Side Dishes:
While the casserole is a complete meal in itself, you can round it out with some simple side dishes:
- Mexican Rice or Cilantro Lime Rice: A classic pairing that makes the meal even heartier.
- Simple Green Salad: A light, refreshing salad with a zesty vinaigrette can cut through the richness of the casserole.
- Refried Beans: For an extra dose of bean-y goodness.
- Corn Salad or Elote (Mexican Street Corn): Adds a sweet and smoky element.
Set out a selection of these toppings and let your family and guests build their perfect plate. The vibrant colors and diverse textures of the toppings not only enhance the flavor but also make for a fun and interactive dining experience!
More Delicious Gluten-Free Dinner Recipes to Explore!
If you loved the ease and flavor of this Walking Taco Casserole and are looking for more fantastic gluten-free dinner ideas that satisfy and impress, you’ve come to the right place! We believe that eating gluten-free should never mean compromising on taste or variety. Here are some of our other cherished recipes designed to bring joy and flavor to your family’s table:
- Gluten-Free Meatballs: Tender, savory, and perfect for pairing with your favorite gluten-free pasta or serving as appetizers.
- Gluten-Free Lasagna: Layers of rich meat sauce, creamy ricotta, and perfectly cooked gluten-free lasagna noodles create a comforting classic everyone will adore.
- Gluten-Free Meatloaf: A timeless comfort food, our meatloaf is juicy, flavorful, and incredibly satisfying.
- Gluten-Free Fried Chicken: Crispy on the outside, tender and juicy on the inside – this recipe proves that gluten-free fried chicken can be just as delicious as the traditional version.
- Gluten-Free Empanadas: Delightful savory pastries with a delicious filling, perfect for a unique dinner or impressive appetizer.
Each of these recipes has been carefully crafted to ensure they are not only gluten-free but also bursting with flavor and easy to prepare. We’re committed to helping you discover a world of delicious possibilities, proving that dietary restrictions don’t have to limit your culinary adventures. Happy cooking!
Walking Taco Casserole Recipe
Ingredients
- 2 tablespoons canola oil
- 1 large onion, diced
- 3 cloves garlic, minced
- 1 pound 90% lean ground beef
- 1 1-ounce packet taco seasoning
- 1 15-ounce can black beans, drained and rinsed
- 1 cup salsa
- 1 9.25-ounce bag corn chips, such as Doritos, plain tortilla chips, or Fritos
- 2 cups shredded cheddar cheese
Optional Toppings
- Shredded lettuce
- Diced tomatoes
- Jalapeños
- Cilantro
- Sour Cream
- Salsa
Instructions
-
Preheat your oven to 350°F (177°C).
-
In a large skillet, heat the canola oil over medium heat. Sauté the diced onion until softened, about 5 minutes. Add the minced garlic and continue cooking for an additional minute, until fragrant.
-
Add the ground beef to the skillet and cook until browned. Sprinkle the taco seasoning over the browned beef and stir well.
-
Stir in the black beans and salsa until well combined. Cook for an additional 2-3 minutes.
-
Layer half of the corn chips on the bottom of a greased baking dish. Top with half of the beef and bean mixture, then sprinkle half of the shredded cheddar cheese over it. Repeat with another layer of corn chips, beef and bean mixture, and shredded cheddar cheese.
-
Bake in the preheated oven for 15-20 minutes, or until the cheese is melted and bubbly.
-
Once out of the oven, sprinkle your favorite taco toppings over the casserole. Serve and enjoy!
Notes
- Don’t overcrowd the pan when browning the ground beef. This can steam the meat instead of searing it, resulting in less flavor. You may need to cook the beef in batches for optimal browning.
- This is a great recipe to use up stale chips since slightly stale chips hold their shape better.
- Bake the casserole just until the cheese is melted and bubbly and the chips are slightly softened. Overbaking can make the chips soggy.
- Nutritional information does not include optional toppings.
- To store: Wrap the casserole or place servings in airtight containers in the refrigerator for up to 4 days.
- To freeze: Transfer to an airtight container to store for up to 3 months.
- Mama says, “Always check your labels!”
Nutrition
Nutrition information is automatically calculated, so should only be used as an approximation.