
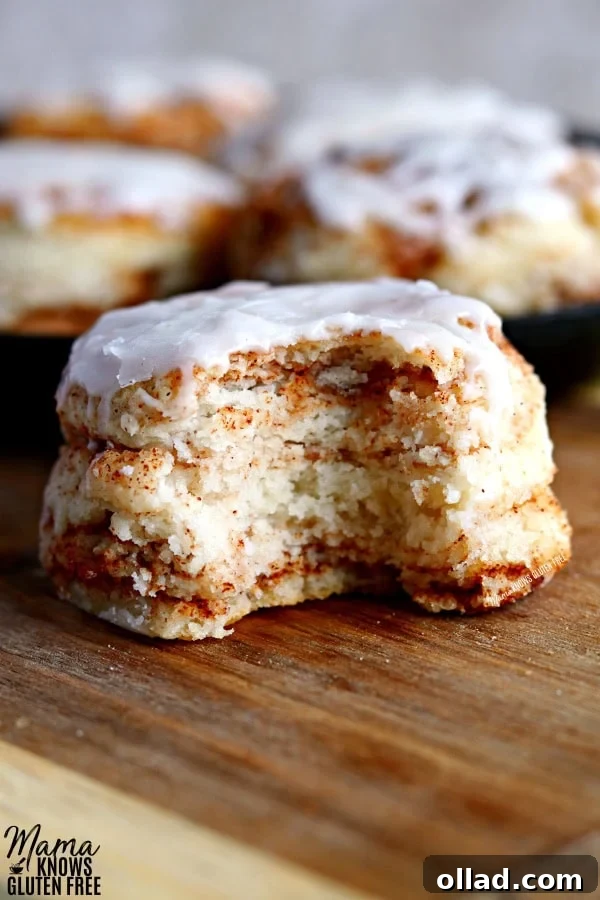
Imagine sinking your teeth into a warm, tender, and incredibly flaky biscuit, bursting with the comforting flavors of cinnamon and brown sugar, all topped with a luscious vanilla glaze. Now imagine it’s entirely gluten-free! These Gluten-Free Cinnamon Biscuits are a game-changer for breakfast, brunch, or any time you crave a sweet, satisfying treat. With options for dairy-free and Vegan diets, everyone can indulge in this delightful twist on a classic.
Save this irresistible recipe to Pinterest HERE!
If you’re already a fan of my incredibly flaky and tender Gluten-Free Buttermilk Biscuits, then get ready for an elevated experience! While those classic biscuits are a staple, this recipe for Gluten-Free Cinnamon Biscuits truly takes things to a whole new level of deliciousness. The inspiration for these beauties came from my husband’s adoration for cinnamon raisin biscuits, and I knew I had to create a gluten-free version that would not only satisfy his craving but also impress everyone who tries them.
My love affair with cinnamon rolls and all their delightful variations runs deep. You might have already explored my other cinnamon-infused creations like Gluten-Free Cinnamon Roll Cake, Gluten-Free Cinnamon Roll Muffins, Gluten-Free Cinnamon Biscuit Balls, or even Gluten-Free Cinnamon Roll Cookies. It was only natural to transform my beloved gluten-free buttermilk biscuit base into these extraordinary cinnamon marvels. And I promise you, despite their decadent appearance, these cinnamon biscuits are surprisingly easy to make. My goal is always to make gluten-free baking both simple and incredibly flavorful!
The Magic Behind Flaky Cinnamon Biscuits
Achieving that perfect flaky texture in gluten-free biscuits requires a few key techniques. The secret lies in using very cold butter and handling the dough minimally. The layers of butter, when they melt in the hot oven, create steam that pushes the dough apart, forming those beautiful, tender layers we all love. Combining this with the sweet swirl of cinnamon and brown sugar makes for a breakfast pastry that feels like a special occasion every time.
Crafting Your Gluten-Free Cinnamon Biscuits: A Step-by-Step Guide
Let’s walk through the process to create these delightful gluten-free cinnamon biscuits. Careful attention to detail will ensure the best possible results.
First, begin by preheating your oven to a robust 450° F (230° C). While the oven heats, cut your cold butter (or dairy-free shortening) into small pieces and place them in the freezer for about 10 minutes. This step is crucial for maintaining the butter’s cold temperature, which is essential for that signature flaky texture.
Pro Tip for Buttermilk: If you don’t have buttermilk on hand, don’t worry! You can easily make your own. Simply add 1 tablespoon of white vinegar or lemon juice to 1 cup of milk (dairy or non-dairy works). Stir it gently and let it sit in the refrigerator for 5-10 minutes to curdle and keep it cold. This homemade version works wonderfully in the recipe.
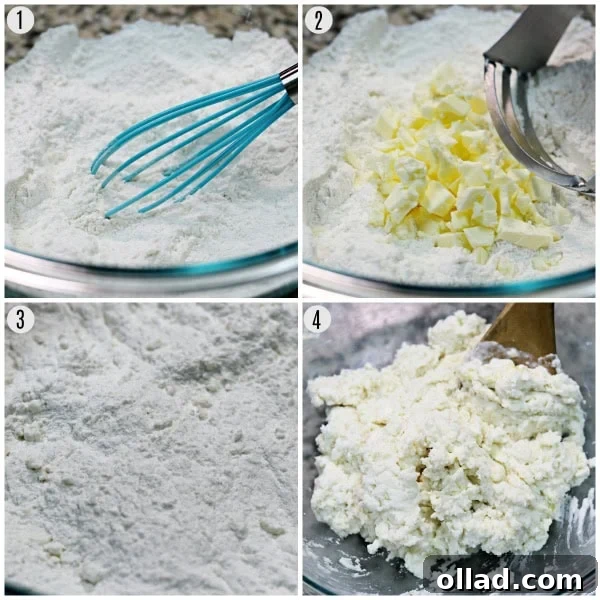
In a large bowl, whisk together your dry ingredients: gluten-free all-purpose flour, xanthan gum (remember to omit this if your specific flour blend already includes it, like Pillsbury gluten-free flour), baking powder, salt, and granulated sugar. Give it a good stir to ensure everything is evenly distributed.
Next, it’s time to incorporate the chilled butter. Add the small pieces of butter (or shortening for dairy-free) to your flour mixture. Using a pastry cutter, two forks, or even your fingertips, cut the butter into the flour until the mixture resembles coarse meal with some pea-sized crumbs. The key here is not to overwork the butter; larger pieces create more steam, which translates to flakier biscuits.
Now, gently add the buttermilk and the whisked egg (I usually whisk the egg directly into the buttermilk). Stir the wet ingredients into the dry ingredients just until a soft, sticky dough forms. It’s important to stop mixing as soon as the ingredients are combined. The dough will be sticky, and that’s perfectly normal and desired. Over-mixing is the enemy of tender biscuits, leading to a tough, dense product. Nobody wants a flat, hard biscuit!
Prepare a large piece of parchment paper by dusting it lightly with one tablespoon of gluten-free flour. Carefully transfer the sticky dough onto the floured parchment paper.
Using your hands, gently pat and form the dough into a round disk, about 7 inches in diameter and 1 inch thick. Resist the urge to use a rolling pin! Rolling the dough too thin or too wide will result in hard, flat biscuits rather than the fluffy, tender ones we’re aiming for.
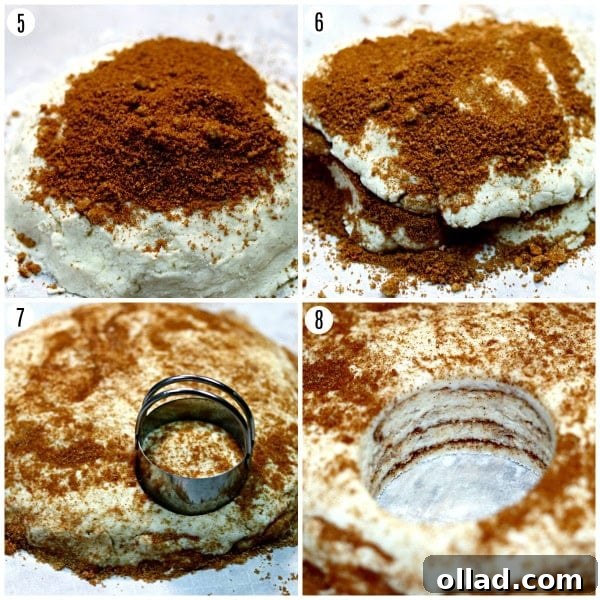
In a small separate bowl, combine the brown sugar and ground cinnamon, stirring until well mixed. Sprinkle 2 tablespoons of this aromatic cinnamon-sugar mixture generously over the entire surface of your dough round.
Now, for the layering! Gently fold the dough in half over itself. Sprinkle another 2 tablespoons of the cinnamon-sugar mixture over this newly folded dough. This simple folding technique is key to creating those beautiful swirls of cinnamon goodness throughout your biscuits.
Fold the dough over itself one more time, so you’ve folded it twice in total. Again, gently reshape the dough into a round disk, approximately 7 inches in diameter and 1 inch thick. Ensure you’re not flattening it too much. Sprinkle the remaining cinnamon-sugar mixture over the final dough round.
Using a 2-inch biscuit cutter (or a glass mouth or mason jar lid), cut out your biscuits. An important tip here: press straight down with the cutter; do not twist it. Twisting can crimp the edges of the biscuit, preventing it from rising properly and hindering those lovely layers from separating.
Pro Tip for Larger Biscuits: If you prefer “Pillsbury Grands” style large biscuits, simply use a larger biscuit cutter. My family often prefers the larger size when I make these cinnamon biscuits!
Gather any dough scraps, gently press them together into a new round (again, avoid overworking), and cut out any remaining biscuits.
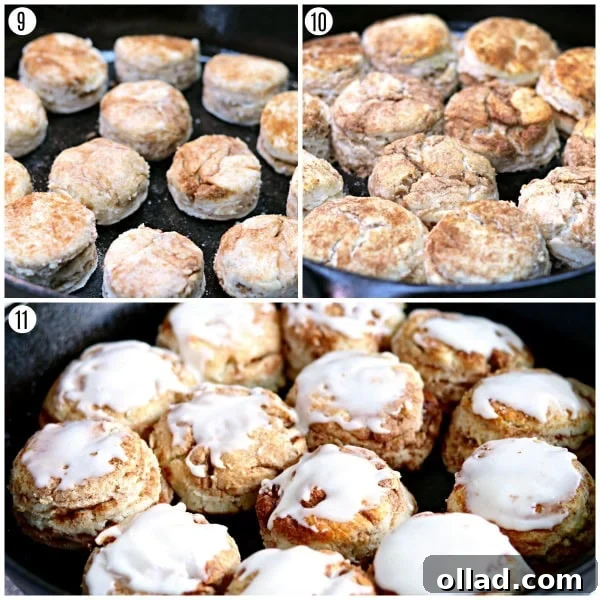
Arrange the cut biscuits on a lightly greased large cast iron pan or baking sheet. Placing them fairly close together, almost touching, helps them rise taller and more evenly. You should yield about 12 delicious cinnamon biscuits.
Bake the biscuits in your preheated 450° F (230° C) oven for 15-20 minutes. Begin checking them at the 15-minute mark to see if they’re beautifully golden brown and fully cooked. Keep an eye on them, as oven temperatures can vary.
While the biscuits are baking, prepare your simple vanilla glaze. In a small bowl, whisk together the powdered sugar, pure vanilla extract, and milk (dairy or dairy-free) until the mixture is smooth and has a pourable consistency.
Once the biscuits emerge from the oven, warm and fragrant, immediately spread the prepared vanilla glaze generously over their tops. The glaze will melt slightly into the warm biscuits, creating an irresistible finish. Serve these cinnamon delights warm and savor every bite!
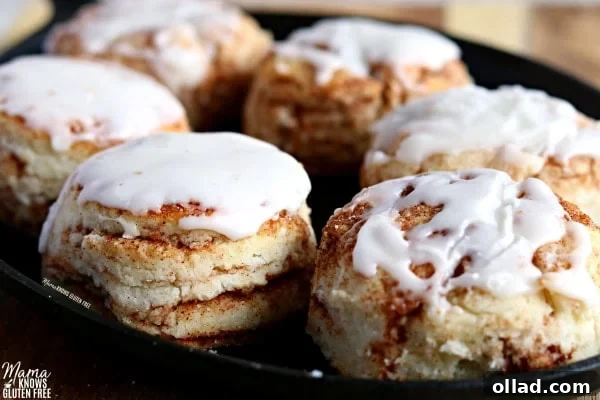
When these golden beauties emerged from the oven, filling the kitchen with their sweet, spicy aroma, my husband’s reaction was immediate and enthusiastic: “You’ve got something really special here!” I couldn’t agree more. Each biscuit is a perfect harmony of tender, flaky layers, warm cinnamon, rich brown sugar, and a dreamy vanilla glaze – truly reminiscent of a cinnamon roll, but in a simpler, biscuit form.
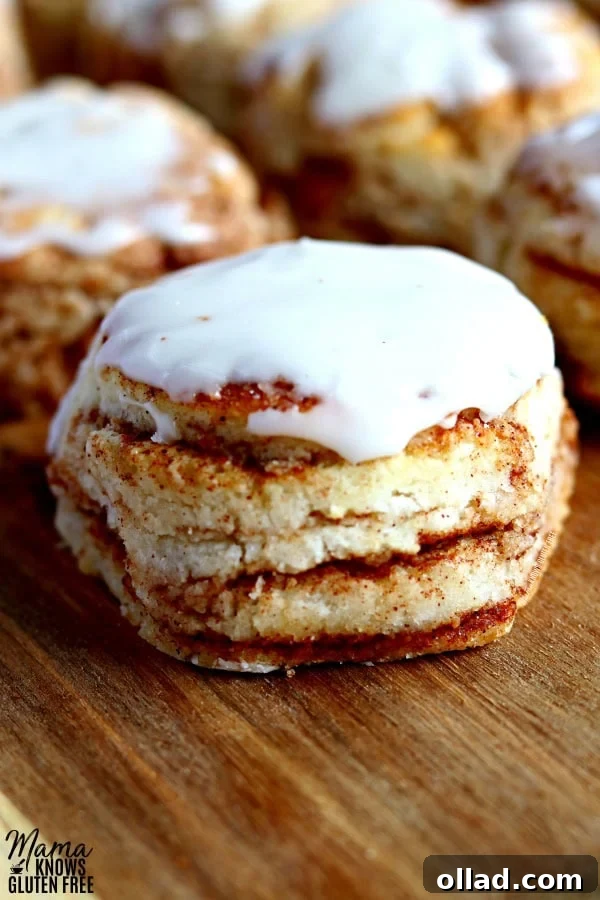
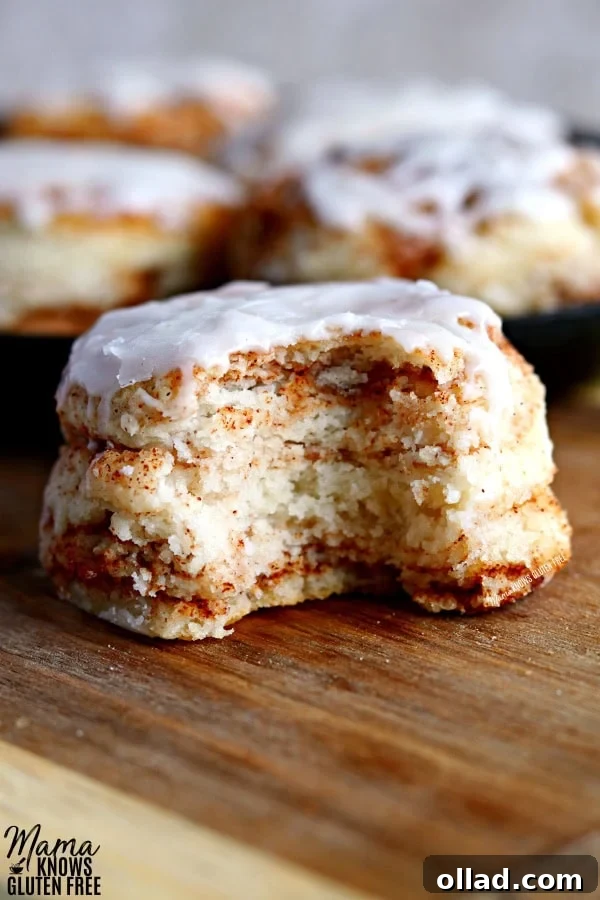
Just look at those incredible layers of cinnamon and brown sugar! Every bite delivers a delightful combination of textures and flavors that will have you coming back for more. They’re perfect for a cozy morning, a celebratory brunch, or even as a comforting dessert.
Discover More Gluten-Free Breakfast Recipes
If you loved these cinnamon biscuits, be sure to explore my other delicious Gluten-Free Breakfast Recipes for more inspiration to start your day right, regardless of dietary needs.
Let’s Connect! You can FOLLOW ME on Facebook, Instagram, or Pinterest!
Gluten-Free Cinnamon Biscuits {Dairy-Free & Vegan Options}
Tender and flaky gluten-free buttermilk biscuits layered with cinnamon and sugar and topped with a vanilla glaze. This recipe includes dairy-free and Vegan options, making it accessible for many dietary needs.
Yields: 12 biscuits
Prep time: 15 mins
Cook time: 15-20 mins
Total time: 30-35 mins
Ingredients
For the Cinnamon Biscuits:
- 2 cups gluten-free all-purpose flour (Pillsbury gluten-free is recommended for best results. Note that different GF flour blends may yield varied results.)
- 1/2 teaspoon xanthan gum (omit if your chosen flour blend already contains it)
- 1 tablespoon gluten-free baking powder
- 1 teaspoon salt
- 2 tablespoons granulated sugar
- 1 cup buttermilk (For dairy-free, use almond, cashew, or coconut milk. To make homemade buttermilk, add 1 tablespoon of white vinegar or lemon juice to 1 cup of milk and let it stand for 5-10 minutes in the refrigerator to keep cold.)
- 6 tablespoons unsalted butter, very cold and cut into small pieces (For dairy-free, use solid shortening, Smart Balance, or Earth Balance butter.)
- 1 large egg, at room temperature (For egg-free or Vegan, use Bob’s Red Mill Egg Replacer according to package instructions.)
- 1 tablespoon gluten-free all-purpose flour, for dusting the parchment paper
- 1/4 cup packed brown sugar
- 1 tablespoon ground cinnamon
For the Vanilla Glaze:
- 1 cup powdered sugar
- 1 teaspoon pure vanilla extract
- 2 teaspoons milk (For dairy-free, use almond, cashew, or coconut milk.)
Instructions
- Preheat your oven to 450°F (230°C). Lightly grease a large cast iron pan or baking sheet.
- Cut the very cold butter (or dairy-free alternative) into small, pea-sized pieces and place them in the freezer for about 10 minutes. This step is crucial for achieving flaky biscuits.
- In a large mixing bowl, combine the gluten-free all-purpose flour, xanthan gum (if using), baking powder, salt, and granulated sugar. Whisk or stir these dry ingredients together thoroughly to ensure even distribution.
- Add the chilled butter pieces to the dry ingredients. Using a pastry cutter or a fork, cut the butter into the flour mixture until it resembles coarse meal with some pea-sized crumbs. Avoid overworking the butter.
- In a separate small bowl, whisk the egg (or prepared egg replacer) into the buttermilk (or dairy-free milk alternative). Pour this wet mixture into the dry ingredients. Stir just until a soft, sticky dough forms. Be careful not to overmix, as this can lead to tough biscuits. The dough will naturally be quite sticky.
- Lightly flour a large piece of parchment paper with one tablespoon of gluten-free flour. Transfer the sticky dough onto the floured parchment paper.
- With lightly floured hands, gently pat and form the dough into a round disk, approximately 7 inches in diameter and 1 inch thick. Do not use a rolling pin; excessive handling will make the biscuits tough and flat.
- In a small bowl, thoroughly mix together the brown sugar and ground cinnamon.
- Sprinkle 2 tablespoons of the cinnamon-sugar mixture evenly over the top of the dough round.
- Gently fold the dough in half, layering it on top of itself. Sprinkle another 2 tablespoons of the cinnamon-sugar mixture over the folded dough.
- Fold the dough in half once more. Now, use your hands to gently reshape the dough into a 7-inch diameter, 1-inch thick round. Sprinkle the remaining cinnamon-sugar mixture over the top. This layering technique helps create distinct cinnamon swirls and a wonderfully flaky texture.
- Using a 2-inch biscuit cutter (or the rim of a glass/mason jar lid), cut out the biscuits. Press straight down without twisting the cutter to ensure the edges are not crimped, which allows for optimal rising.
- Gather any dough scraps, gently press them together into a new round (avoiding overworking), and cut out additional biscuits until all dough is used.
- Place the cut biscuits onto the prepared cast iron pan or baking sheet, ensuring they are slightly touching. This proximity helps them rise taller and more evenly. You should have about 12 biscuits.
- Bake for 15-20 minutes at 450°F (230°C), or until the biscuits are golden brown on top and cooked through. Ovens vary, so start checking at 15 minutes.
- While the biscuits are baking, prepare the glaze: In a small bowl, whisk together the powdered sugar, vanilla extract, and milk until smooth and pourable.
- Once baked, remove the cinnamon biscuits from the oven. While still warm, spread the vanilla glaze generously over the tops.
- Serve these warm, tender, and flaky gluten-free cinnamon biscuits immediately and enjoy! The biscuits are best enjoyed fresh, but can be stored in an airtight container.
Recipe Notes & Tips for Success
- Gluten-Free Flour Choice: Not all gluten-free flour blends are created equal. For best results, Pillsbury gluten-free all-purpose flour is highly recommended. Other blends, especially those containing sorghum flour (like Bob’s Red Mill Cup for Cup or Great Value Gluten-Free Flour), may result in a wetter dough and less fluffy biscuits. Experiment to find your favorite!
- The Importance of Cold Butter: Ensuring your butter (or dairy-free shortening) is very cold and cut into small pieces is paramount. This prevents it from fully incorporating into the flour, instead creating pockets that release steam during baking, yielding those coveted flaky layers.
- Homemade Buttermilk Made Easy: If you find yourself without buttermilk, simply add 1 tablespoon of white vinegar or lemon juice to 1 cup of milk (dairy, almond, cashew, or coconut milk all work) and let it sit for 5-10 minutes. The slight curdling effect mimics true buttermilk. Keep it chilled until ready to use.
- Avoid Overmixing the Dough: This is a crucial rule for tender biscuits, whether gluten-free or not. Overmixing develops gluten (even in gluten-free flours with binders), resulting in tough, dense biscuits. Mix only until the ingredients are just combined and a sticky dough forms.
- Gentle Dough Handling: Resist the temptation to use a rolling pin. Instead, gently pat the dough into its desired shape with your hands. When cutting biscuits, press the cutter straight down without twisting. Twisting can seal the edges of the dough, which inhibits the biscuits from rising properly and forming distinct layers.
- Dairy-Free Adaptation: For a dairy-free version, substitute unsalted butter with solid shortening, Smart Balance, or Earth Balance vegan butter. Use almond, cashew, or coconut milk for both the buttermilk component and the glaze.
- Egg-Free & Vegan Options: To make these biscuits egg-free, use Bob’s Red Mill Egg Replacer according to its package instructions. For a completely Vegan option, combine the egg replacer with a dairy-free butter alternative (like shortening or Earth Balance) and dairy-free milk.
- Storage and Reheating: These cinnamon biscuits are at their absolute best when served warm, fresh from the oven. If you have any leftovers, store them in an airtight container at room temperature for up to 2 days. To enjoy them warm again, a quick reheat in the microwave for 15-30 seconds or in a low oven for a few minutes works wonders.
- Always Check Labels: For strict dietary needs (gluten-free, dairy-free, vegan), always double-check all ingredient labels to ensure they meet your specific requirements.
Nutrition Information (Approximate per biscuit)
- Serving Size: 1 biscuit
- Calories: 203 kcal
- Carbohydrates: 33g
- Protein: 3g
- Fat: 7g
- Saturated Fat: 4g
- Cholesterol: 30mg
- Sodium: 276mg
- Potassium: 139mg
- Fiber: 2g
- Sugar: 17g
- Vitamin A: 230 IU
- Calcium: 95mg
- Iron: 1mg
Nutrition information is automatically calculated and should be used as an approximation. Actual values may vary based on ingredients and preparation.
Additional Info
Course: Breakfast
Cuisine: American
Tried this recipe? Mention @mamaknowsglutenfree or tag #mamaknowsglutenfree!