
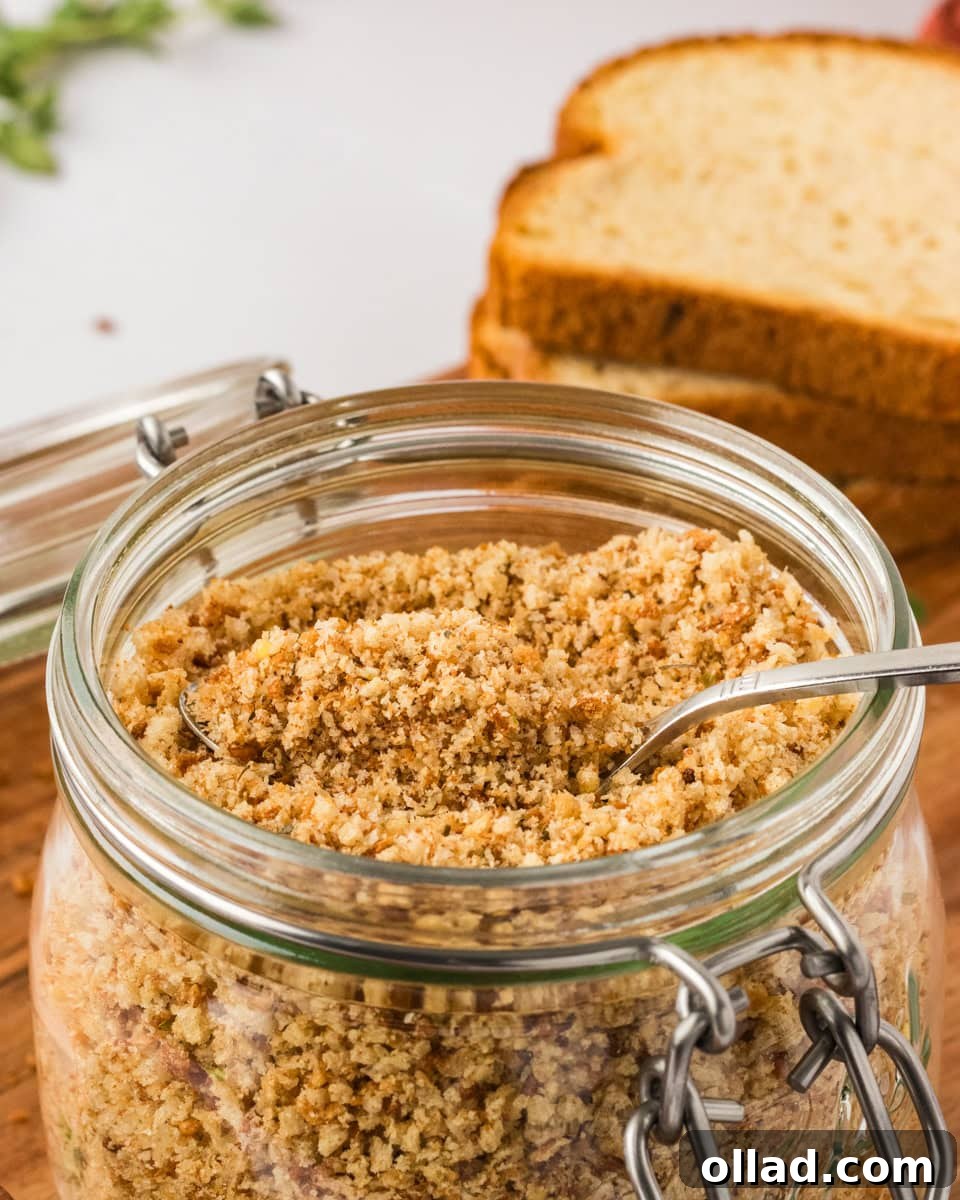
In the realm of culinary staples, few ingredients offer the versatility and texture-enhancing power of breadcrumbs. For those navigating a gluten-free lifestyle, however, readily available, high-quality gluten-free breadcrumbs can often be a challenge to find—and an expense to regularly purchase. This is precisely why mastering the art of making your own gluten-free breadcrumbs at home is not just a culinary skill, but a game-changer. It’s a remarkably straightforward process that champions cost-effectiveness, provides complete control over ingredients, and, most importantly, results in a superior product that elevates your cooking.
Our method is designed to be entirely gluten-free, dairy-free, and vegan, making it an inclusive staple for any household, especially those with diverse dietary needs or allergies. Beyond its dietary benefits, this recipe offers a brilliant solution to minimize food waste: transforming stale, forgotten bread into a golden, crispy, and indispensable ingredient. Say goodbye to store-bought varieties with questionable additives and hello to fresh, flavorful breadcrumbs made right in your kitchen.
“These came out great!! I was worried they may burn without oil or be crunchy on the outside but not the inside, I was so very wrong! Super crunchy and perfect 🙂 thank you for this great recipe!”
– Natalie
This effortless recipe has become my secret weapon for repurposing those often-discarded bread ends and slices that my kids inevitably leave behind. Instead of letting them go to waste, I transform them into wonderfully crisp, golden gluten-free breadcrumbs. These homemade crumbs infuse an incredible texture into a myriad of dishes, from succulent gluten-free turkey meatballs to rich and savory stuffed mushrooms. While I typically opt for my own homemade gluten-free bread, feel free to use store-bought gluten-free loaves or even gluten-free dinner rolls; they all yield fantastic results. A quick tip: if you’re aiming for a completely dairy-free recipe, always double-check the ingredient list of any store-bought bread to ensure it meets your dietary needs. I’ve found that making a generous batch and storing some in the freezer ensures I always have a supply of these versatile crumbs on hand, ready to elevate any meal at a moment’s notice!
Why Homemade Gluten-Free Breadcrumbs Are a Must-Have
Making your own gluten-free breadcrumbs isn’t just a simple kitchen task; it’s an investment in flavor, health, and sustainability. Here’s why this recipe should become a permanent fixture in your culinary repertoire:
- Unmatched Freshness and Flavor: Store-bought breadcrumbs, even gluten-free ones, often sit on shelves for extended periods, losing their vibrancy. Homemade crumbs, however, are made fresh, resulting in a superior aroma and a more pronounced, nuanced flavor that truly enhances your dishes.
- Complete Ingredient Control: When you make breadcrumbs yourself, you dictate every ingredient. This is paramount for individuals with allergies or specific dietary preferences. You can ensure they are truly gluten-free, dairy-free, and vegan, free from hidden sugars, preservatives, or unwanted additives commonly found in commercial products.
- Cost-Effective Solution: Gluten-free products can often carry a premium price tag. By utilizing stale or leftover gluten-free bread, you transform what might otherwise be waste into a valuable ingredient, saving money in the long run. It’s an economical choice that benefits your wallet and the environment.
- Customizable Texture: Do you prefer coarse crumbs for a rustic topping or fine crumbs for delicate breading? With a food processor, you can easily achieve your desired texture, something not always possible with pre-packaged options.
- Reduces Food Waste: This recipe is a champion of waste reduction. Instead of discarding stale bread, you give it a new, delicious purpose. It’s an eco-friendly practice that contributes to a more sustainable kitchen.
Gluten-Free Bread Crumbs
Audrey Roberts
2 cups
20 minutes
15 minutes
Step-by-step photos can be seen below the recipe card.
Ingredients
- 4 cups gluten-free bread, cubed
Instructions
-
Preheat oven to 350°F. Ensure your oven rack is in the middle position for even baking.
-
Cut 4 cups of your chosen gluten-free bread into uniform 1-inch cubes. Uniformity is key for even toasting and crispness.
-
Spread the cubed bread in a single layer on a large baking sheet. Bake on the middle rack for 10-15 minutes, or until the cubes are golden brown and thoroughly crisp. Keep a close eye on them to prevent burning, as oven temperatures can vary.
-
Remove the baking pan from the oven and allow the toasted bread cubes to cool completely on the pan for 10 to 15 minutes. Cooling helps them become even crisper and prepares them for processing.
-
Transfer the cooled, toasted bread cubes into a food processor or a high-powered blender. Process on high speed for approximately 30 seconds to achieve a coarse texture, ideal for crunchy toppings. For a finer texture, continue processing for up to 1 minute. If you desire exceptionally fine crumbs, pulse the mixture in short bursts until your preferred consistency is reached.
-
If you plan to use the breadcrumbs immediately, they are ready to go! For longer storage, transfer them to an airtight container and store at room temperature, or place them in a freezer bag and freeze for future use.
-
For a classic Italian seasoning blend, stir the following spices into your finished breadcrumbs: 1 teaspoon salt, 1 teaspoon garlic powder, 1⁄2 teaspoon onion powder, 1⁄2 teaspoon dried oregano, 1⁄2 teaspoon dried basil.
-
For a fragrant savory seasoning blend, mix these spices into your finished breadcrumbs: 1 teaspoon salt, 1⁄2 teaspoon garlic powder, 1⁄2 teaspoon onion powder, 1⁄2 teaspoon dried sage, 1⁄2 teaspoon dried thyme, 1⁄2 teaspoon dried oregano.
Notes
- I almost always use bread that has been frozen and then thawed. This slightly drier texture makes for ideal crumbs. Let the bread defrost on the countertop (I place it on a paper towel-lined baking pan to absorb any excess moisture), and then proceed with the recipe as directed.
- For a truly dairy-free option, it is crucial to use gluten-free bread that is also explicitly labeled as dairy-free. Always check ingredient labels carefully.
- Mama says, “check all of your labels!” This applies to all ingredients, especially if you have strict dietary requirements.
Nutrition
Calories: 239kcal
Carbohydrates: 44g
Protein: 8g
Fat: 3g
Saturated Fat: 1g
Sodium: 442mg
Potassium: 104mg
Fiber: 2g
Sugar: 5g
Calcium: 234mg
Iron: 3mg
Nutrition information is automatically calculated, so should only be used as an approximation.
Additional Info
Main Course
American
Tried this recipe?
Mention @mamaknowsglutenfree or tag #mamaknowsglutenfree!
How to Make Gluten-Free Bread Crumbs Step by Step
Creating your own gluten-free breadcrumbs is a simple journey from stale bread to a versatile kitchen staple. Follow these easy steps to achieve perfectly crisp crumbs every time.
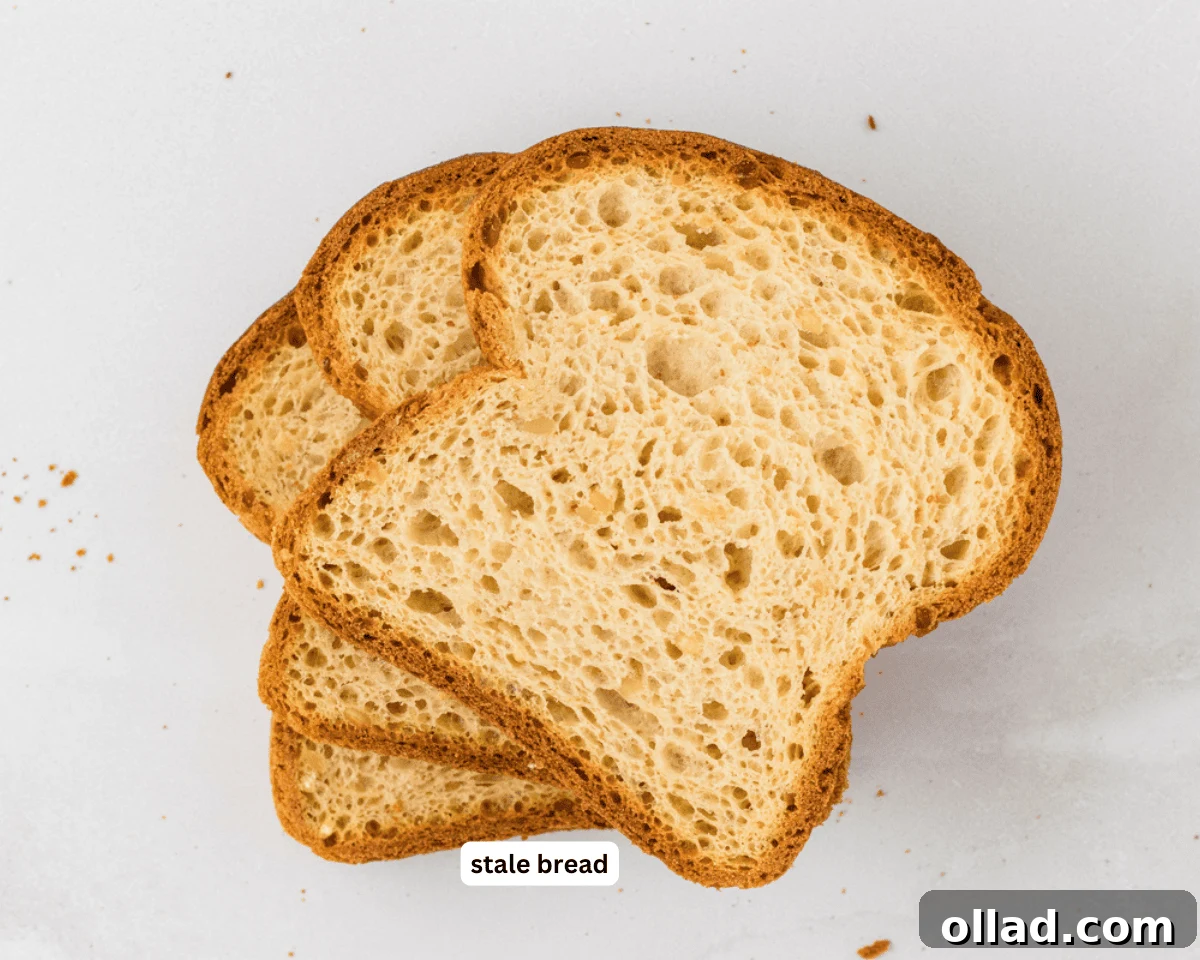
Step 1: Gather Your Ingredients and Preheat Oven. Before you begin, ensure you have all your tools and ingredients ready. This includes your gluten-free bread, a sturdy baking sheet, and a food processor or high-powered blender. Preheat your oven to 350°F (175°C). Proper preheating is crucial for even toasting, ensuring the bread dries out and crisps up perfectly.
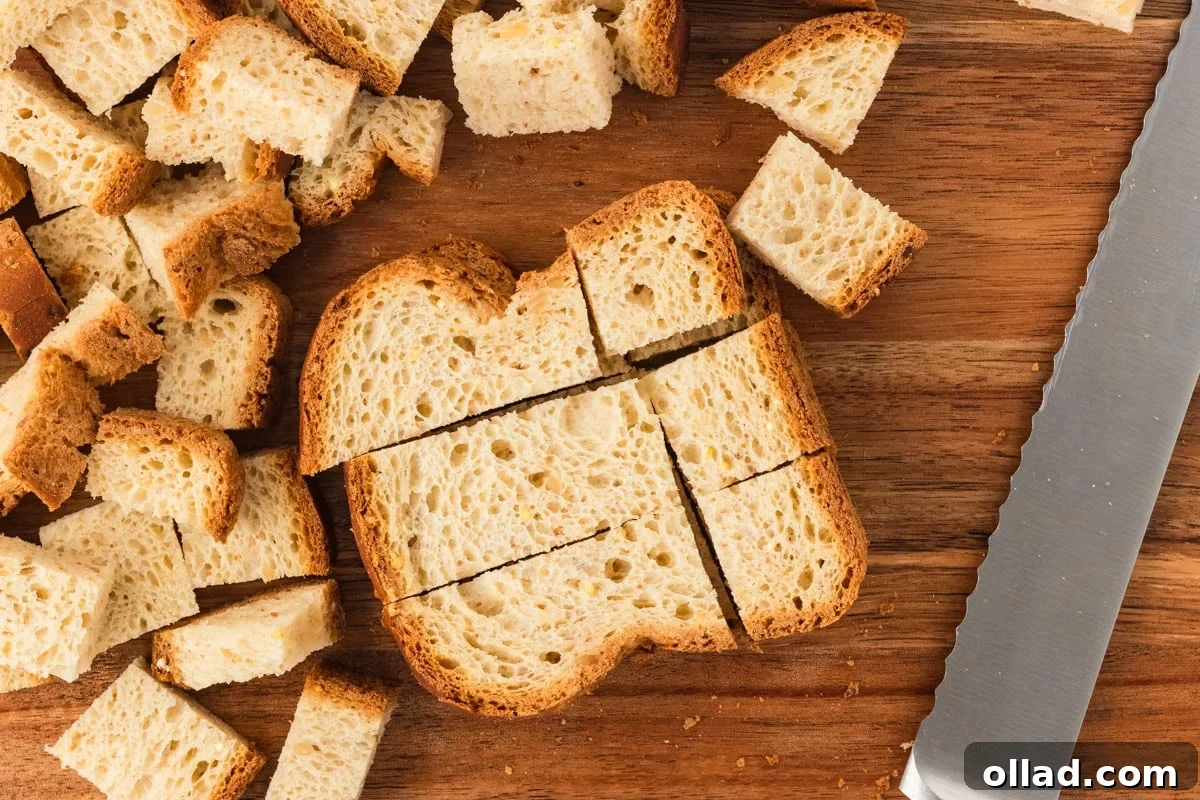
Step 2: Cube the Bread. Take 4 cups of your chosen gluten-free bread and carefully cut it into 1-inch (2.5 cm) cubes. The size and uniformity of these cubes are important. Smaller, more consistent pieces will toast more evenly and quickly, which is essential for achieving a consistent crunch throughout your batch of breadcrumbs. Avoid excessively large or uneven pieces as they may toast unevenly.
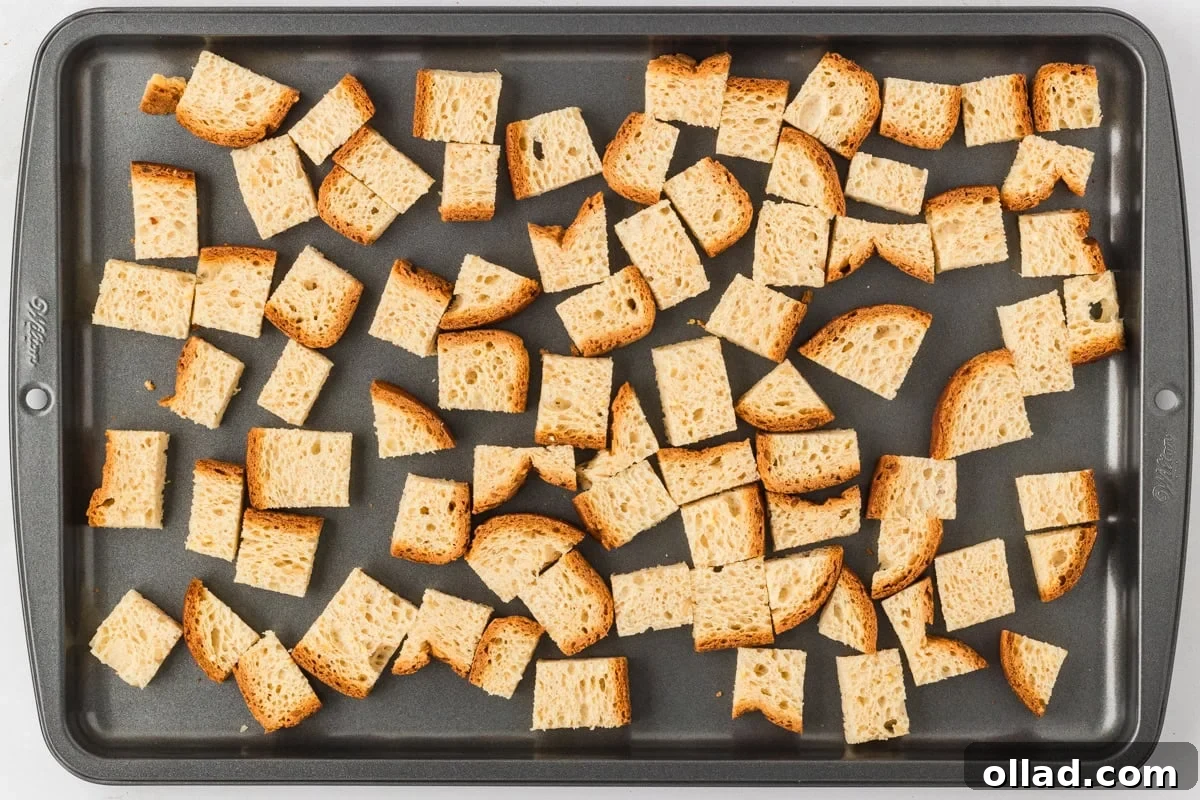
Step 3: Bake the Bread. Arrange the cubed bread in a single layer on a baking sheet. Overcrowding the pan can lead to steaming rather than toasting, so use two sheets if necessary. Bake on the middle rack of your preheated oven for 10-15 minutes. The goal is for the bread cubes to become lightly browned and completely crisp, indicating all moisture has been removed. Once baked, remove the pan from the oven and allow the bread cubes to cool completely on the baking sheet for an additional 10 to 15 minutes. This cooling period is critical as it allows the cubes to firm up and achieve maximum crispness before processing.
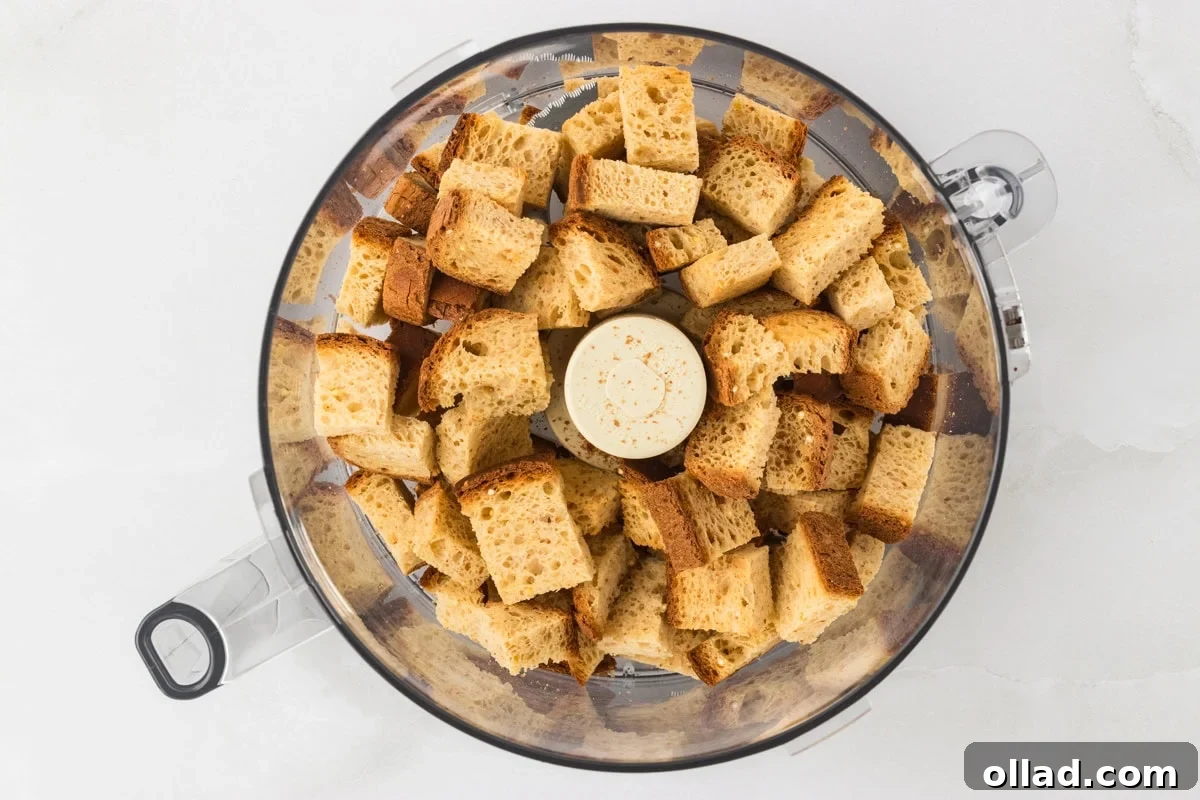
Step 4: Blend into Crumbs. Once fully cooled, transfer the toasted bread cubes into a food processor or a high-powered blender. Process the bread on high speed. For a coarse texture, which is excellent for toppings and crunchy breading, process for about 30 seconds. If you prefer a finer, more uniform texture, ideal for binders in meatballs or for lighter coatings, continue processing for up to 1 minute. For exceptionally fine crumbs, akin to panko, use short, quick pulses until your desired size is achieved. Be careful not to over-process, as this can turn crumbs into a paste.
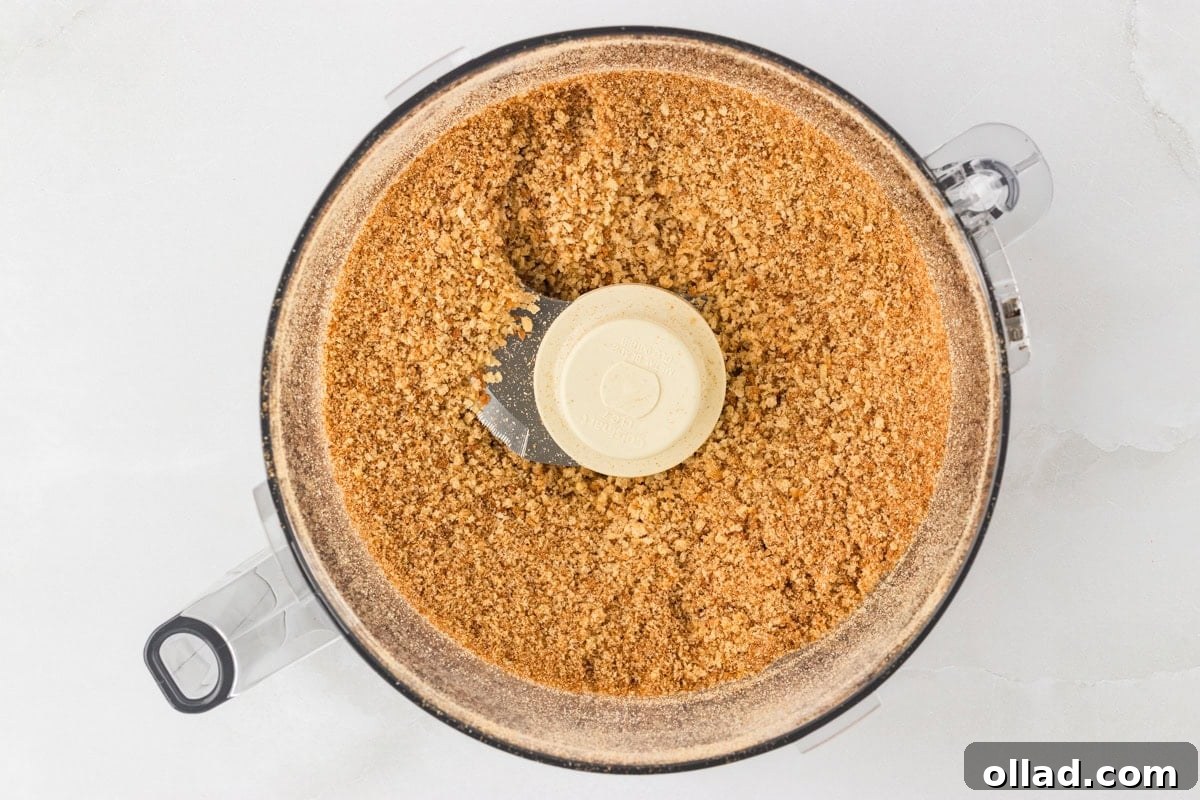
Step 5: Use and Store. Your fresh, homemade gluten-free breadcrumbs are now ready to be used! If you’re not incorporating them into a recipe immediately, proper storage is key to maintaining their freshness and crispness. Place them in an airtight container or a heavy-duty freezer bag. Enjoy the versatility and superior quality of your homemade crumbs in all your favorite dishes.
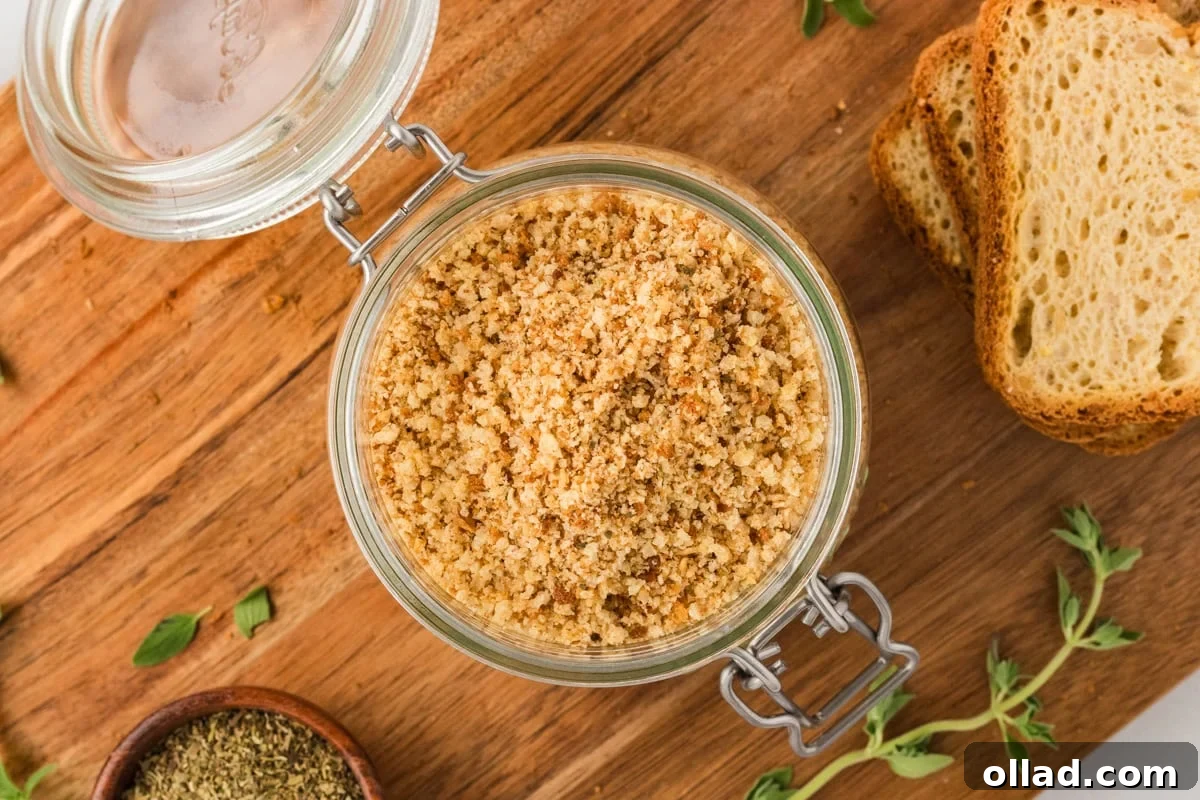
Gluten-Free Bread Selection Tips
The foundation of great gluten-free breadcrumbs lies in the bread itself. Not all gluten-free breads are created equal when it comes to crumb-making. Here are some pointers to help you choose the best bread for optimal results:
- Texture is Key: Look for gluten-free breads that are on the firmer side, or even slightly dry. Soft, moist breads (like some fresh gluten-free sandwich breads) can become gummy when processed and may not crisp up as effectively in the oven. Stale bread is truly your best friend here!
- Plain Varieties Preferred: For versatile breadcrumbs, opt for plain, unflavored gluten-free bread. This allows you to customize the seasoning later. If you use a flavored bread (e.g., rosemary olive oil gluten-free bread), be mindful that its flavor will transfer to your crumbs.
- Check for Additional Allergens: Since our recipe is dairy-free and vegan, always scrutinize the ingredient labels of store-bought gluten-free bread. Many gluten-free breads may still contain dairy, eggs, or other animal products. Look for certifications or explicit “dairy-free” and “vegan” labels.
- Homemade vs. Store-Bought: Both homemade and store-bought gluten-free breads work wonderfully. If using homemade, ensure it’s a few days old or has been frozen and thawed (see notes below). If using store-bought, brands known for a slightly denser texture often work best.
Gluten-Free Crumb-Making Tips & Tricks
- Embrace Stale Bread: This is perhaps the most crucial tip. I highly recommend not using bread that was baked the same day. Freshly baked bread, whether homemade or store-bought, tends to be too soft and retains too much moisture. This makes it challenging to achieve that perfect, crisp texture in the oven; it’s more likely to dry out unevenly or become chewy. Bread that is 1-3 days old, or even bread that has been frozen and thawed, is ideal.
- Uniformity is Essential: Slice the bread into equal-sized 1-inch pieces. This ensures even cooking and browning in the oven. If pieces are uneven, some will burn while others remain soft.
- Always Check Labels: If using store-bought gluten-free bread, take a moment to read the ingredients list carefully. This is especially important if you are committed to a dairy-free or vegan diet, as some gluten-free breads may contain dairy or egg derivatives.
- Don’t Overcrowd the Pan: When baking the bread cubes, arrange them in a single layer on the baking sheet. If the pan is too full, the bread will steam instead of crisping up, leading to soggy crumbs. Use two baking sheets if necessary.
- Cool Completely: After toasting, allow the bread cubes to cool completely on the baking sheet. This step is vital for them to crisp up further as they release residual heat and moisture.
- Adjust Texture to Your Liking: Use your food processor’s pulse function to control the texture precisely. Short pulses yield coarse crumbs, while longer processing creates finer crumbs.
Serving Suggestions: Unleash the Versatility of Your Breadcrumbs
Homemade gluten-free breadcrumbs are a true workhorse in the kitchen, offering endless possibilities to add texture, flavor, and binding to your favorite dishes. Here are just a few ways I love to use them, transforming everyday meals into culinary delights:
- Perfect Breading: These crumbs create an incredibly crispy coating for fried or baked dishes. Think about breading baked BBQ chicken thighs, fish fillets, or even gluten-free onion rings. For extra crispness, try a three-step breading process: dredge in gluten-free flour, then egg wash, then coat generously with your homemade crumbs.
- Binders in Meat Dishes: They are an essential ingredient in dishes like my gluten-free meatloaf and turkey meatballs, helping to bind the ingredients together while adding moisture and preventing a dense texture. They also work wonders in gluten-free burgers or lentil patties.
- Crunchy Toppings: Sprinkle them over casseroles like macaroni and cheese, baked pasta dishes, or vegetable gratins for a golden, crunchy crust. For a savory twist, sauté them briefly with a touch of olive oil and herbs before topping.
- Stuffed Delights: Use them as a key component in stuffings for vegetables, poultry, or seafood. They absorb flavors beautifully, adding body and moisture. Try them in stuffed bell peppers, zucchini boats, or even baked apples for a sweet and savory contrast.
- Seafood Cakes: My gluten-free salmon cakes with a creamy dill sauce are a family favorite, and these breadcrumbs are the secret to their perfect texture. They prevent the cakes from falling apart and provide a delightful bite.
- Holiday Stuffing: Around the holidays, that classic stuffing texture really matters. These crumbs are ideal for creating a traditional, flavorful stuffing that everyone can enjoy, free from gluten.
- Pasta Dishes: Use them as a garnish for pasta dishes, especially those with lighter sauces, to add a contrasting texture and a hint of toasted flavor. Think garlic and olive oil pasta or a simple tomato sauce.
- Panko-Style Crumbs: For a lighter, airier texture, process the bread until you achieve larger, flaky crumbs. These are fantastic for a true panko-style coating on fried foods.
Flavor Variations to Elevate Your Crumbs
Once you’ve mastered the basic gluten-free breadcrumb recipe, the possibilities for customization are endless. Experiment with these flavor profiles to match your culinary creations:
- Classic Italian: Already provided in the recipe card, this blend of salt, garlic powder, onion powder, dried oregano, and dried basil is perfect for pasta, chicken parmesan, or meatballs.
- Savory Herb: Also in the recipe, this mix of salt, garlic powder, onion powder, dried sage, dried thyme, and dried oregano is fantastic for poultry, stuffing, or savory casseroles.
- Spicy Crumbs: Add a pinch of cayenne pepper, red pepper flakes, or a dash of smoked paprika along with garlic powder and a touch of salt. Ideal for dishes that need a kick, like spicy chicken tenders or chili-topped gratins.
- Lemon Herb: Mix in finely grated lemon zest and a blend of dried dill, parsley, and chives. Excellent for fish, chicken, or light vegetable dishes.
- Garlic & Rosemary: Infuse your crumbs with robust flavor by adding granulated garlic and dried rosemary. Perfect for lamb, potatoes, or hearty stews.
- Nutty Crumbs (Nut-Free): For an added layer of flavor and texture, you can experiment with finely ground seeds (like sunflower or pumpkin seeds) or even toasted sesame seeds, ensuring they are suitable for any allergen concerns.
Storage Instructions
Proper storage is essential to keep your homemade gluten-free breadcrumbs fresh, crisp, and ready for use. I typically store my gluten-free bread crumbs in one of two ways:
- Airtight Container (Room Temperature): For regular use, I keep them in a clean, dry airtight container in my pantry. Stored at room temperature, they will remain fresh and perfectly crisp for up to 1 month. Ensure the container is truly airtight to prevent moisture from seeping in, which can cause them to become stale or moldy.
- Freezer Bag (Frozen): For longer storage, or if I’ve made a large batch, I prefer to freeze them. Transfer the cooled breadcrumbs to a heavy-duty freezer bag, squeezing out as much air as possible before sealing. They can be frozen for up to 3 months. When you need them, you can use them directly from the freezer; they thaw almost instantly and retain their crisp texture. This is a fantastic way to always have a supply on hand.
Always ensure your breadcrumbs are completely cooled before storing, especially before freezing, to prevent condensation and sogginess.
Troubleshooting & Common Crumb-Making Questions
Even though making breadcrumbs is straightforward, a few common questions or issues might arise. Here’s how to tackle them:
- My crumbs aren’t crisp enough. What went wrong? This usually means the bread cubes weren’t toasted long enough, or they weren’t spread in a single layer on the baking sheet, causing them to steam rather than crisp. Ensure your oven is fully preheated and that the bread cubes are truly dry and golden brown before cooling. You can always pop them back in the oven for a few more minutes if needed.
- Can I air-fry the bread cubes instead of baking? Yes, absolutely! Air-frying is a great alternative. Preheat your air fryer to 350°F (175°C) and arrange the bread cubes in a single layer. Air fry for 5-10 minutes, shaking the basket halfway through, until golden and crisp. Adjust timing based on your air fryer model.
- Can I use a regular blender instead of a food processor? A high-powered blender can work, but a food processor with a sharp blade is generally more efficient for achieving uniform crumbs. If using a blender, work in smaller batches and use the pulse setting to prevent over-processing and turning the bread into a paste.
- Should I season the bread before toasting? While you can, it’s generally best to season the crumbs *after* they are processed. This ensures the seasonings are evenly distributed and prevents them from burning during the toasting process. Adding fresh herbs (like parsley or basil) is also best done after processing to preserve their vibrant color and flavor.
- What if my gluten-free bread is very fresh and soft? If your bread is too fresh, it will be difficult to get truly crisp crumbs. The best approach is to let it sit out on the counter overnight, uncovered, to allow it to stale naturally. Alternatively, you can slice it and very lightly toast it in the oven at a low temperature (around 200°F/95°C) for 15-20 minutes to dry it out before cubing and toasting at the higher temperature.
More Gluten-Free Bread Recipes to Try
If you enjoy baking your own gluten-free staples, don’t stop at breadcrumbs! Expand your repertoire with these other fantastic gluten-free bread recipes from our collection:
- Bread Machine Gluten-Free Bread
- Gluten-Free Sourdough
- Gluten-Free Baguette
- Gluten-Free Pita Bread
- Gluten-Free Flat Bread
Our Gluten-Free Bread Crumbs recipe was originally published 4/2/2020. It was retested, reworked, and republished to be better than ever 7/8/25. We continuously strive to provide the most accurate and delicious gluten-free recipes for your enjoyment.