
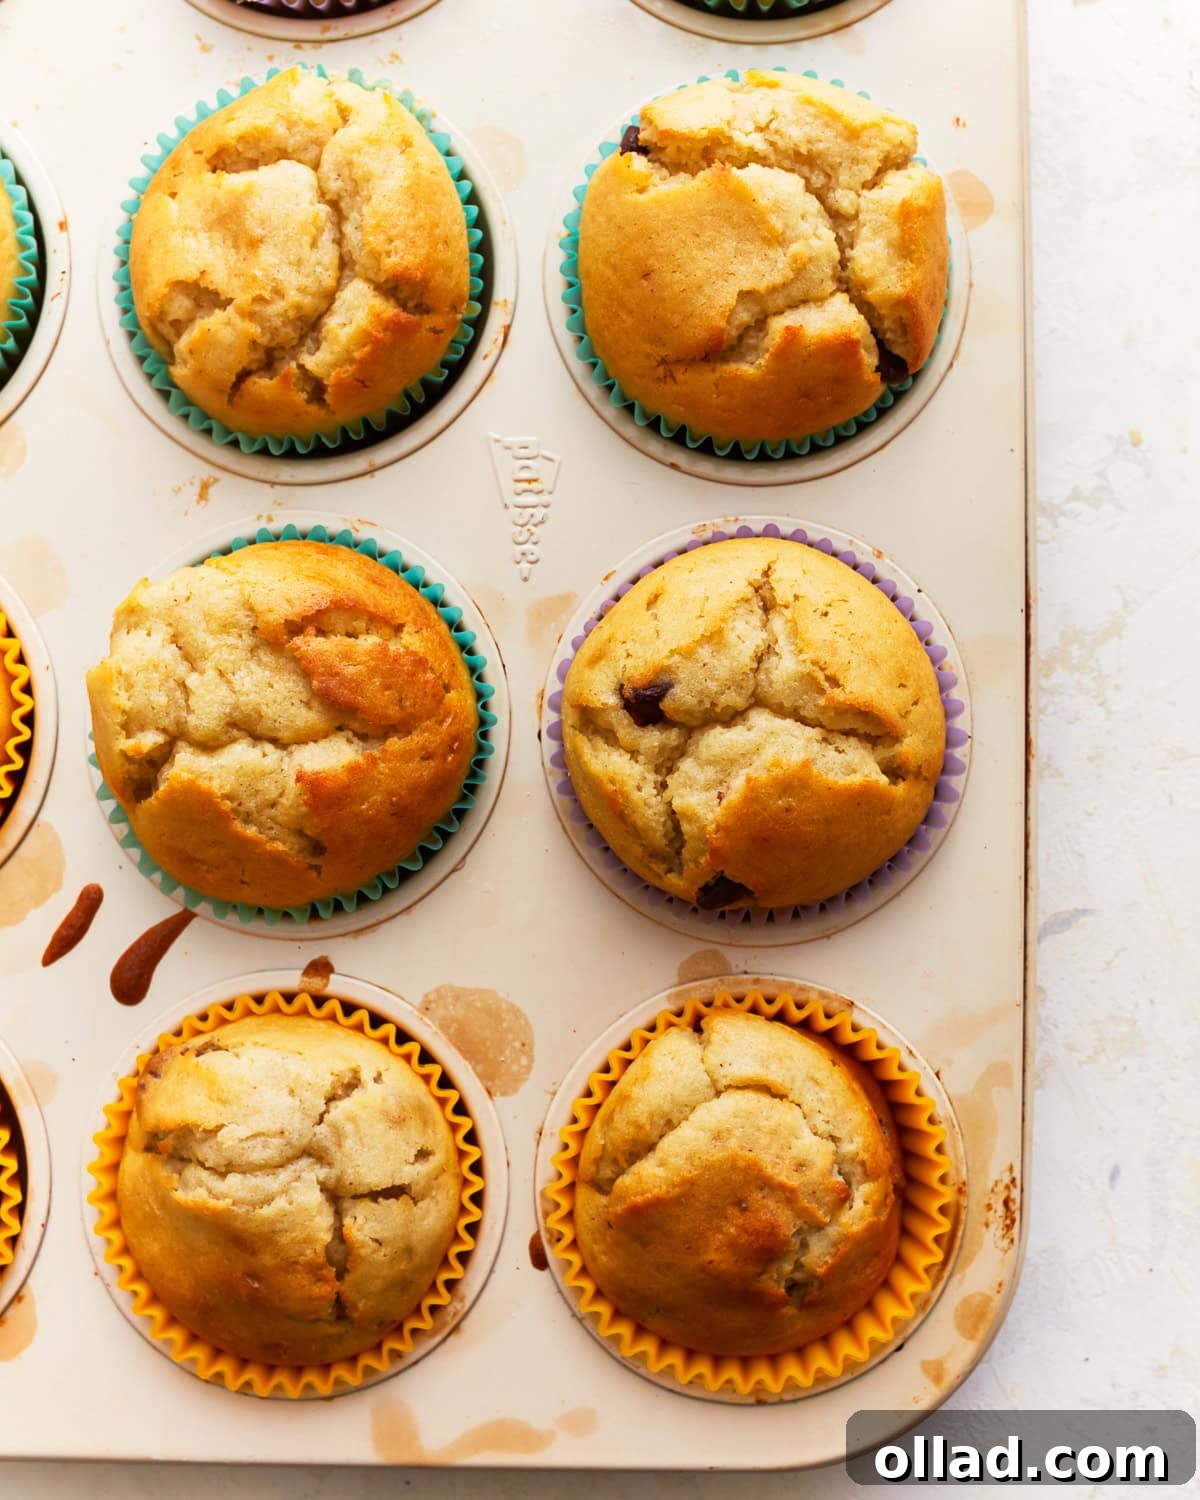
The Ultimate Gluten-Free Muffins: Your Go-To Master Recipe
Muffins have always been a beloved breakfast item and a comforting snack for many, but finding a truly delightful gluten-free version can often feel like searching for a needle in a haystack. That’s precisely why I set out to develop and perfect a **master recipe for gluten-free muffins** that stands out from the rest. This isn’t just another gluten-free recipe; it’s a foundation for creating consistently quick, easy, and incredibly tender muffins bursting with flavor. The best part? Its exceptional versatility allows for endless customization with your favorite additions, ensuring that every batch can be a unique culinary adventure tailored to anyone’s taste preference.
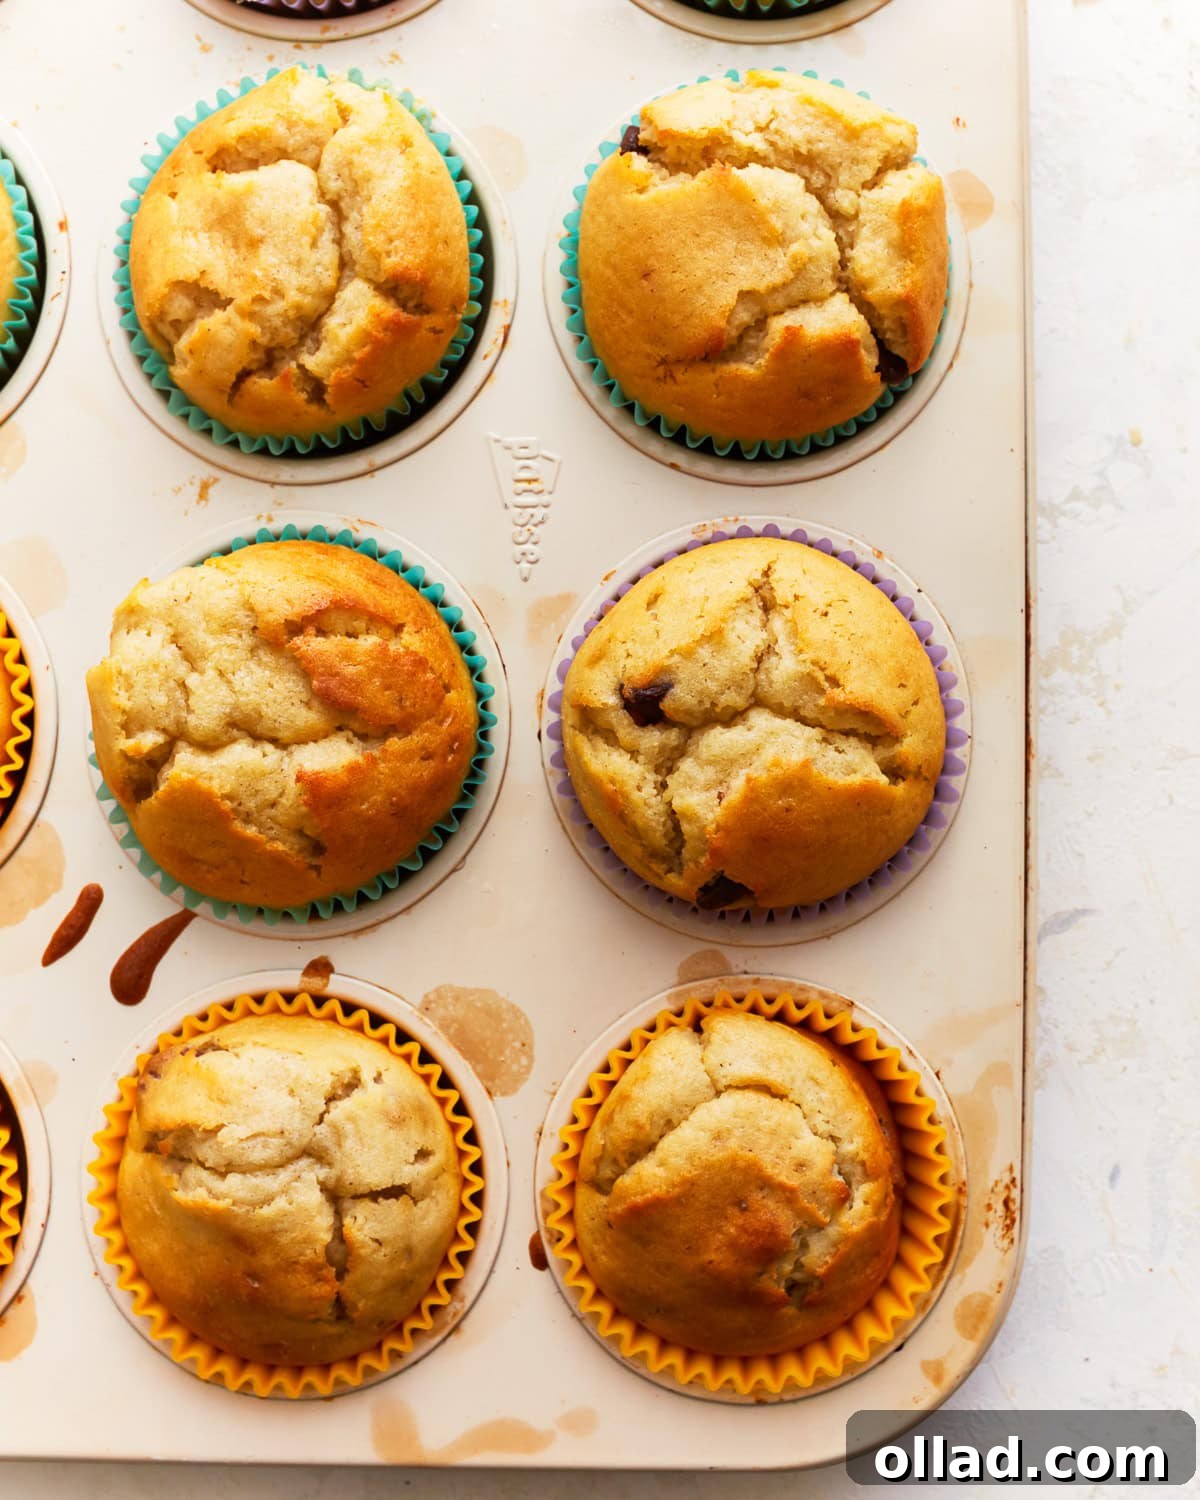
“Came out terrific! Really satisfied a craving, and my family enjoyed them as much as they do regular muffins.”
– Alisha, Satisfied Home Baker
Why You’ll Adore This Easy Gluten-Free Muffin Recipe
For those navigating a gluten-free lifestyle, finding convenient yet delicious baked goods can be a challenge. These homemade gluten-free muffins offer the perfect solution. As a busy individual, I rely on this recipe to provide wholesome, tasty, and satisfying grab-and-go options for myself and my family throughout the week. I often dedicate a Sunday evening to baking a large batch, knowing they will stay wonderfully moist and flavorful for days, making them a far superior and healthier choice than most store-bought alternatives.
Here’s what makes this recipe truly special and why it will quickly become a favorite in your kitchen:
- Uncomplicated Baking: Forget complex techniques or obscure ingredients. This recipe is designed for simplicity, making it accessible for bakers of all skill levels, even those new to gluten-free baking.
- Perfectly Tender & Fluffy: The carefully balanced ratio of wet and dry ingredients, combined with room-temperature components, guarantees a light, airy, and exceptionally tender crumb that mirrors traditional muffins.
- Rich, Appealing Flavor: A hint of vanilla and a balanced sweetness create a delectable base that perfectly complements any mix-ins you decide to add, from fruits to chocolate.
- Remarkably Customizable: This isn’t just a single muffin recipe; it’s a versatile canvas. Use it to create endless variations—from classic blueberry to decadent chocolate chip, or even savory herb muffins—catering to every craving and season.
- Ideal for Meal Prep: Prepare a batch on the weekend, and you’ll have delicious, nutrient-rich breakfasts and snacks ready to grab and go for several days. They store beautifully and freeze exceptionally well.
- Everyday Kitchen Equipment: You won’t need any fancy gadgets. A couple of mixing bowls, a whisk, and a standard muffin pan are all you need to bring these delightful treats to life.
Gluten-Free Muffins: The Comprehensive Master Recipe
Below, you’ll find the complete guide to crafting these incredible gluten-free muffins. From the precise measurements of each ingredient to the step-by-step baking process, every detail is covered to ensure your success in the kitchen.
Recipe At a Glance
This master recipe is designed to yield 12 perfectly sized muffins, making it ideal for family breakfasts, snack boxes, or entertaining. With efficient preparation and baking times, you can enjoy freshly baked muffins in less than an hour.
- Yields: 12 generously sized muffins
- Preparation Time: 15 minutes
- Cook Time: 18-20 minutes
- Total Time: Approximately 33-35 minutes
- Cuisine: American
- Course: Breakfast, Dessert, Snack
- Author: Sabine Venier
- Overall Rating: 5 out of 5 stars (based on numerous positive baker reviews)
Ingredients for Perfectly Fluffy Gluten-Free Muffins
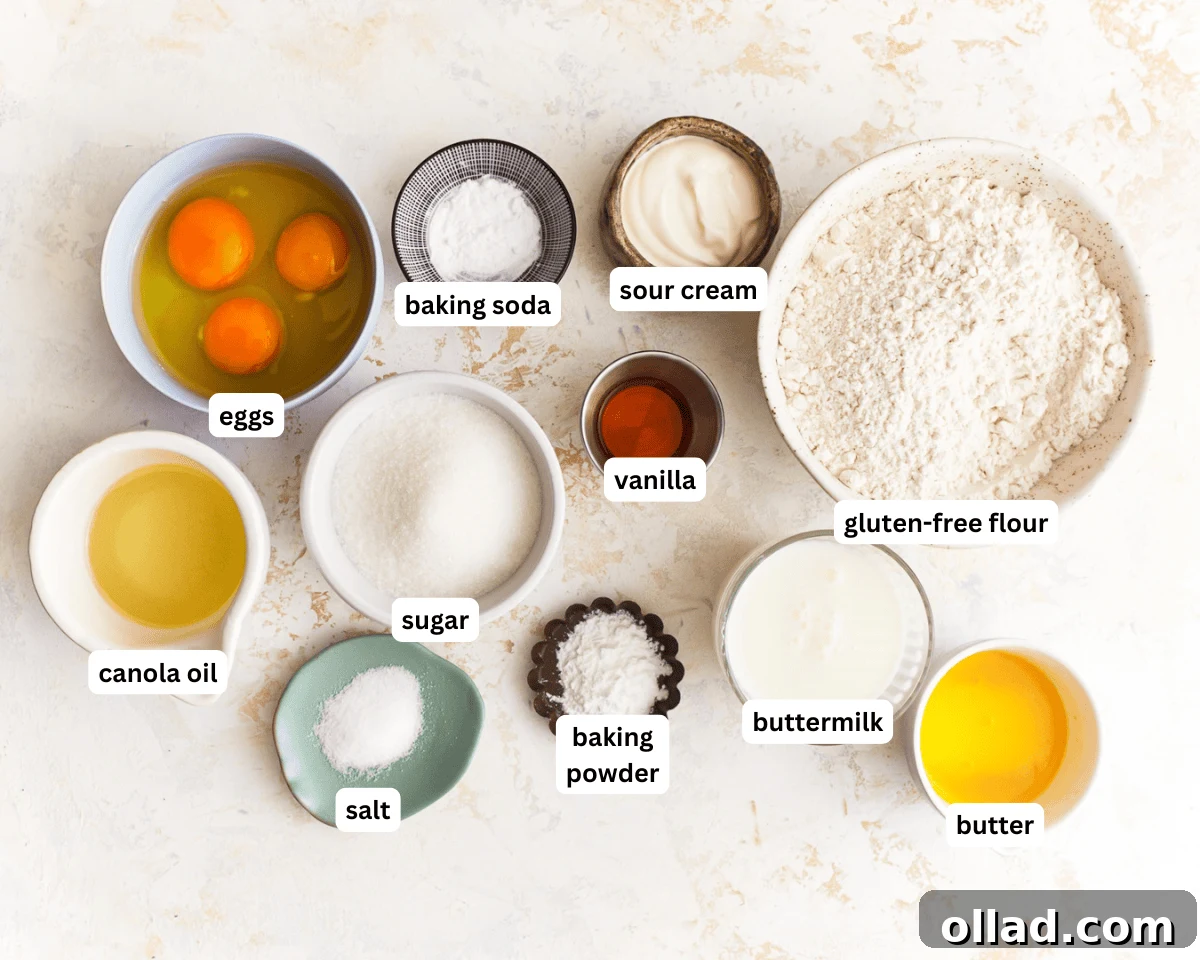
Before you begin, ensure all your ingredients are measured and ready. Using room-temperature wet ingredients is a fundamental secret to achieving that smooth batter and ultimately, the moistest, most tender muffins.
- 3 large eggs, at room temperature
- 1 cup buttermilk, at room temperature (critical for tenderness and activating baking soda; see notes for dairy-free or DIY substitutes)
- 1/4 cup sour cream, at room temperature (full-fat sour cream adds richness and ensures a moist crumb)
- 1/4 cup unsalted butter, melted and then allowed to cool slightly (warm, not hot)
- 1/4 cup canola oil (or other neutral-flavored vegetable oil like grapeseed or sunflower oil, contributing to overall moisture)
- 1 tsp pure vanilla extract (enhances all the flavors with its warm, sweet notes)
- 2 cups gluten-free all-purpose flour blend with xanthan gum (using a blend specifically designed for 1:1 substitution is recommended for best results; if your blend lacks xanthan gum, add 1/2 tsp)
- 1 tsp baking powder (the primary leavening agent responsible for the muffins’ initial rise)
- 1/2 tsp baking soda (works with the acidity of buttermilk and sour cream to provide additional lift and a tender texture)
- 1/2 tsp salt (balances the sweetness and intensifies the overall flavor profile)
- 1 cup granulated sugar (provides sweetness, aids in browning, and contributes to moisture retention)
- 1 cup mix-ins, such as chocolate chips, fresh or dried berries, chopped nuts, or shredded coconut (optional, but highly encouraged for personalized flavors!)
Baking Instructions: Step-by-Step Guide
Follow these clear and concise instructions for a perfect batch of gluten-free muffins. Remember, gentle mixing is crucial for the ideal texture.
- Preheat Oven & Prepare Pan: Begin by preheating your oven to 375°F (190°C). Prepare a standard 12-cup muffin pan. For easy removal and cleanup, line each cup with paper muffin liners. If you don’t have liners, generously grease each well with butter or a non-stick cooking spray.
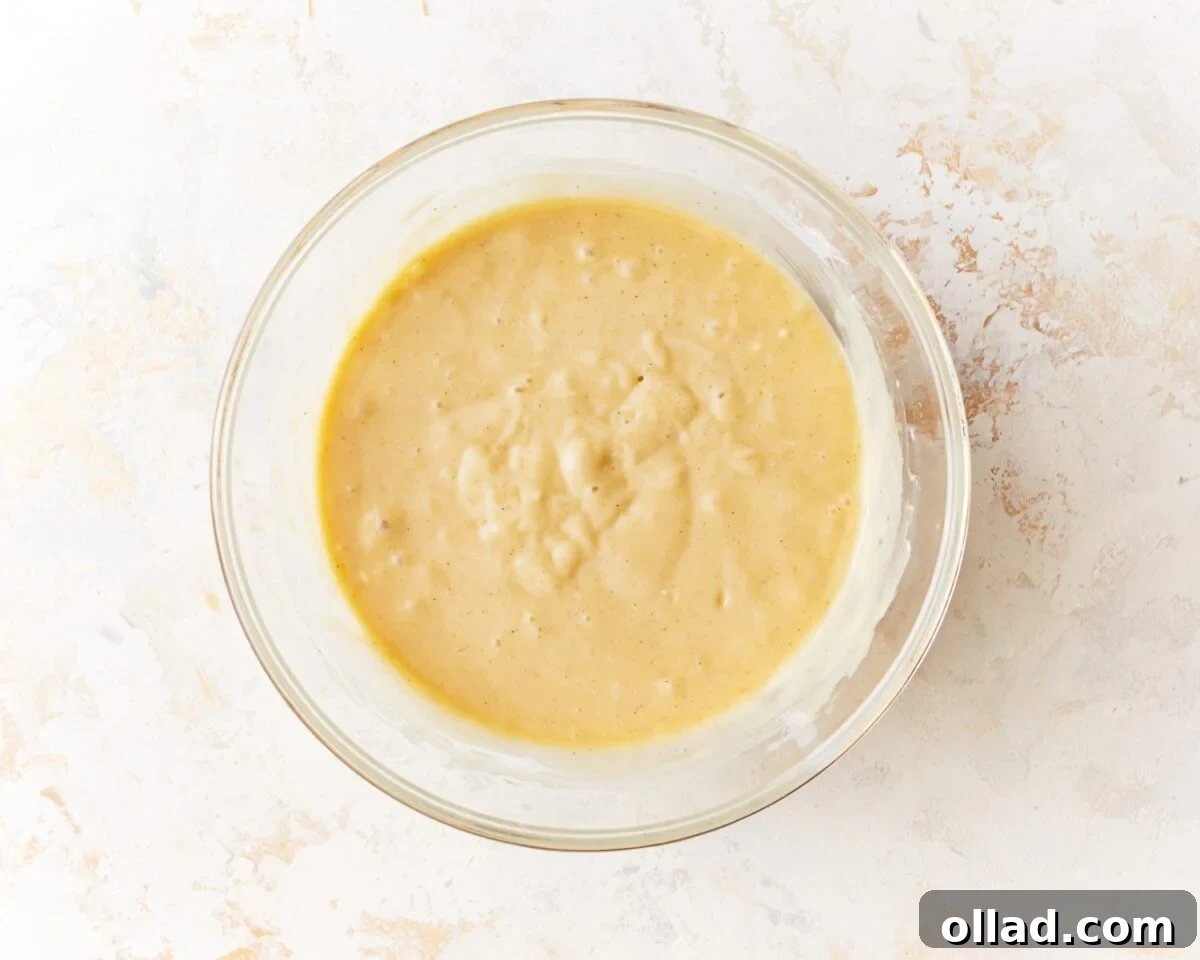
- Combine Wet Ingredients: In a large mixing bowl, thoroughly whisk together the room-temperature eggs, buttermilk, sour cream, the slightly cooled melted butter, canola oil, and pure vanilla extract. Continue whisking until the mixture is completely smooth and homogeneous, with no visible streaks.
- Incorporate Dry Ingredients: Carefully add the gluten-free all-purpose flour blend (which includes xanthan gum), baking powder, baking soda, salt, and granulated sugar into the bowl with the wet ingredients. Using a spatula or a wooden spoon, gently stir the mixture until the dry ingredients are just combined with the wet. It’s vital not to overmix; a few small lumps in the batter are perfectly acceptable and actually contribute to a more tender muffin.
- Fold in Mix-ins (Optional): If you’ve chosen to enhance your muffins with mix-ins like chocolate chips, fresh blueberries, or chopped nuts, gently fold them into the batter now. Distribute them evenly throughout the batter with minimal stirring to avoid overworking it.
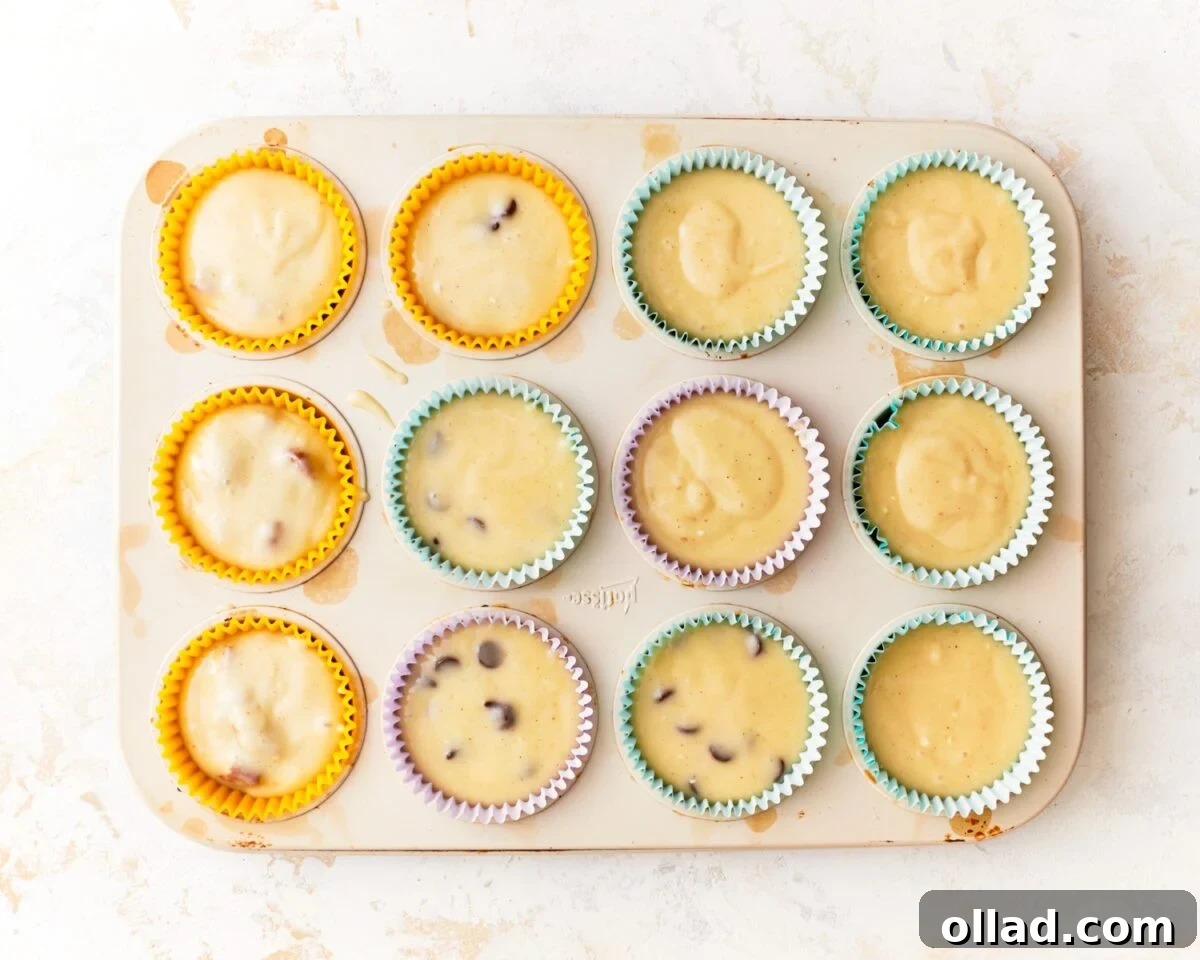
- Fill Muffin Cups: Using an ice cream scoop or a large spoon, divide the muffin batter evenly among the 12 prepared muffin cups. Fill each cup approximately three-quarters full. This ensures the muffins have enough room to rise beautifully and achieve those classic domed tops without overflowing.
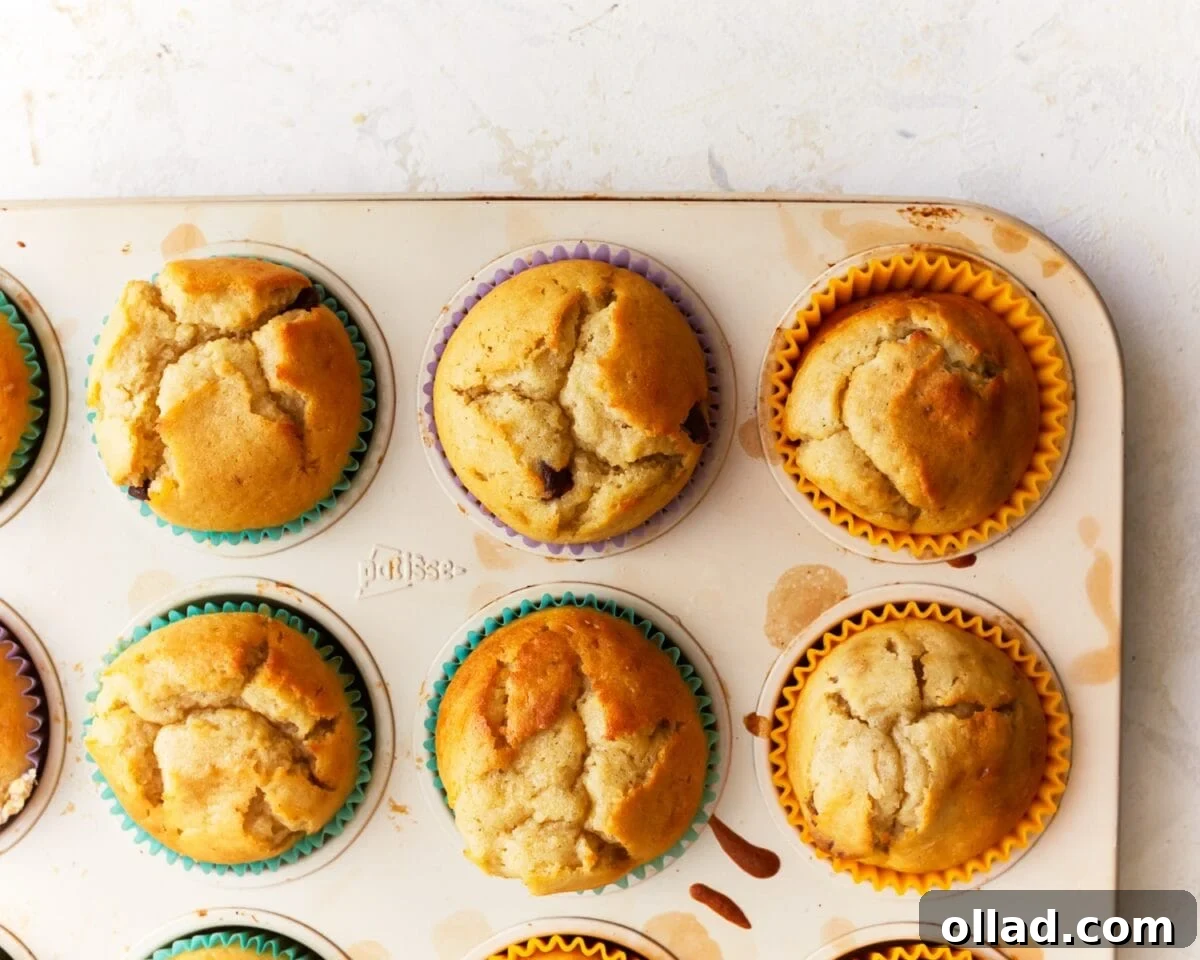
- Bake to Perfection: Place the muffin pan into your preheated oven. Bake for 18-20 minutes, or until the tops of the muffins are golden brown and spring back lightly when touched. To confirm doneness, insert a wooden toothpick into the center of a muffin; it should come out clean.
- Cool & Serve: Once baked, remove the muffin pan from the oven. Allow the muffins to cool in the pan for about 5 minutes. This brief cooling period helps them firm up and prevents them from sticking or falling apart when transferred. After 5 minutes, carefully transfer the muffins to a wire rack to cool completely. Serve warm for the ultimate treat, or store for later.
Important Notes, Substitutions, and Pro Tips
These additional insights will help you customize your gluten-free muffins and troubleshoot common baking questions:
- Buttermilk Substitutions: No buttermilk? No problem! You can use regular dairy milk (whole milk often yields richer results) if dairy isn’t an issue. For a dairy-free alternative, any plant-based milk (almond, soy, oat) works perfectly. To create a DIY buttermilk substitute, simply add 1 tablespoon of lemon juice or white vinegar to 1 cup of your chosen milk (dairy or non-dairy) and let it sit for 5-10 minutes until it slightly curdles.
- Adjusting Sugar Levels: The recipe calls for 1 cup of granulated sugar for a balanced sweetness that appeals to most. If you prefer your muffins less sweet, you can reduce the sugar by up to 1/4 cup. Bear in mind that sugar not only adds sweetness but also plays a role in the texture and moisture of the muffins, so a significant reduction might slightly alter the crumb.
- The Magic of Muffin Liners: While greasing the muffin tin is an option, I wholeheartedly recommend using paper muffin liners. They ensure effortless removal, make cleanup a breeze, and help the muffins maintain their perfect shape, especially when adding moist fruit mix-ins.
- Choosing Your Gluten-Free Flour Blend: The quality of your gluten-free all-purpose flour blend is crucial. Opt for a reputable brand that specifically states it contains xanthan gum, which provides the necessary structure and elasticity that gluten typically offers. If your chosen blend does not include xanthan gum, add approximately 1/2 teaspoon for every cup of flour specified in the recipe.
- The Importance of Room Temperature: This is a non-negotiable tip for achieving the best texture. Cold ingredients, particularly eggs and dairy, do not combine as smoothly with fats, which can lead to a less uniform batter and a denser, less tender muffin. Plan ahead and take your refrigerated ingredients out 30-60 minutes before you start baking.
Nutrition Facts (per 1 muffin serving)
Please be aware that this nutrition information is an estimated calculation, automatically generated, and can vary significantly based on the specific brands, ingredient substitutions, and exact quantities used. It should be considered an approximation for general informational purposes only.
- Serving Size: 1 muffin
- Calories: 247 kcal
- Carbohydrates: 33 g
- Protein: 4 g
- Fat: 12 g
- Saturated Fat: 4 g
- Polyunsaturated Fat: 2 g
- Monounsaturated Fat: 5 g
- Trans Fat: 0.2 g
- Cholesterol: 62 mg
- Sodium: 219 mg
- Potassium: 52 mg
- Fiber: 2 g
- Sugar: 19 g
- Vitamin A: 249 IU
- Vitamin C: 0.04 mg
- Calcium: 69 mg
- Iron: 1 mg
How to Make Gluten-Free Muffins: A Visual Step-by-Step Guide
A picture is worth a thousand words, especially in baking! Follow this visual guide to see each crucial step in making these delightful gluten-free muffins, ensuring you achieve perfect results every time.


Expert Tips for Consistently Perfect Gluten-Free Muffins
Even with the best recipe, a few clever tricks can elevate your gluten-free muffin game. Follow these expert tips for consistently achieving bakery-quality results:
- Embrace Room Temperature Ingredients: This tip is paramount for superior texture. Cold ingredients resist mixing and can lead to a lumpy batter and a denser, less uniform crumb. Always ensure your eggs, buttermilk, and sour cream are at room temperature before you begin.
- Master the Spoon-and-Level Flour Method: Accurately measuring gluten-free flour is crucial. Avoid scooping directly with your measuring cup, as this can compact the flour and lead to dry, dense muffins. Instead, gently spoon the flour into your measuring cup until it overflows, then level it off with a straight edge (like the back of a knife) without pressing down.
- Never Overmix: This is arguably the most common pitfall in muffin making. Overmixing develops starches in the flour, resulting in tough, chewy muffins. Once you add the dry ingredients to the wet, stir only until they are just combined. A few small lumps in the batter are perfectly fine—they’re a sign you’re on the right track for tender muffins!
- Utilize an Ice Cream Scoop for Portioning: For perfectly uniform muffins that bake evenly and look professional, use a greased ice cream scoop to divide the batter among the muffin cups. This also minimizes mess and ensures consistent muffin sizes.
- Experiment with Fresh Fruit Additions: Fresh fruits like berries (blueberries, raspberries), diced apples, chopped peaches, or even grated zucchini add natural sweetness, moisture, and delightful bursts of flavor. Remember to gently fold them into the batter just before filling the cups to avoid overmixing.
- Avoid Overfilling Muffin Cups: Filling the muffin cups about three-quarters full allows the batter enough space to rise beautifully without spilling over, resulting in those desirable domed tops. Overfilling can lead to flat or mushroom-shaped muffins.
- Consider a Small Amount of Zest: For an extra burst of freshness and aroma, consider adding a teaspoon of citrus zest (lemon or orange) to your wet ingredients, especially if you’re making fruit-based muffins.
Endless Customization: Make These Gluten-Free Muffins Uniquely Yours!
The beauty of this master recipe lies in its incredible adaptability. It’s the perfect blank canvas for a myriad of flavor combinations. Let your culinary imagination run wild with these popular and delicious mix-in ideas to create muffins that suit any occasion or preference:
- Fruity & Vibrant Options:
- Classic Blueberry: Gently fold in 1 cup of fresh or frozen blueberries. If using frozen, toss them lightly in a tablespoon of gluten-free flour first to prevent them from sinking to the bottom.
- Luscious Raspberry & White Chocolate: Combine 1 cup of fresh raspberries with 1/2 cup of high-quality white chocolate chips for a sweet and tart delight.
- Comforting Apple Cinnamon: Add 1 cup of finely diced apples and 1 teaspoon of ground cinnamon to the batter. A sprinkle of cinnamon sugar on top before baking adds a lovely crunch.
- Bright Lemon Poppy Seed: Introduce 2 tablespoons of poppy seeds and the zest of one fresh lemon to the wet ingredients for a zesty, aromatic muffin.
- Festive Cranberry Orange: Mix in 1 cup of fresh or dried cranberries along with the bright zest of one orange.
- Decadent Chocolate Lover’s Choices:
- Ultimate Double Chocolate: Elevate your muffins by adding 1/2 cup of unsweetened cocoa powder to the dry ingredients, then fold in 1 cup of your favorite chocolate chips (milk, dark, or semi-sweet).
- Sweet Chocolate Chip Banana: Incorporate 1/2 cup of mashed ripe banana into the wet ingredients and fold in 1 cup of classic chocolate chips.
- Nutty, Spiced & Hearty Variations:
- Wholesome Banana Nut: Blend 1/2 cup of mashed ripe banana into the wet ingredients and fold in 1 cup of crunchy chopped walnuts or pecans.
- Autumnal Pumpkin Spice: Add 1/2 cup of pumpkin puree to the wet ingredients and enhance the flavor with 1-2 teaspoons of pumpkin pie spice blend.
- Crunchy Streusel Topping: For an extra special texture, prepare a simple streusel (e.g., 1/4 cup gluten-free flour, 2 tablespoons granulated sugar, 2 tablespoons cold butter cut into small pieces, and a pinch of cinnamon) and sprinkle it generously over the batter before baking.
- Exotic & Tropical Twists:
- Tropical Coconut Pineapple: Fold in 1/2 cup of shredded coconut (sweetened or unsweetened) and 1/2 cup of finely diced pineapple for a taste of the tropics.
Storage & Freezing Instructions for Lasting Freshness
Proper storage is key to maintaining the deliciousness and moisture of your homemade gluten-free muffins. Here’s how to keep them fresh for longer:
Room Temperature Storage: To keep your muffins fresh for daily enjoyment, store any leftover muffins in an airtight container at room temperature. They will remain wonderfully moist and flavorful for up to 3 days. For a slightly extended shelf life, especially in warmer climates, you can refrigerate them for up to 4 days.
Reheating: For that freshly baked warmth, simply reheat refrigerated or room-temperature muffins in the microwave for 15-20 seconds, or in a toaster oven for a few minutes, until gently warmed through.
Freezing for Long-Term Storage: These gluten-free muffins freeze exceptionally well, making them ideal for future breakfasts or spontaneous snacks! To freeze, first ensure the muffins have cooled completely to room temperature on a wire rack. Once fully cooled, individually wrap each muffin tightly in plastic wrap to prevent freezer burn. For an extra layer of protection, you can then place the wrapped muffins into a freezer-safe bag or wrap them again in aluminum foil. Stored this way, they will stay fresh for up to 3 months in the freezer.
Thawing Frozen Muffins: When you’re ready to enjoy a frozen muffin, simply remove the desired number from the freezer. You can let them thaw gradually at room temperature for a few hours (perfect for an afternoon snack), or place them in the refrigerator overnight to thaw. For a quick thaw and warm treat, gently reheat the frozen muffins in the microwave for 30-60 seconds, or in a toaster oven until they are heated through and soft.
Frequently Asked Questions (FAQs) About Gluten-Free Muffins
Here are answers to some common questions that arise when baking gluten-free muffins:
- Q: Which gluten-free flour blend is best for these muffins?
- A: For optimal results, I highly recommend using a high-quality, all-purpose gluten-free flour blend that explicitly states it contains xanthan gum. Popular and reliable brands such as Bob’s Red Mill 1-to-1 Baking Flour or King Arthur Gluten-Free Measure for Measure Flour typically work very well. If your chosen blend does not include xanthan gum, it’s crucial to add about 1/2 teaspoon per cup of flour to the dry ingredients to ensure proper structure and prevent crumbly muffins.
- Q: Can I adapt this recipe to be dairy-free?
- A: Absolutely! Making these muffins dairy-free is straightforward. Replace the buttermilk with a dairy-free milk alternative (such as almond milk, oat milk, or soy milk) that has been soured with 1 tablespoon of lemon juice or vinegar to create a dairy-free “buttermilk.” For the sour cream, you can use a plain dairy-free yogurt or a specialized dairy-free sour cream substitute. Ensure any butter used is also swapped for a dairy-free butter alternative or you can slightly increase the amount of canola oil.
- Q: Why did my muffins turn out dry or crumbly?
- A: Dry or crumbly muffins are often caused by one of two common mistakes: overmixing the batter or overbaking. Ensure you only stir the batter until the dry ingredients are just incorporated, stopping as soon as no dry streaks remain. Also, oven temperatures can vary, so it’s a good idea to use an oven thermometer. Begin checking for doneness at the lower end of the recommended baking time (around 18 minutes) to avoid overbaking, which can quickly dry out gluten-free baked goods.
- Q: How can I achieve those beautiful domed tops on my muffins?
- A: Several factors contribute to achieving those coveted domed tops:
- Room Temperature Ingredients: These create a smoother, more uniform batter that rises consistently.
- Gentle Mixing: Avoid overmixing, as a light batter rises better.
- Correct Leavening: The precise balance of baking powder and baking soda in this recipe is key to providing adequate lift.
- Filling Muffin Cups 3/4 Full: This provides enough batter to rise into a lovely dome without overflowing.
- Q: Is it okay to substitute other oils for canola oil?
- A: Yes, absolutely. You can easily substitute canola oil with other neutral-flavored oils like vegetable oil, grapeseed oil, or even melted and cooled coconut oil. Just ensure that if using coconut oil, it is in a liquid state and at room temperature to blend smoothly with the other wet ingredients.
Explore More Delicious Gluten-Free Muffin Recipes!
If you’ve fallen in love with the versatility and deliciousness of this master recipe, you’ll be thrilled to discover other specialized gluten-free muffin variations. Each recipe offers a unique flavor profile while maintaining the tender, moist texture you now know and adore from this ultimate guide.
- Irresistible Gluten-Free Banana Muffins
- Effortlessly Easy Gluten-Free Blueberry Muffins
- Flavorful Gluten-Free Pumpkin Muffins (Seasonal Favorite!)
- Wholesome Gluten-Free Zucchini Muffins (A Great Way to Add Veggies!)
- Decadent Gluten-Free Double Chocolate Muffins (For the Chocolate Lovers!)
- Comforting Gluten-Free Apple Cinnamon Crumb Muffins
- Naturally Delicious Coconut Flour Muffins