
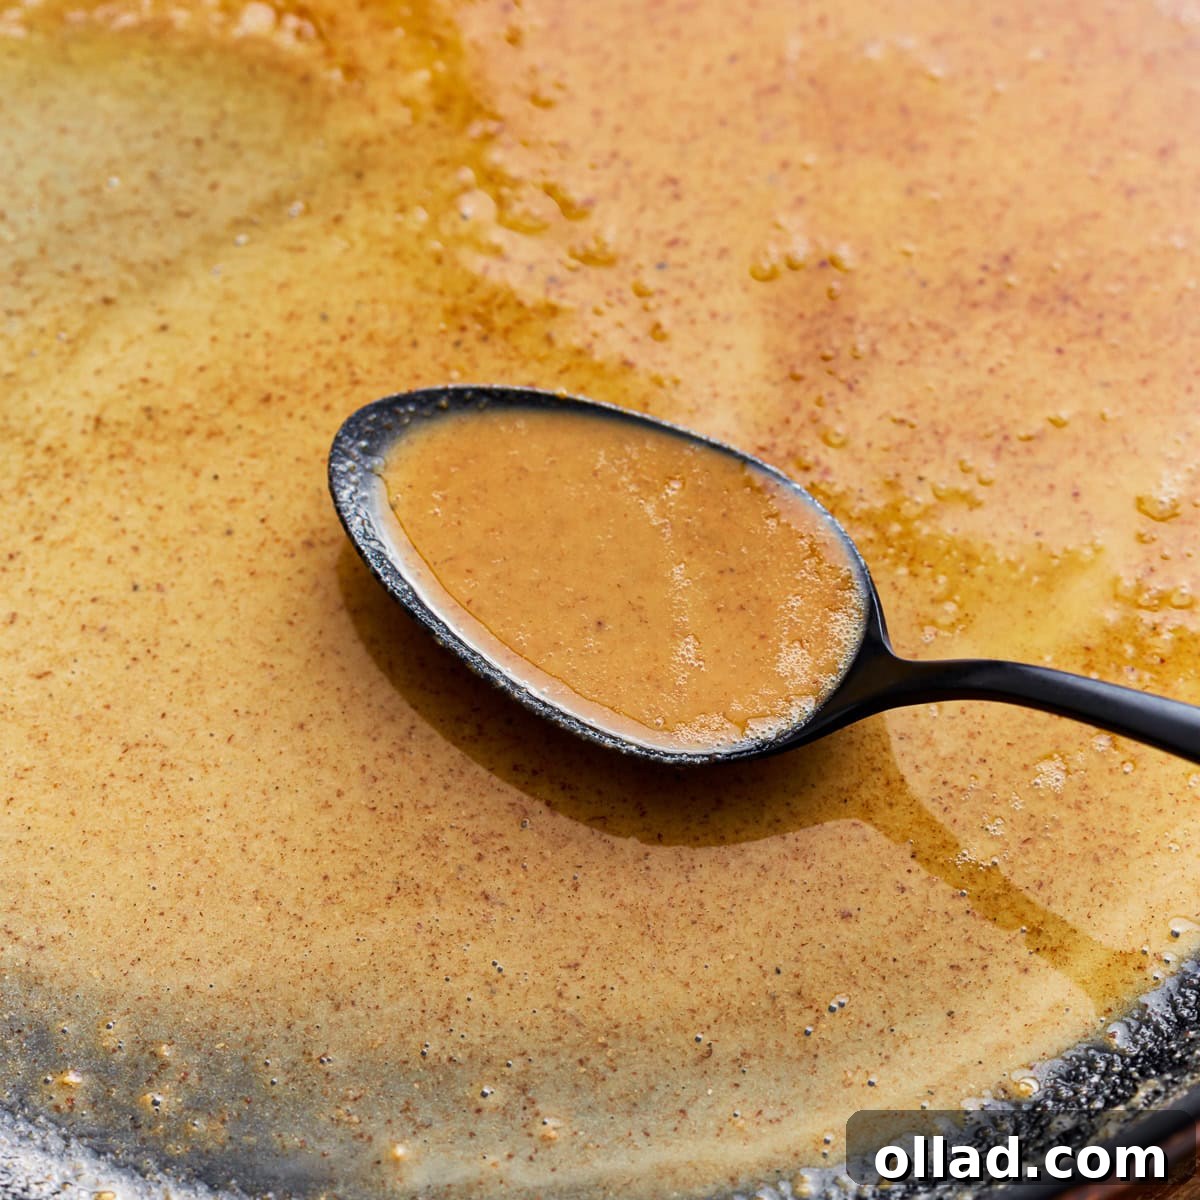
Discover the cornerstone of countless delicious, saucy dishes that cater to a gluten-free lifestyle: the simple yet essential gluten-free roux. For anyone navigating the world of gluten-free cooking, mastering a versatile thickening agent is a game-changer. Traditionally, a roux is crafted with wheat flour, a staple that’s off-limits for those with celiac disease or gluten sensitivities. This easy-to-follow recipe offers a fantastic alternative, swapping conventional flour for a reliable gluten-free blend, combined with rich butter to form the perfect creamy, thick base for your favorite gravies, sauces, and soups. It’s not just about thickening; it’s about building flavor and achieving that desirable silky texture without compromise. My tested method emphasizes the crucial balance of fat to flour and the optimal cooking time, ensuring a consistently smooth and flavorful result every single time. This isn’t just a recipe; it’s a fundamental technique that will unlock a world of culinary possibilities in your gluten-free kitchen, making it indispensable for any gluten-free cook.
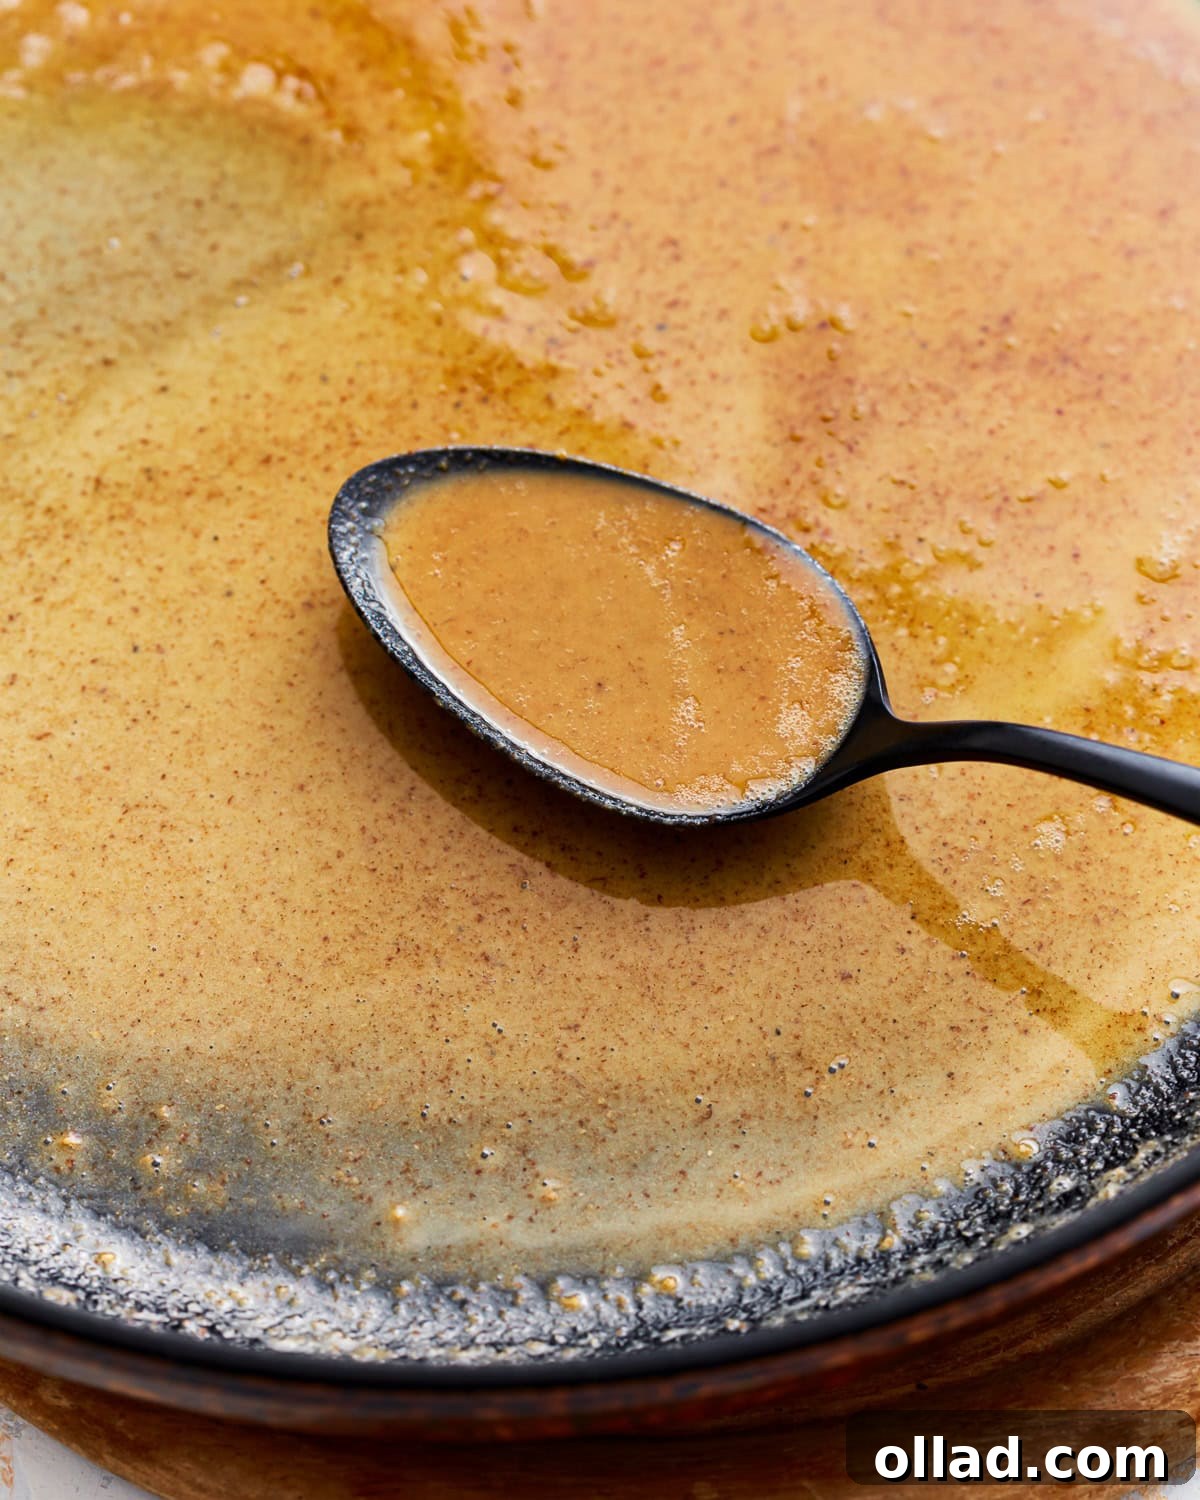
Mastering the Gluten-Free Roux: The Ultimate Thickening Agent
A roux is a foundational element in classical French cuisine, and it plays an equally vital role in modern gluten-free cooking. Essentially, it’s a cooked mixture of fat (typically butter) and flour, designed to create a paste-like consistency. This paste then serves as the essential thickener for an array of dishes, from rich gravies and creamy soups to hearty stews and decadent cheese sauces. In the realm of gluten-free cooking, the challenge lies in selecting the right flour substitute that mimics the thickening power and textural contribution of traditional wheat flour. My recipe demystifies this process, ensuring you can achieve a perfectly smooth, stable, and flavorful roux every time. The key is in precise ratios and careful cooking, transforming simple ingredients into a powerful culinary tool that enhances both the texture and the nutty depth of your dishes. From a simple weeknight meal to a holiday feast, a well-made gluten-free roux is your secret ingredient for culinary success.
Why Choose Gluten-Free Roux?
Opting for a gluten-free roux isn’t just a dietary necessity for some; it’s a smart choice for enhancing the digestibility and accessibility of many beloved dishes. For individuals with celiac disease, gluten sensitivity, or those following a gluten-free lifestyle, a traditional wheat-based roux is strictly off-limits. This recipe provides a safe and delicious alternative, allowing everyone to enjoy the rich, thick consistency that a roux brings to gravies and sauces. Beyond dietary restrictions, gluten-free flours can often impart unique nutritional benefits and subtle flavor profiles to your cooking. Crafting your own gluten-free roux from scratch also gives you complete control over the ingredients, ensuring freshness and avoiding hidden additives found in some store-bought thickeners. It empowers you to create healthier, homemade meals that don’t compromise on taste or texture.
Essential Ingredients for Your Gluten-Free Roux
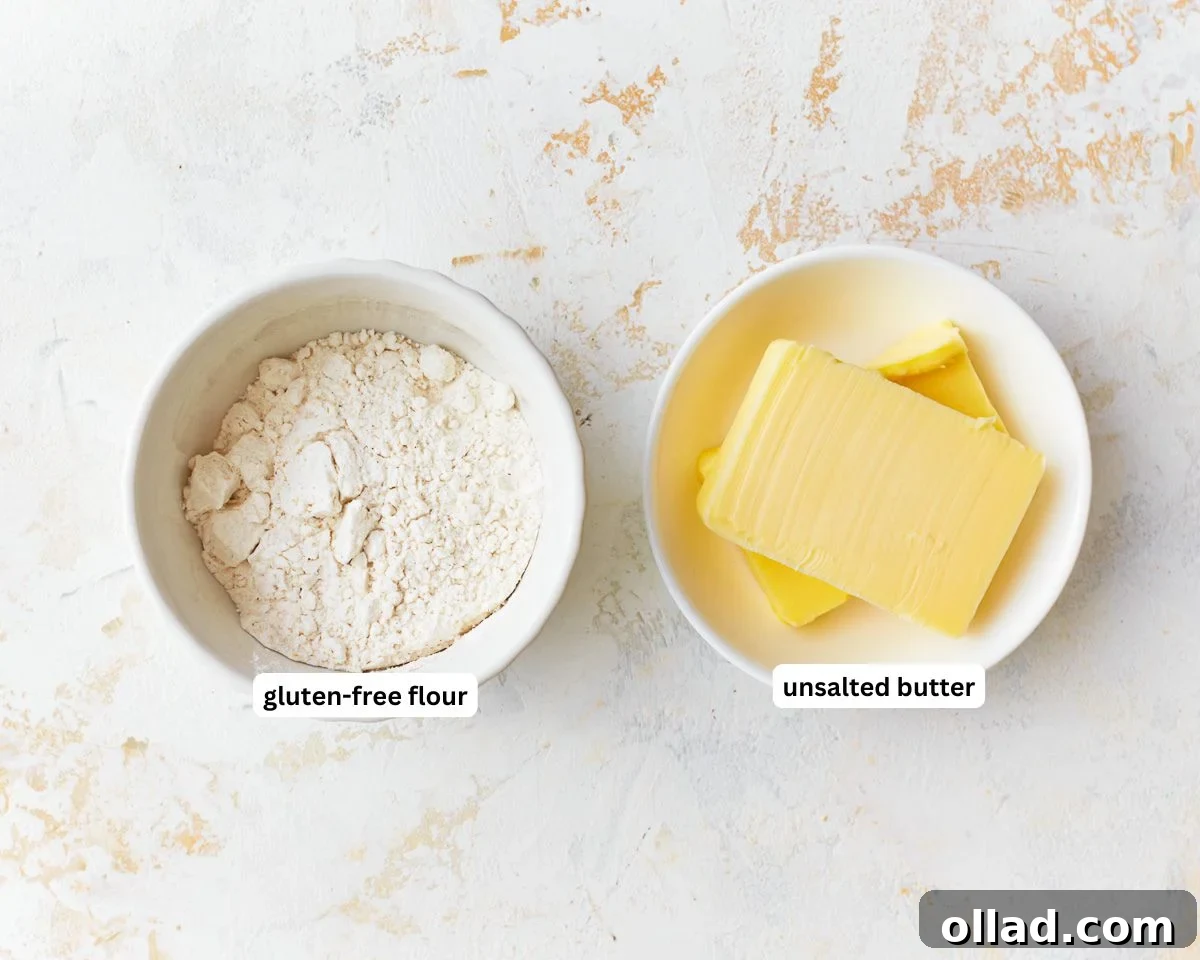
- Unsalted Butter: I highly recommend using unsalted butter for this recipe. It gives you precise control over the overall salt content in your final dish. Different brands of salted butter can vary significantly in their sodium levels, which might inadvertently lead to an overly salty sauce or gravy. If you only have salted butter on hand, it’s certainly usable, but remember to drastically reduce or omit any additional salt you would normally add to your recipe until you taste the finished product. This flexibility ensures your dishes are perfectly seasoned.
- Gluten-Free Flour Blend: The choice of gluten-free flour is paramount here, as it directly impacts the roux’s consistency and thickening power. Not all gluten-free flours are created equal; some are more absorbent than others. I recommend using a high-quality, all-purpose gluten-free flour blend that is specifically designed for baking and thickening, often containing a mix of rice flour, tapioca starch, potato starch, and sometimes xanthan gum. Avoid single-ingredient gluten-free flours like almond or coconut flour, which behave very differently. When incorporating the flour, always add it slowly and whisk continuously. Pay close attention to the thickness of your roux as you go; if it seems too thin, you might need a tiny bit more flour, or vice versa if it becomes too thick too quickly. Different blends will yield slightly different results, so don’t be afraid to experiment with your favorite blend.
Expert Tips and Suggestions for a Perfect Roux
- Achieving the Right Consistency and Color: The ideal gluten-free roux is a light golden-brown with a smooth, paste-like consistency. This usually takes about 8-10 minutes of consistent stirring over medium heat. The color is not just aesthetic; it indicates that the flour has been sufficiently cooked, removing any raw flour taste, and has begun to develop a delicious nutty aroma that will add depth to your dish. A darker roux will have a more pronounced flavor and less thickening power.
- Preventing Lumps: Lumps are the enemy of a smooth sauce! To avoid them, gradually sprinkle the gluten-free flour into the melted butter while vigorously whisking. Adding all the flour at once can create a dense mass that’s difficult to break down. Continuous whisking ensures that each flour particle is coated with fat, preventing it from clumping together when liquid is added later.
- Alternative Fats for Dietary Needs and Flavor: While unsalted butter provides a rich, classic flavor, you can certainly use other fats. For a dairy-free option, substitute with a good quality dairy-free butter alternative or a neutral-flavored vegetable oil like canola, grapeseed, or avocado oil. Keep in mind that using different fats will slightly alter the final flavor and consistency of your roux and, consequently, your dish. Olive oil can also be used, but its stronger flavor might be noticeable.
- Troubleshooting: What to Do If Your Roux Burns: If your roux starts to smell burnt, turns too dark too quickly, or develops black flecks, it’s best to start over. Burnt flour will impart a bitter, unpleasant taste to your entire dish that cannot be salvaged. Don’t risk ruining your meal; a fresh start with new ingredients is always the better option.
- Scaling Your Recipe: This recipe is incredibly adaptable. Whether you need a small amount for a quick gravy or a larger batch for a family-sized casserole, you can easily adjust the quantities. The golden rule remains: always use equal parts gluten-free flour and butter for the best, most consistent results. Maintaining this 1:1 ratio is crucial for proper thickening.
- Heat Management is Key: Cooking a roux over medium heat is crucial. Too high heat can burn the flour quickly, especially gluten-free flours which can sometimes be more delicate. Too low heat will prolong the cooking process unnecessarily and may not adequately cook out the raw flour taste. A steady medium heat allows for even browning and flavor development.
- Essential Tools: A heavy-bottomed saucepan or skillet is ideal for making roux, as it distributes heat evenly and prevents scorching. A good whisk is also indispensable for continuous stirring and lump prevention.
Can You Make a Roux With Gluten-Free Flour? Absolutely!
Yes, absolutely! Making a roux with gluten-free flour is not only possible but also incredibly straightforward once you understand the basic principles. Just like a traditional roux made with wheat flour, the fundamental technique involves using a 1:1 ratio of fat (butter is preferred for its rich flavor) to gluten-free flour. The mixture is then cooked gently over medium heat, with constant stirring, until it achieves a light golden color and a smooth, cohesive consistency. The primary goal is to cook off the raw starch flavor from the flour and develop a nutty, toasted aroma that enhances the final flavor of your sauces and gravies. With practice, you’ll find that gluten-free roux is just as effective and delicious as its traditional counterpart.
Roux Versus Slurry: Understanding the Difference
While both a roux and a slurry serve the important function of thickening sauces, soups, and stews, they differ significantly in their composition, preparation, and the culinary impact they bring to a dish. Understanding these distinctions is crucial for choosing the right thickening agent for your recipe.
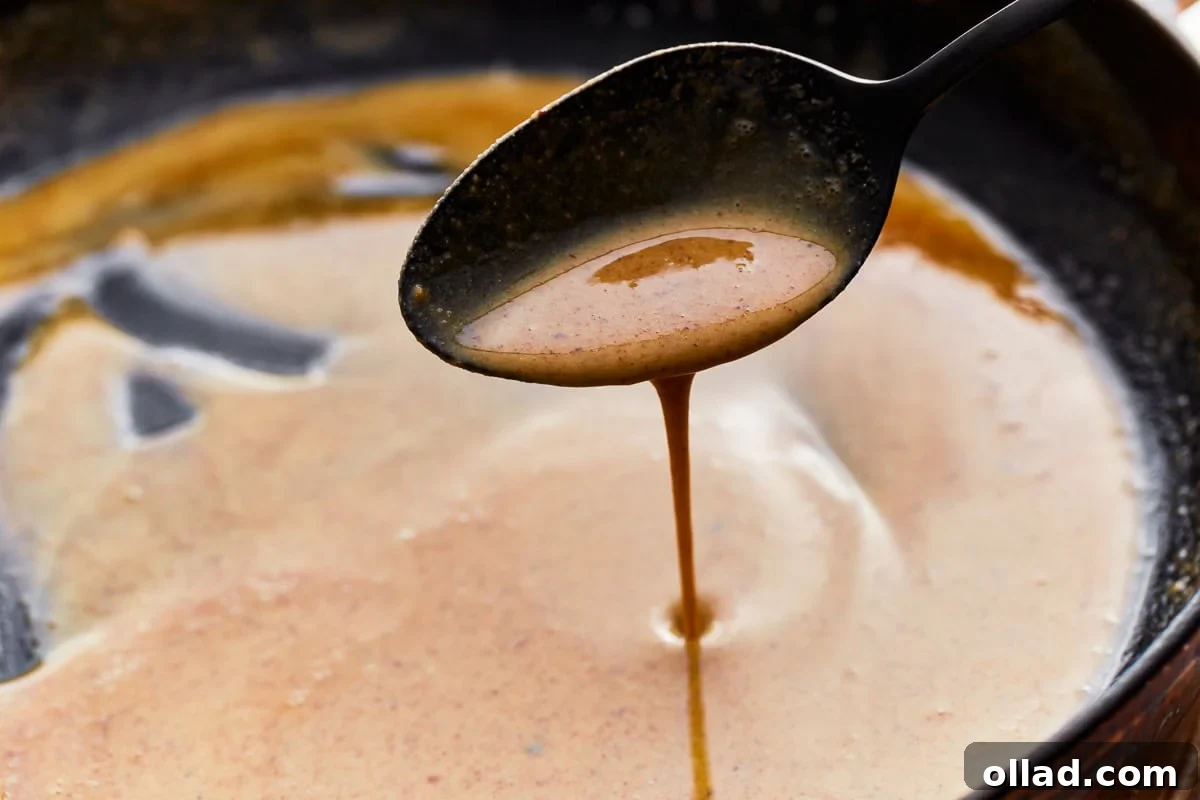
A roux is fundamentally a cooked mixture of fat (most commonly butter) and flour. The process involves cooking these two ingredients together, allowing the flour to absorb the fat and toast slightly. This cooking step is vital because it cooks out the raw taste of the flour and develops a rich, nutty flavor that contributes significantly to the overall taste profile of the final dish. A roux provides a stable, long-lasting thickening effect and creates a smooth, velvety texture, making it ideal for classic gravies, béchamel sauce, and many cream-based soups. Its flavor contribution is often an integral part of the dish’s character.
In contrast, a slurry is typically a mixture of a liquid (such as cold water, broth, or milk) and a pure starch, like cornstarch, arrowroot powder, or tapioca starch. Unlike a roux, a slurry is not cooked before being added to the hot liquid it’s intended to thicken. It works by dispersing the starch granules in cold liquid, which prevents them from clumping when introduced to heat. A slurry provides a quick and powerful thickening effect, resulting in a glossy, clear finish, which is often preferred for Asian stir-fries, fruit pie fillings, or gravies where a cleaner flavor and shinier appearance are desired. The main advantage of a slurry is that it thickens without adding any significant flavor of its own, allowing the original flavors of the dish to shine through unobstructed. However, slurries can sometimes break down if cooked for too long or exposed to high acidity, potentially leading to a thinner consistency over time, a problem less common with a stable roux.
Versatile Ways to Use Your Gluten-Free Roux
Once you’ve mastered this fundamental gluten-free roux, a world of culinary possibilities opens up! It’s an incredibly versatile base that can transform ordinary liquids into rich, satisfying meals. Imagine crafting a velvety homemade gluten-free cream of mushroom soup, far superior to anything from a can, or a comforting gluten-free cream of chicken soup. Your roux can be used to thicken robust gumbos and hearty stews, giving them that classic, full-bodied texture. Don’t stop there; it’s perfect for making a rich, savory gluten-free gravy to complement roasted meats, or a smooth béchamel sauce, which is the foundation for countless creamy dishes, including a decadent gluten-free mac and cheese. You can also use it to create cheese sauces for nachos or vegetables, or even a simple white sauce for casseroles. Its ability to add both thickness and a subtle nutty flavor makes it indispensable in a wide array of savory preparations.
Storage and Reheating: Best Practices
While this gluten-free roux recipe is quick to make, preparing a slightly larger batch can save you time for future meal preparations. Most recipes typically call for only a small amount of roux at a time. If you find yourself with any delicious leftovers, proper storage is key to maintaining its quality. Transfer the cooled roux to an airtight container and store it in the refrigerator for up to 3 days. When you’re ready to use it again, simply reheat it gently on the stovetop over low heat, stirring occasionally, until it reaches a workable consistency. You might need to add a tablespoon or two of liquid (water, milk, or broth) to help loosen it up. I generally do not recommend freezing this recipe. The delicate balance of fat and starch in a gluten-free roux can sometimes lead to an undesirable change in texture once thawed, becoming grainy or separating, which can affect the smoothness of your final dish.
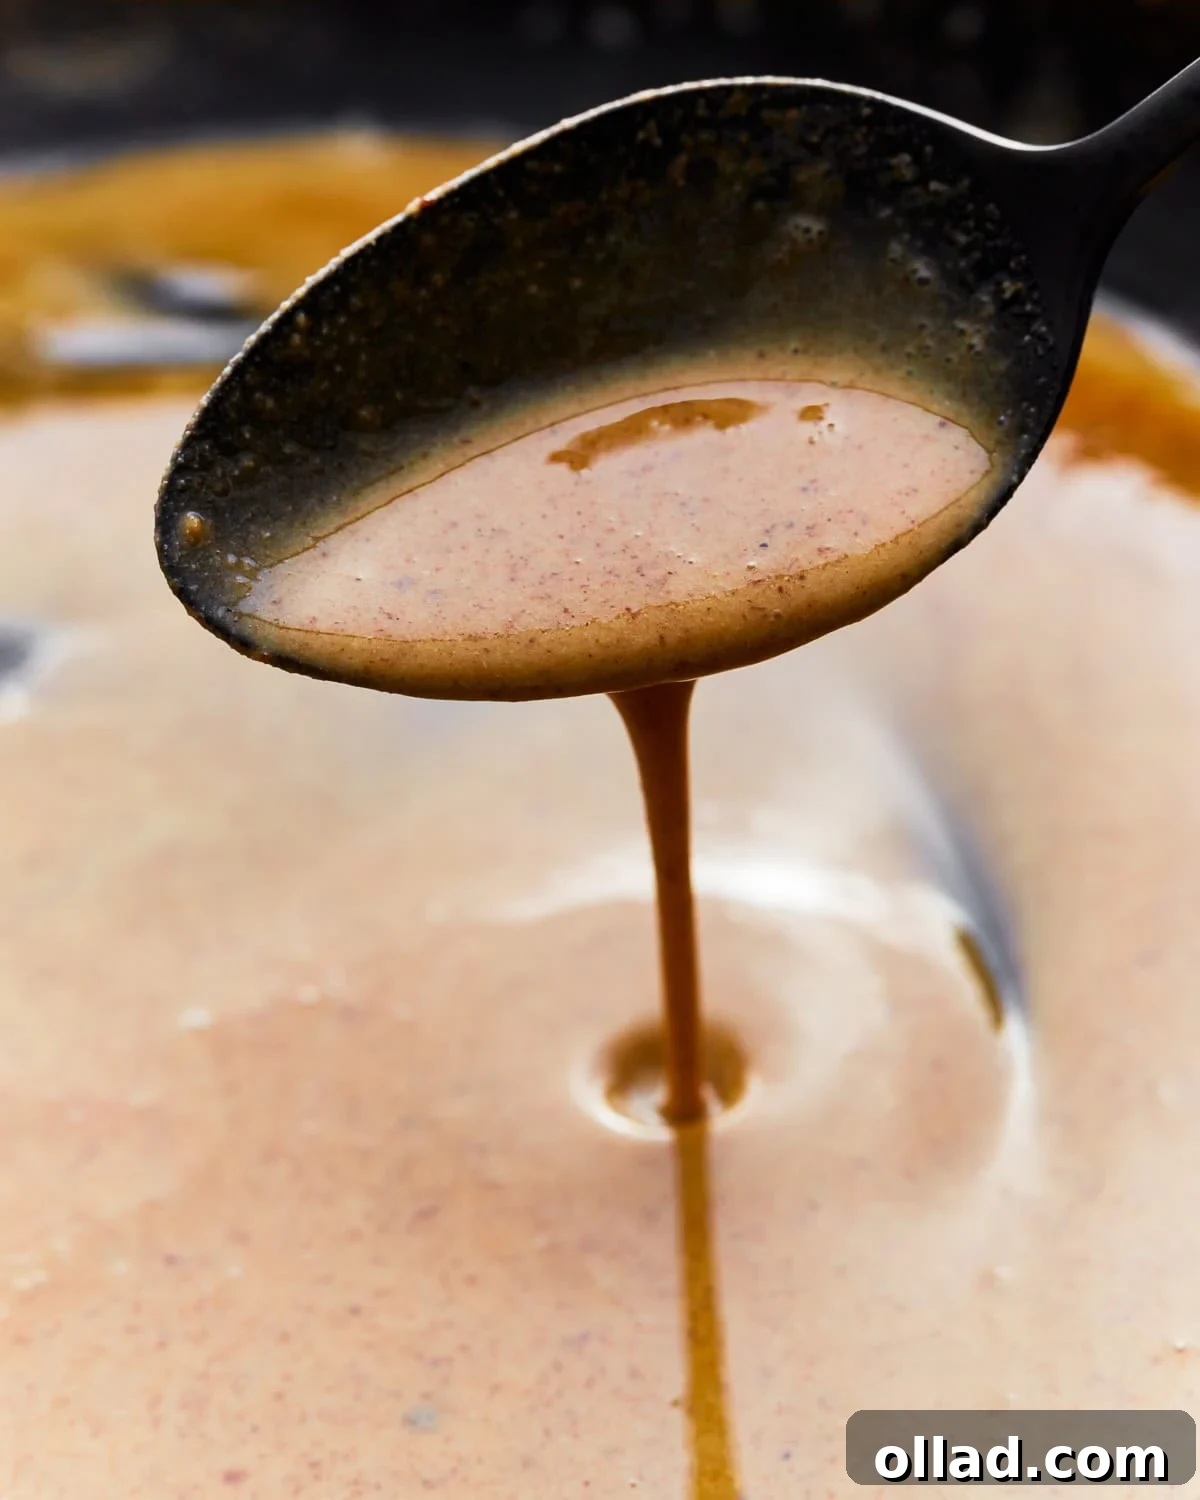
Frequently Asked Questions About Gluten-Free Roux
- What is the best gluten-free flour for roux? The best gluten-free flour is typically an all-purpose gluten-free blend that contains a mix of different flours and starches, such as rice flour, tapioca starch, and potato starch. Some blends also include xanthan gum for elasticity. Avoid single-ingredient flours like almond or coconut flour, as they don’t have the right starch content to create a stable roux.
- Can I use cornstarch instead of gluten-free flour for roux? No, cornstarch is typically used to create a slurry, not a roux. A roux requires flour to be cooked with fat to develop flavor and a stable thickening matrix. While cornstarch is an excellent thickener, it won’t provide the same flavor depth or a similar opaque, creamy texture as a roux, and its properties are different when cooked directly with fat.
- How do I know when my roux is done? Your gluten-free roux is done when it achieves a light golden-brown color and emits a pleasant, nutty aroma. This usually takes about 8-10 minutes of constant stirring over medium heat. It should have a smooth, paste-like consistency. Avoid overcooking, as a burnt roux will have a bitter taste.
- Can I make a large batch of gluten-free roux to store? Yes, you can make a larger batch! Simply scale up the 1:1 ratio of butter to gluten-free flour. Store the cooled roux in an airtight container in the refrigerator for up to 3 days. Reheat it gently on the stovetop when ready to use, adding a splash of liquid if needed to loosen it.
- Will gluten-free roux thicken immediately? A roux works by gradually thickening a liquid as it heats. When you add your roux to a hot liquid (like broth or milk), it will begin to thicken as the liquid comes to a simmer. It’s not instantaneous like some starch slurries, but rather a progressive process that results in a more stable and integrated thickness.
Explore More From Scratch Gluten-Free Recipes!
Elevate your gluten-free cooking by trying these other fantastic recipes that teach you how to make essential components from scratch:
- How to Make Oat Flour
- How to Make Almond Flour
- Homemade Gluten-Free Pasta
- Gluten-Free Gnocchi
- Vegan Mayonnaise
Gluten-Free Roux Recipe Card
Rating: 5 out of 5 stars (based on 1 vote)
Author: Sabine Venier
Yields: 1 serving
Cook Time: 10 minutes
Total Time: 10 minutes
This simple gluten-free roux recipe is your secret weapon for thickening gravies, soups, and sauces. With just two ingredients and under 10 minutes of cook time, you’ll achieve a perfect, rich base every time, adding depth and silky texture to your favorite gluten-free dishes.
Ingredients
- ¼ cup unsalted butter
- ¼ cup gluten-free flour blend
Instructions
- In a medium saucepan, melt the ¼ cup unsalted butter over medium heat. Allow it to fully melt and begin to gently bubble, indicating it’s ready for the next step.
- Gradually add the ¼ cup gluten-free flour blend to the melted butter, whisking continuously. This constant stirring is key to preventing lumps and ensuring a smooth, uniform mixture.
- Continue to cook the mixture, stirring constantly, for approximately 8-10 minutes. During this time, the roux will transform, developing a light golden-brown color and a distinct nutty aroma. This stage is crucial for cooking out the raw flour taste and enhancing the flavor of your final dish.
- Once the desired color and aroma are achieved, remove the saucepan from the heat and let the roux cool slightly before incorporating it into your chosen recipe.
Notes
- Always add flour gradually to melted butter while whisking constantly to ensure a smooth, lump-free roux.
- Storage: Store any leftover gluten-free roux in an airtight container in the refrigerator for up to 3 days. Gently reheat it on the stovetop over low heat before using.
- Ingredient Check: Always double-check ingredient labels to ensure they are certified gluten-free, especially for flour blends, to prevent cross-contamination.
Nutrition
Nutrition information is automatically calculated and should be used as an approximation.
- Serving: 1 serving (total amount as made)
- Calories: 507 kcal
- Carbohydrates: 22g
- Protein: 4g
- Fat: 47g
- Saturated Fat: 29g
- Polyunsaturated Fat: 2g
- Monounsaturated Fat: 12g
- Trans Fat: 2g
- Cholesterol: 122mg
- Sodium: 6mg
- Potassium: 14mg
- Fiber: 3g
- Sugar: 1g
- Vitamin A: 1418 IU
- Calcium: 34mg
- Iron: 1mg
Additional Info
- Course: Dinner
- Cuisine: French
How to Make a Gluten-Free Roux Step-by-Step with Images
Follow these simple steps with accompanying visuals to ensure your gluten-free roux turns out perfect every single time. This visual guide will walk you through the essential stages of preparation.
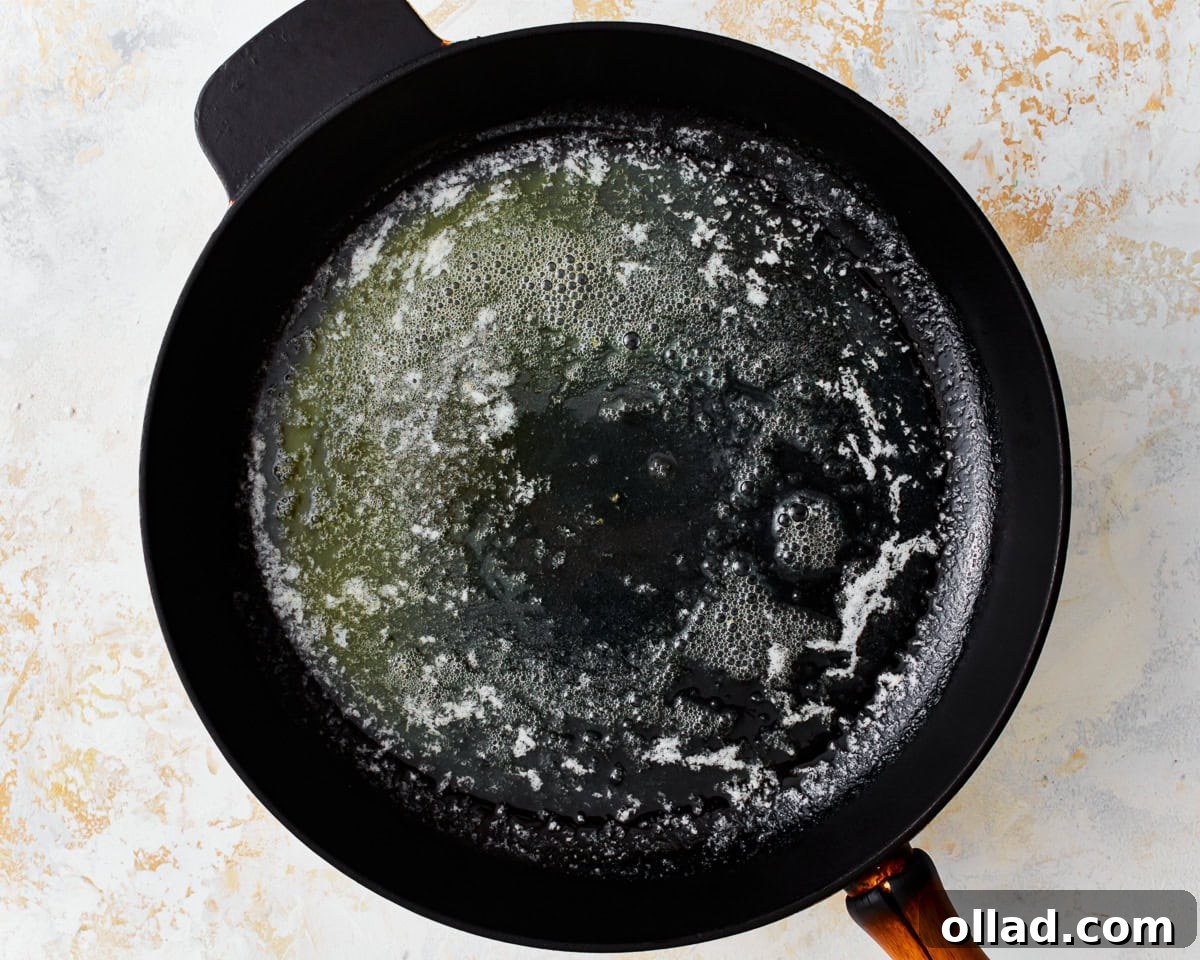
Step 1: Melt the Butter. In a sturdy saucepan, add ¼ cup of unsalted butter. Place the saucepan over medium heat and allow the butter to melt completely. Continue heating until it begins to gently bubble around the edges. This initial step is vital as it prepares a smooth, hot fat base for the flour, preventing lumps and ensuring even cooking.
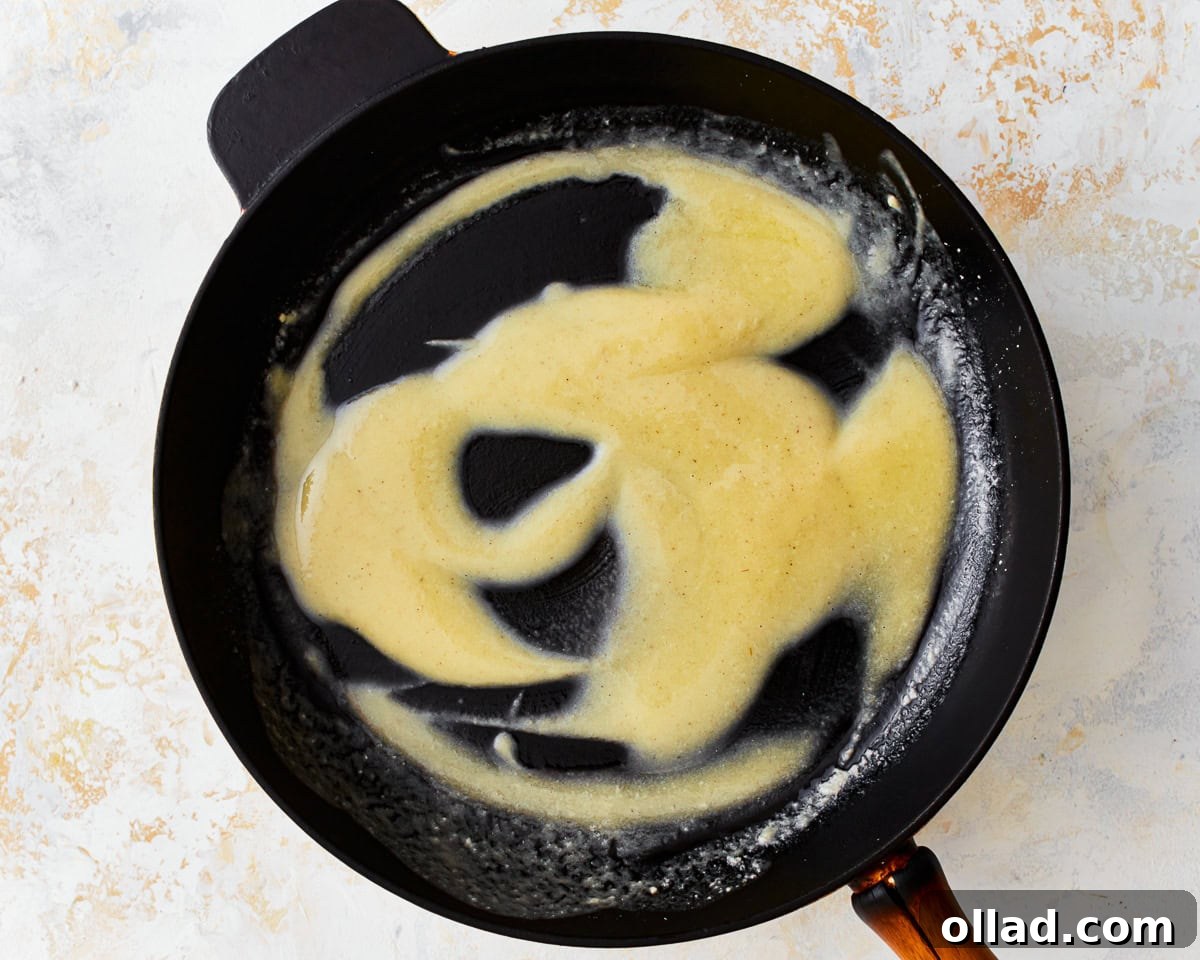
Step 2: Incorporate the Gluten-Free Flour. Once the butter is fully melted and bubbling, gradually sprinkle in ¼ cup of your preferred gluten-free flour blend. As you add the flour, maintain continuous and vigorous whisking. This constant motion is paramount for thoroughly combining the flour with the butter, creating a uniform, lump-free paste that will form the foundation of your thickening agent.
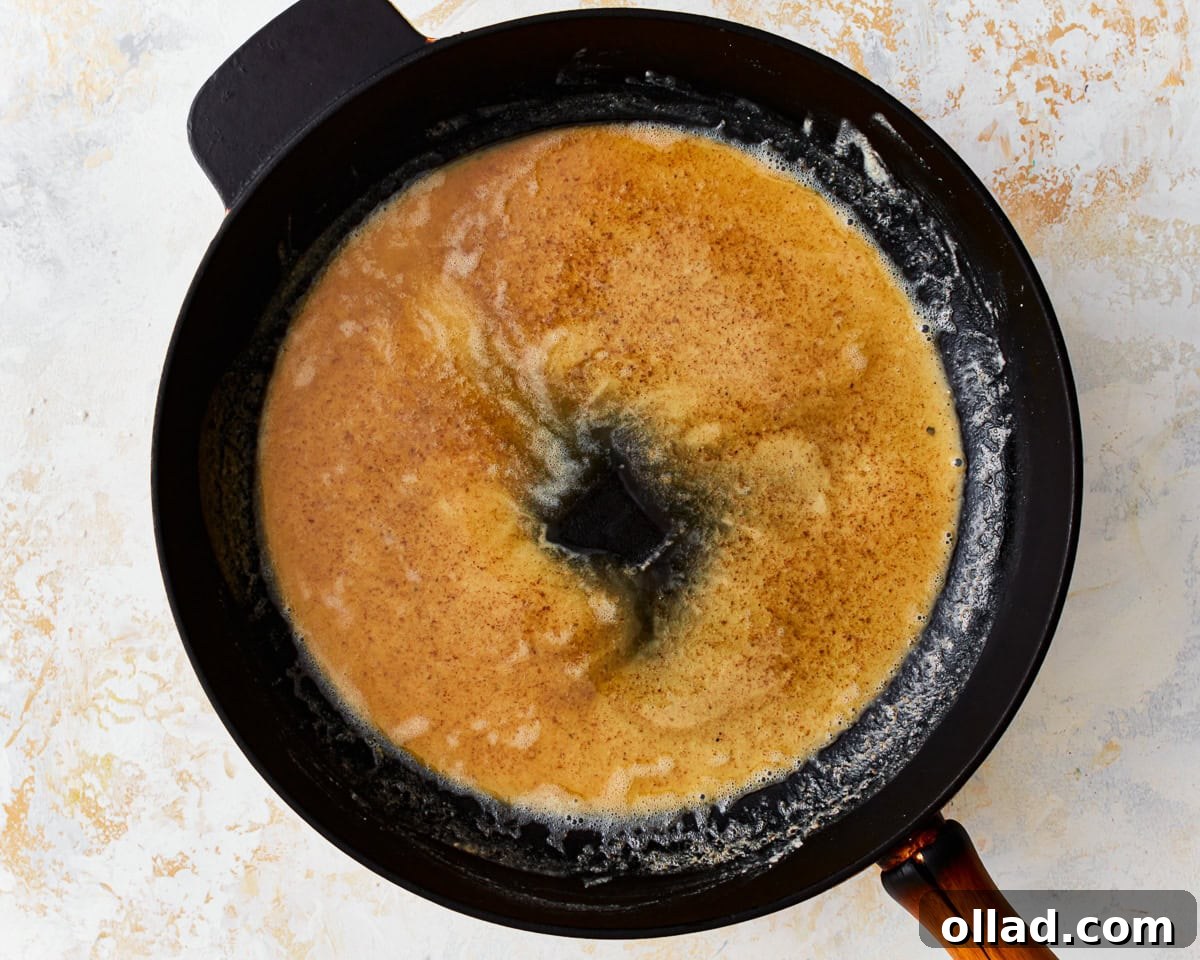
Step 3: Cook to Golden Perfection. Continue to cook the butter and flour mixture over medium heat, stirring constantly with your whisk for approximately 8-10 minutes. During this crucial stage, observe the mixture as it transforms: it will gradually transition from a pale yellow to a light golden-brown color, simultaneously developing a rich, appealing nutty aroma. This cooking process is essential for eliminating the raw flour taste and enhancing the overall flavor profile of your roux. Once the desired color and fragrance are achieved, promptly remove the saucepan from the heat and allow the roux to cool slightly before incorporating it into your chosen recipe, ensuring it’s ready to thicken your dish beautifully.