
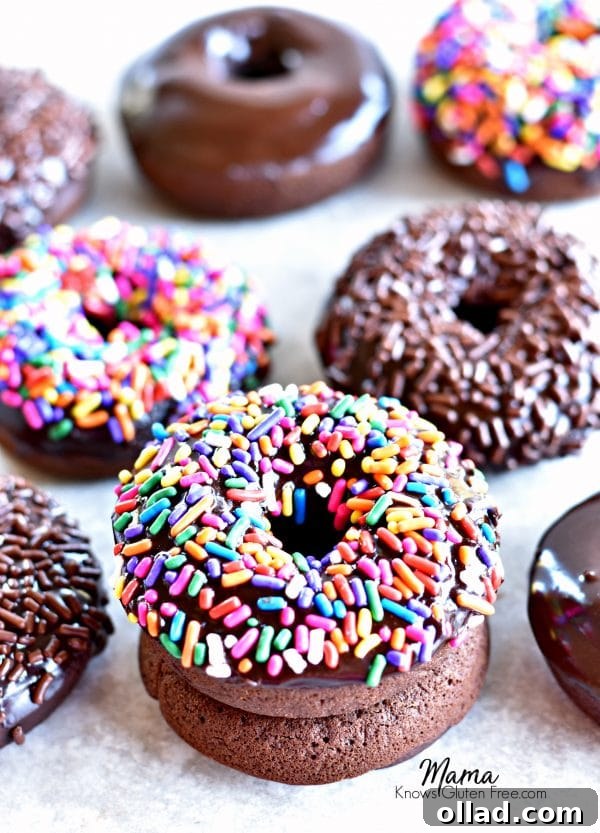
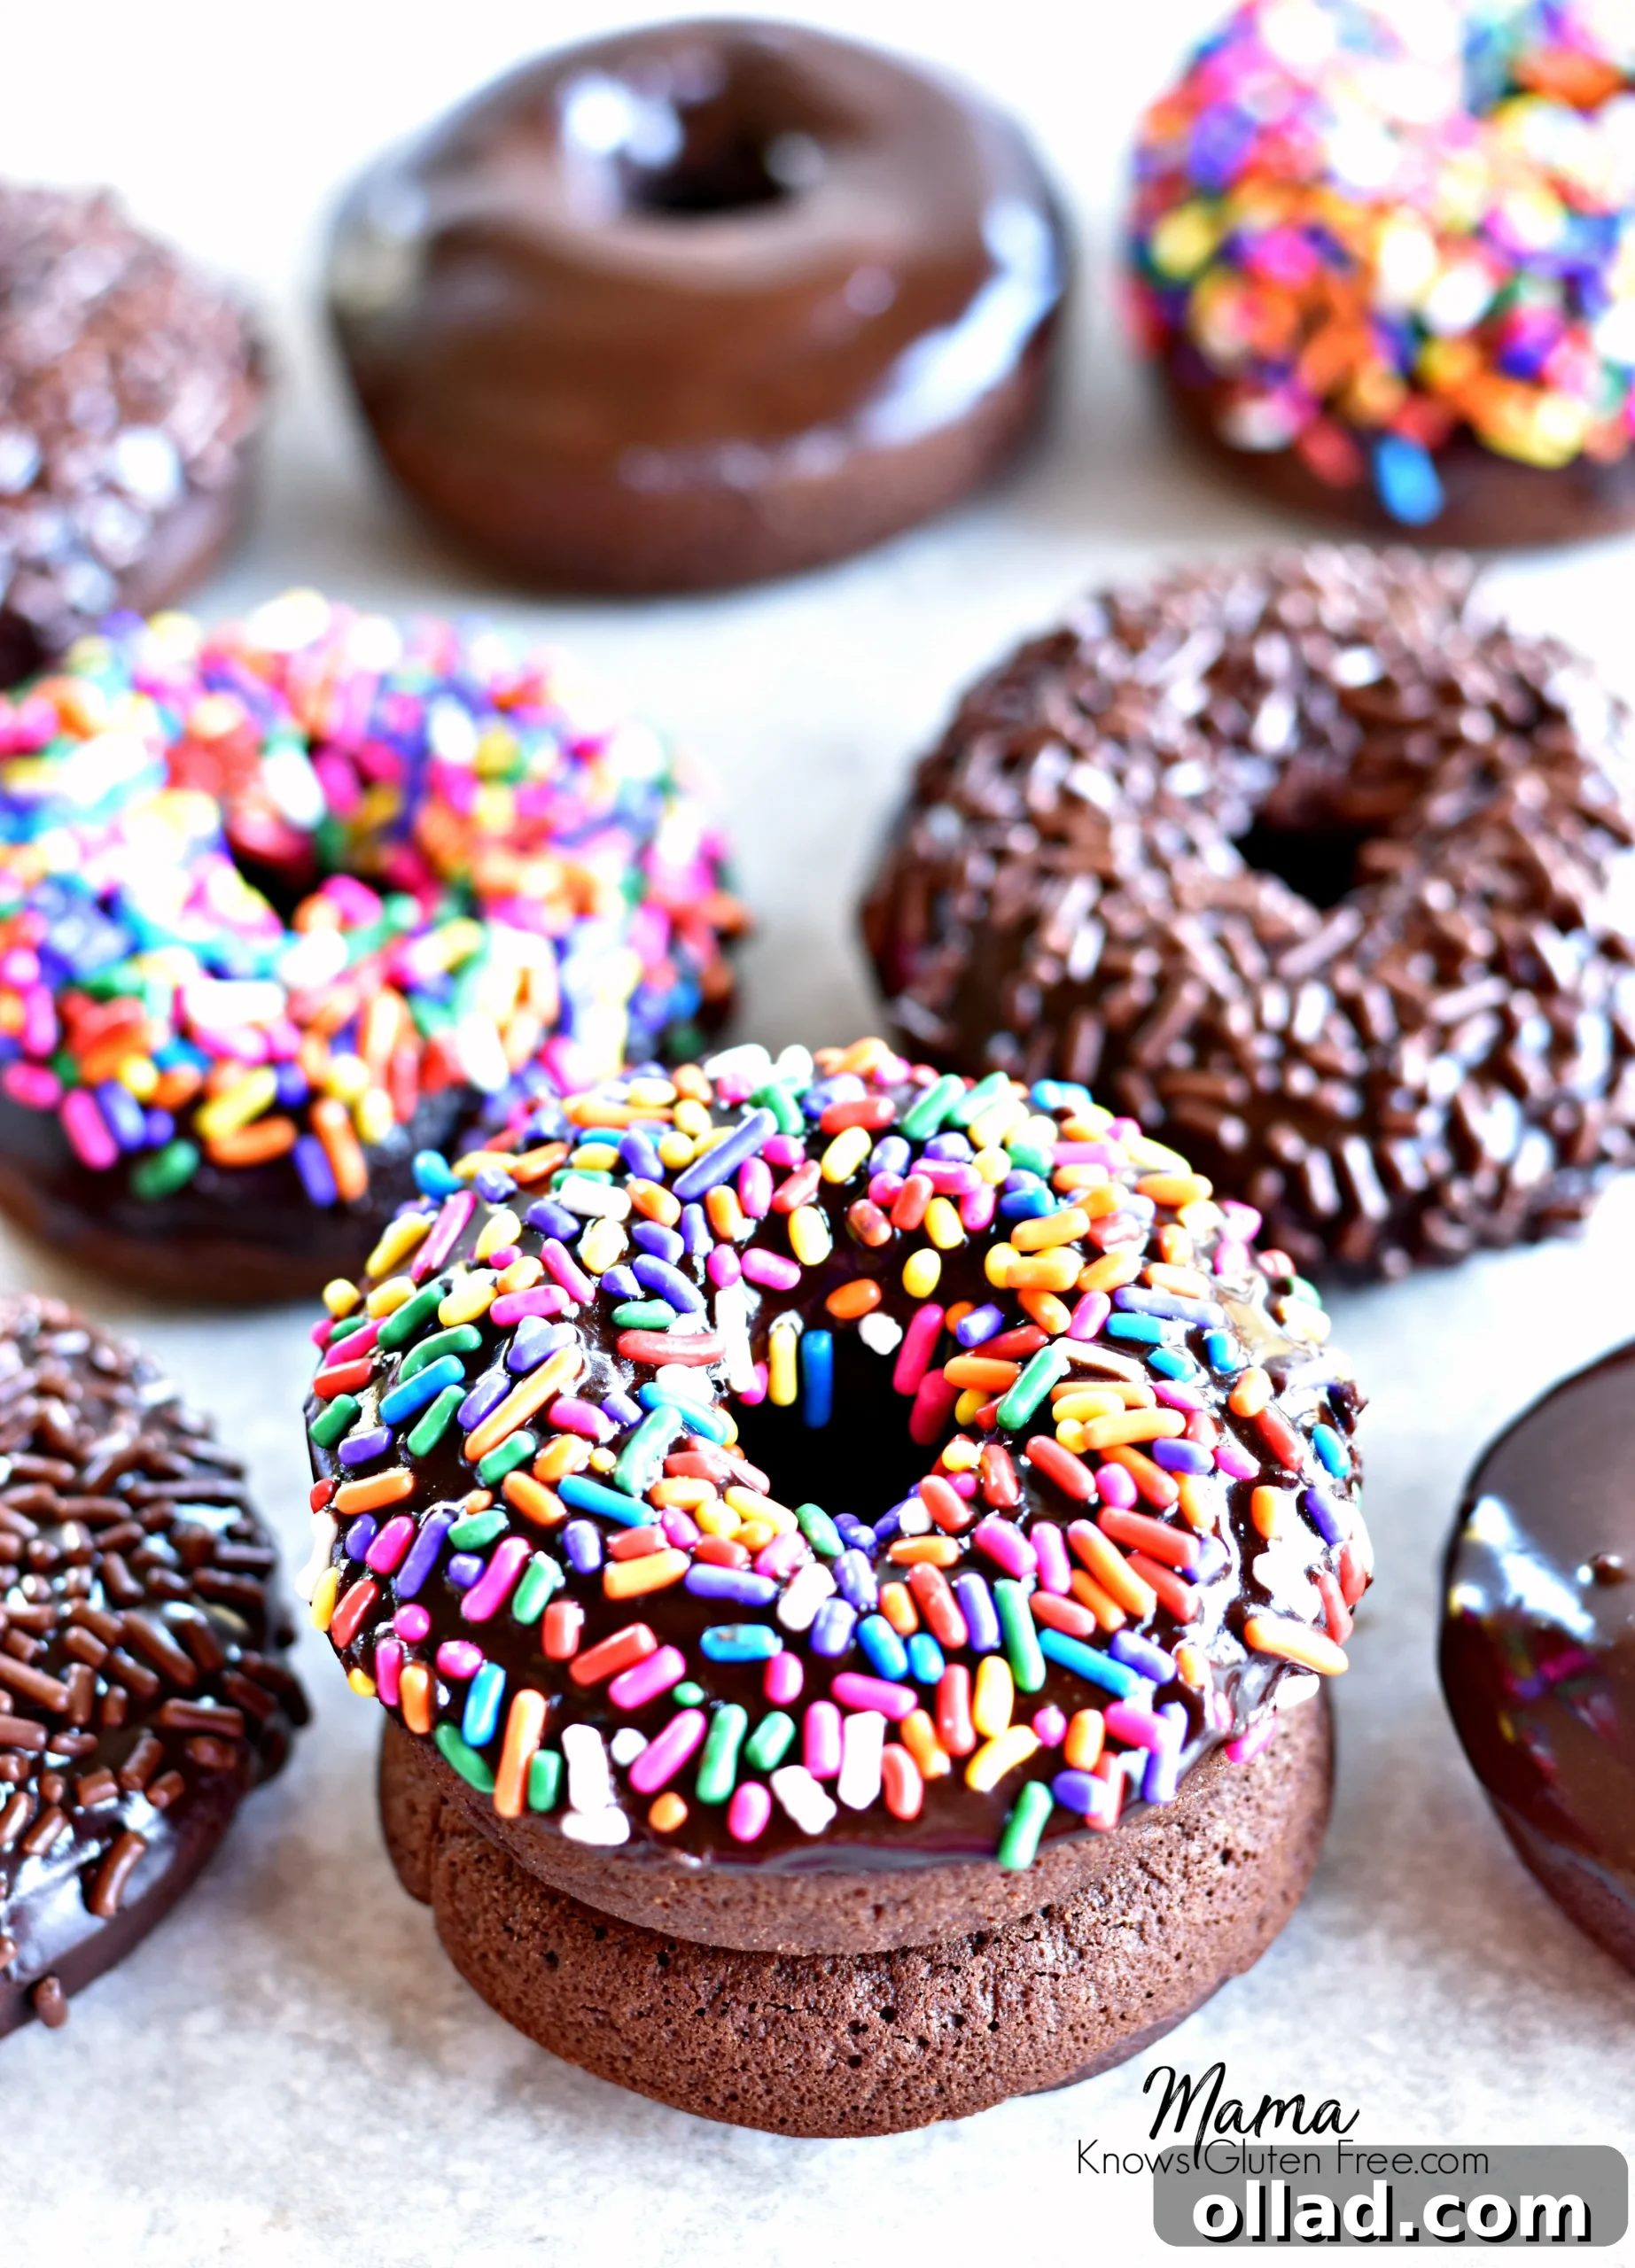
Imagine sinking your teeth into a warm, fluffy, chocolatey delight that’s not only incredibly delicious but also completely gluten-free. These easy-to-make gluten-free chocolate cake donuts are the ultimate treat, boasting a wonderfully soft and cakey texture, generously coated in a rich, decadent chocolate glaze. Perfect for kick-starting your day, satisfying a sweet craving after dinner, or simply as a special indulgence, these homemade baked donuts are a game-changer for anyone following a gluten-free diet. Plus, we’ve included a fantastic dairy-free option so everyone can enjoy them!
This post contains an Amazon affiliate link. As an Amazon Associate, I earn from qualifying purchases.
Recipe originally posted January 2018, post updated January 2020, and significantly expanded in 2024.
Indulge in Homemade Gluten-Free Chocolate Cake Donuts
There’s something uniquely comforting about a freshly baked donut, and being gluten-free shouldn’t mean you have to miss out on that joy. These gluten-free chocolate cake donuts are a testament to how easy and rewarding gluten-free baking can be. In a mere 20 minutes, you can whip up a batch of these delightful treats, transforming your kitchen into a sweet-smelling haven. Forget the hassle of deep-frying; these baked donuts offer a lighter, yet equally satisfying, experience.
Whether you’re looking for a delightful breakfast item, an afternoon pick-me-up, or a show-stopping dessert, these donuts fit the bill perfectly. Their rich chocolate flavor and tender, moist crumb make them irresistible, especially when adorned with a glossy chocolate glaze and a generous scattering of sprinkles. They’re a fantastic way to celebrate special occasions or simply make an ordinary day extraordinary.
The Simplicity of Baked Donuts
One of the best things about this recipe is that it calls for baking, not frying. This not only makes the process much simpler and less messy but also results in a donut that’s wonderfully cake-like in texture and often preferred for its lighter feel. All you need is a reliable full-sized donut pan and a few pantry staples, and you’ll be on your way to enjoying warm, homemade donuts in no time. If you’re new to baking gluten-free, this recipe is an excellent starting point, demonstrating just how straightforward it can be to create delicious treats without gluten.
Explore More Gluten-Free Donut Recipes
If you fall in love with these baked chocolate donuts (and we’re sure you will!), there are plenty of other gluten-free donut recipes to explore. Variety is the spice of life, and your gluten-free journey can be filled with endless delightful flavors. Consider trying:
- Gluten-Free Vanilla Cake Donuts {Dairy-Free Option} for a classic taste.
- Baked Apple Cinnamon Donuts {Gluten-Free, Dairy-Free Option} for a comforting, autumnal twist.
- Gluten-Free Baked Pumpkin Donuts {Dairy-Free Option} when you’re craving a taste of fall.
Crafting Your Perfect Gluten-Free Chocolate Donuts
Creating these delectable donuts is a simple process that yields impressive results. Follow these steps to achieve beautifully baked, soft, and chocolatey donuts every time.
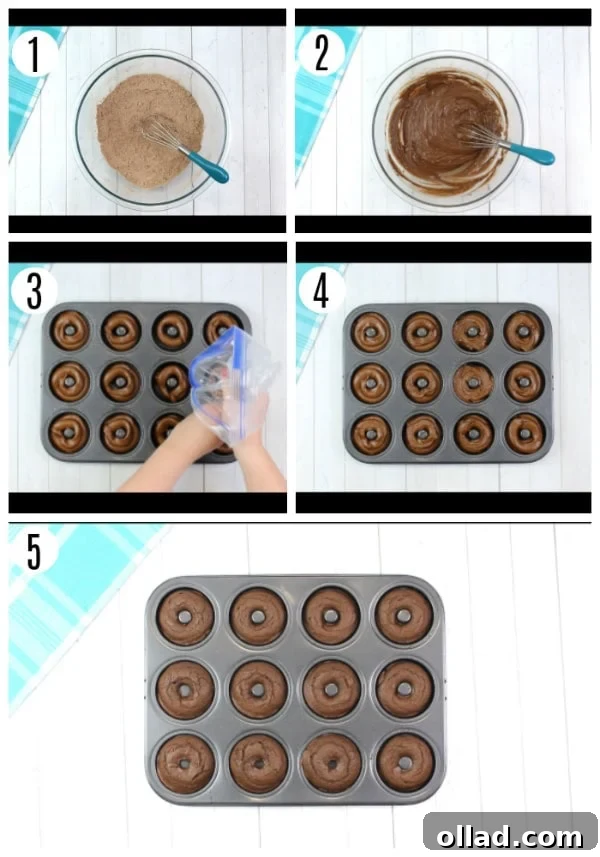
- Preheat your oven to 350º F. This ensures the oven is at the correct temperature for even baking from the moment your donuts go in.
- Lightly spray your donut pan with a gluten-free cooking spray. Coconut oil spray works wonderfully here, preventing sticking and ensuring easy release.
- In a large mixing bowl, whisk together the dry ingredients: gluten-free all-purpose flour, baking powder, baking soda, salt, cocoa powder, and brown sugar. Ensuring these are well combined will help distribute the leavening agents and flavor evenly throughout the batter.
- In a separate bowl, combine the wet ingredients: egg, melted butter (or oil for dairy-free), milk, and pure vanilla extract. Whisk them until thoroughly blended.
- Gently pour the wet ingredients into the dry ingredient mixture. Mix until just combined. The batter will be notably thick, which is exactly the right consistency for baked cake donuts. Be careful not to overmix, as this can lead to tougher donuts.
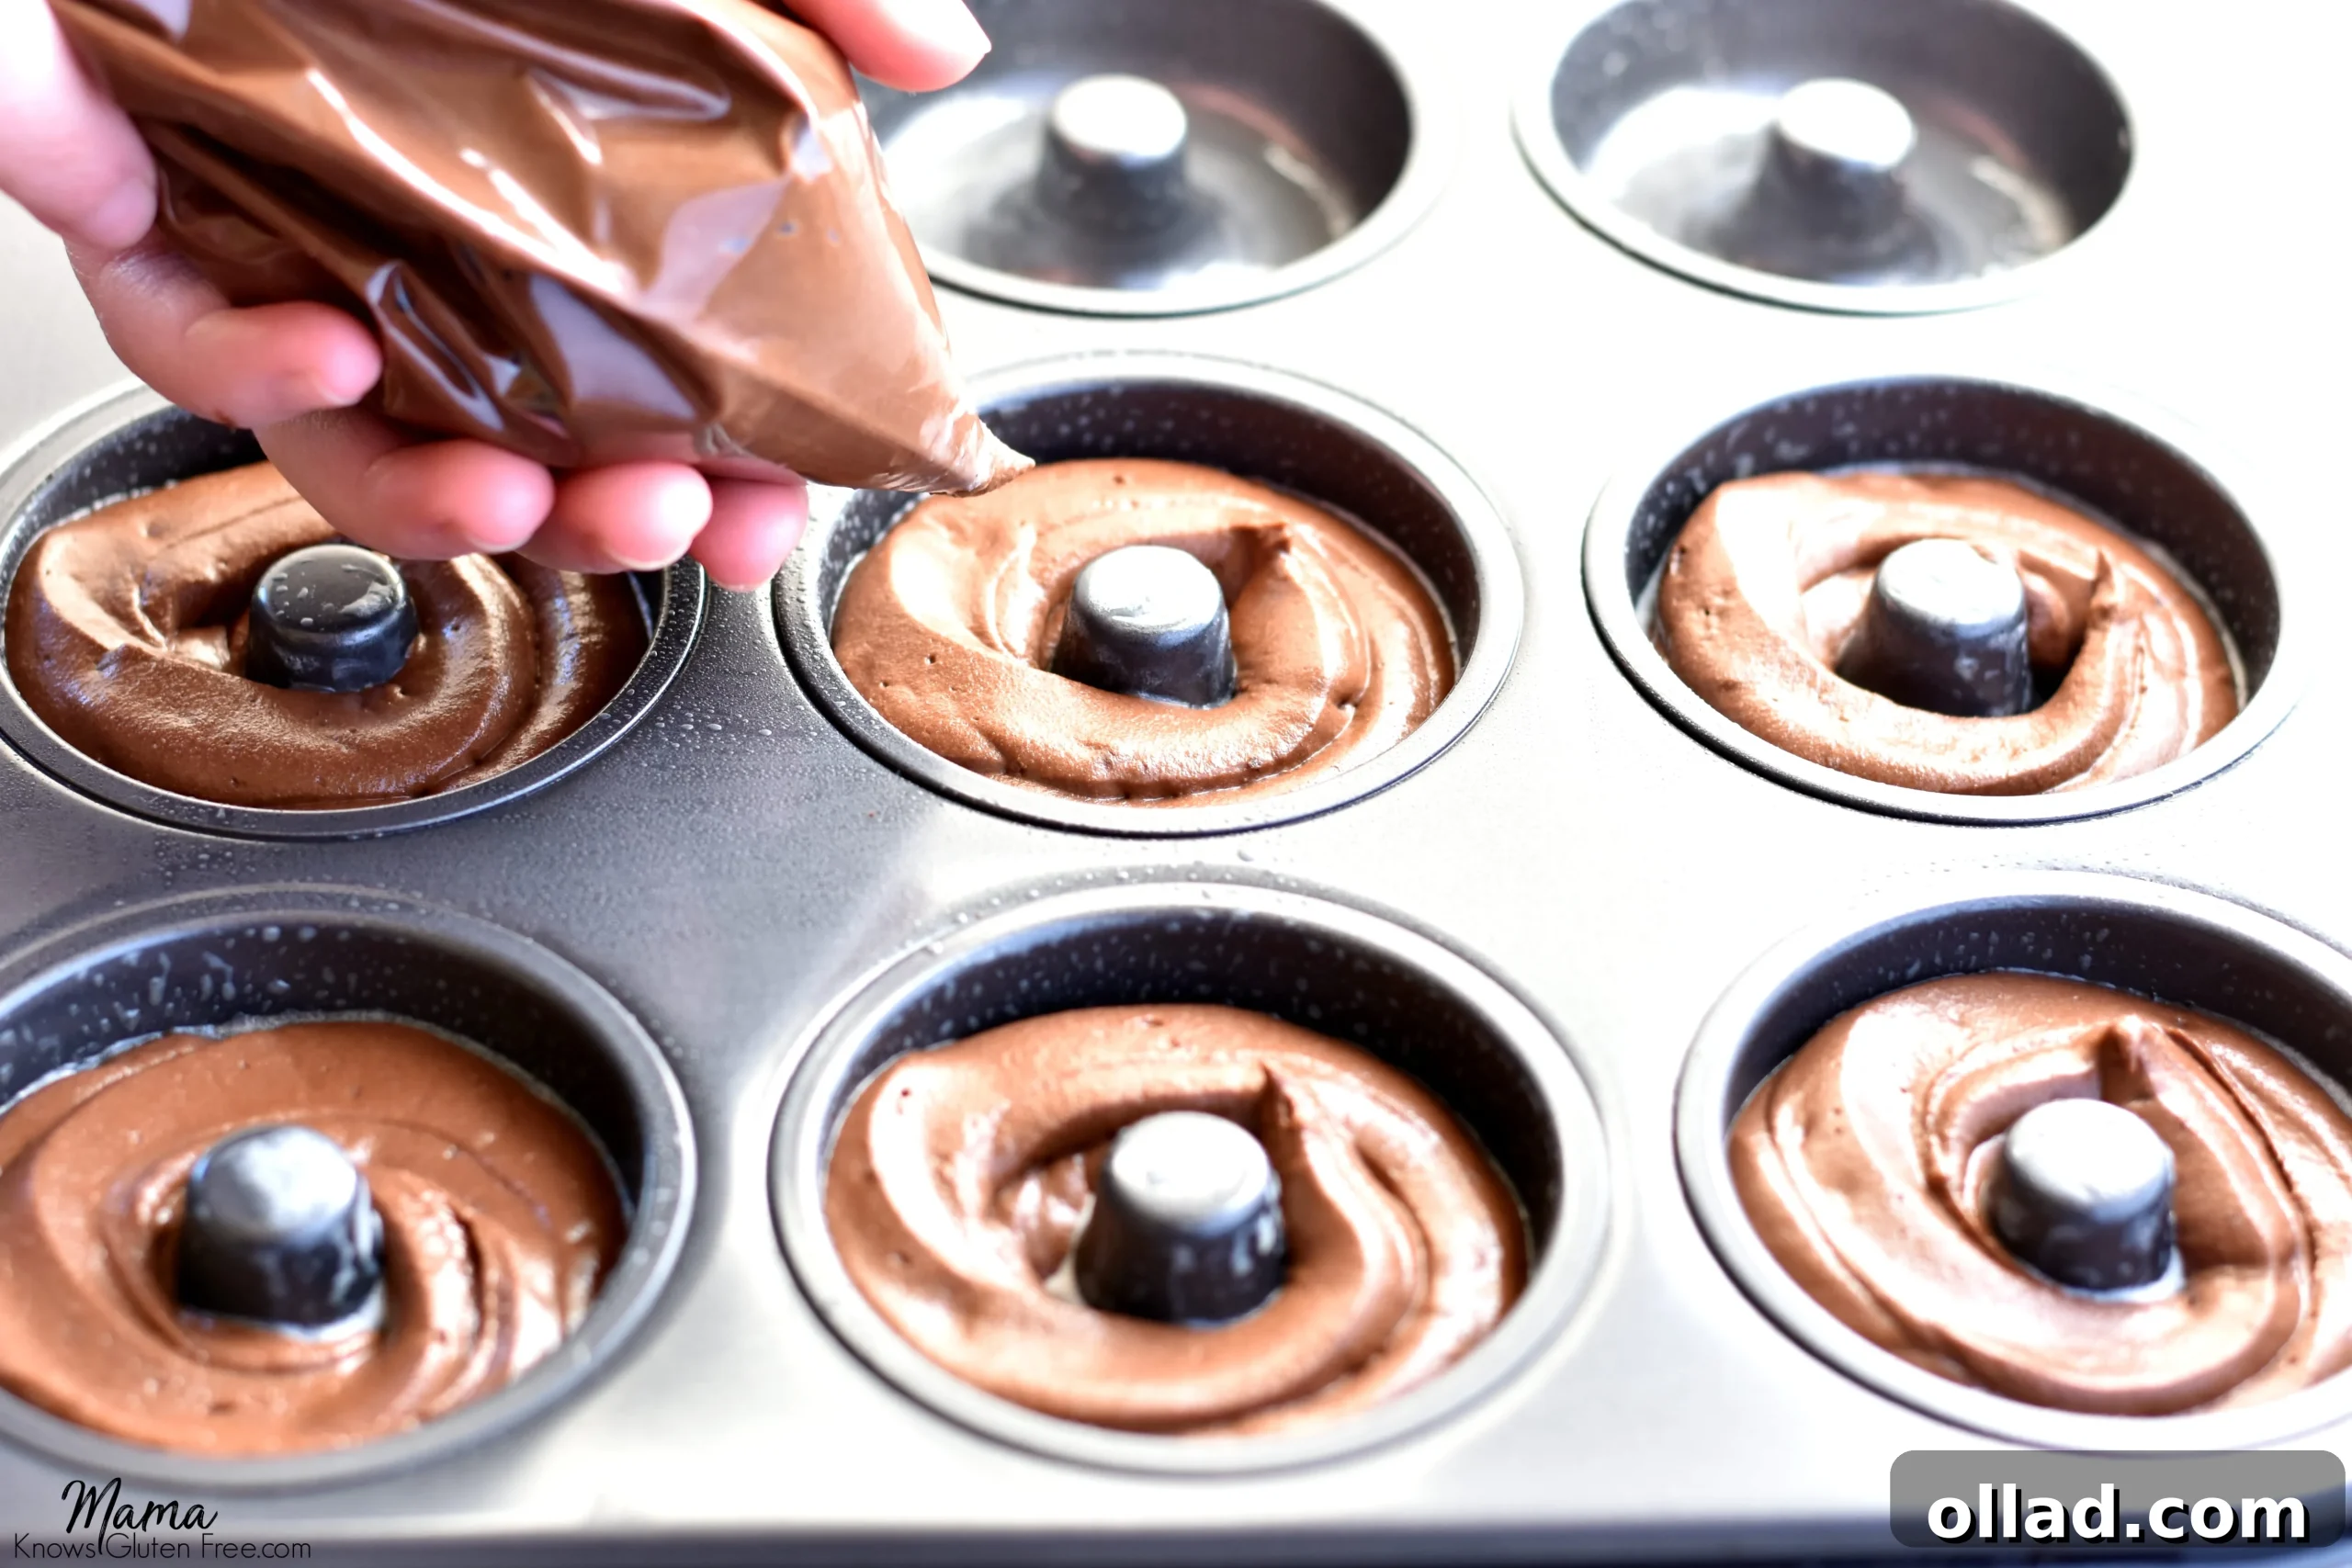
- Transfer the thick donut batter into a large plastic storage bag or a piping bag. A clever trick for easy filling is to place the bag inside a tall cup, folding the edges of the bag over the rim. This creates a stable opening, making it much easier to spoon the batter in without a mess. Seal the bag once filled.
- Snip off a corner of the bag with scissors, creating an opening large enough to pipe the batter smoothly.
- Carefully squeeze the bag, piping the batter into each cavity of your prepared donut pan. Fill each cavity about two-thirds full to allow for expansion during baking.
- Bake for 10-12 minutes. The donuts are ready when they are firm to the touch and a toothpick inserted comes out clean.
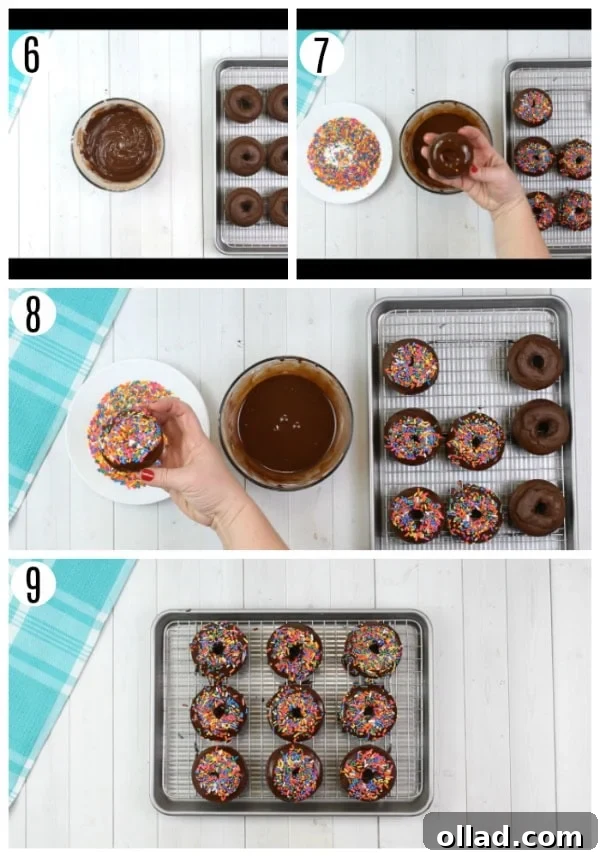
- While the donuts are baking or cooling slightly, prepare the luscious chocolate glaze. In a small bowl, whisk together powdered sugar, vanilla extract, cocoa powder, and 2-3 tablespoons of milk until smooth and glossy. Adjust the milk quantity to achieve your desired glaze consistency – thicker for a rich coating, thinner for a delicate sheen. A dash of cinnamon can add an unexpected depth of flavor to the glaze.
- Once the donuts are warm but cool enough to handle, dip each one into the prepared chocolate glaze. For an extra festive touch, immediately dip the glazed donut into a bowl of gluten-free sprinkles. Place the finished donuts on a plate or a wire rack to set.
- Serve immediately and savor every bite!
- Any leftover donuts should be stored in an air-tight container at room temperature to maintain their freshness.
Expert Tips for Perfect Gluten-Free Donuts
Achieving bakery-quality gluten-free donuts at home is easier than you think, especially with a few helpful tips:
- The Piping Bag Method: As mentioned in the instructions, using a large plastic storage bag or a piping bag is the ultimate hack for mess-free donut filling. It ensures your donut cavities are neatly filled, preventing spills and creating beautifully uniform donuts. To fill the bag easily, place it inside a tall glass or cup, fold the edges over, and then spoon in your batter. Once filled, snip a corner and pipe away!
- Donut Pan Preparation: Always use a good quality gluten-free cooking spray to grease your donut pan thoroughly. This step is crucial for preventing your precious donuts from sticking and ensures they release cleanly, preserving their perfect shape. Coconut oil cooking spray is an excellent choice.
- Using a Donut Pan: While baked donuts are best made in a dedicated donut pan, which can be found at most large retailers or online, there are alternatives. If you don’t have one, a muffin pan can be used, though the baking time will need to be adjusted. Start by adding 2 minutes to the suggested baking time and check for doneness, adding more time as needed. The shape will differ, but the delicious taste remains!
Freezing Gluten-Free Donuts for Later Enjoyment
Yes, you can absolutely freeze baked gluten-free donuts! This is a fantastic way to prepare a batch ahead of time or ensure you always have a quick treat on hand. Here’s how to freeze them effectively:
- Freezing Glazed Donuts: Once your donuts are completely cooled and the glaze has set, arrange them in a single layer on a baking sheet. Place the baking sheet in the freezer for several hours until the donuts are solid. This “flash freezing” prevents them from sticking together. Once frozen, transfer the glazed donuts to a plastic freezer bag or an airtight container, separating layers with parchment paper if stacking. They can be frozen for up to three months. When ready to enjoy, simply thaw them in the refrigerator overnight or at room temperature.
- Freezing Unglazed Donuts: If you prefer to glaze them fresh, simply place the completely cooled, unglazed donuts directly into a plastic freezer bag or airtight container. They will keep well in the freezer for up to three months. To thaw, leave them in the refrigerator overnight, or for a quicker option, gently warm them in the microwave for a few seconds if desired, then proceed with glazing.
Understanding Gluten-Free All-Purpose Flour
The choice of gluten-free flour blend significantly impacts the outcome of your baked goods. For this recipe, an all-purpose rice flour blend that already contains xanthan gum is highly recommended. Not all gluten-free flours are created equal, so sticking to a reliable brand like Pillsbury gluten-free flour, which I personally favor, can ensure consistent results.
Xanthan gum is a crucial ingredient in gluten-free baking. It acts as a binder, mimicking the elasticity and structure that gluten provides in traditional baked goods. It helps prevent crumbling and gives your donuts that desirable cakey texture. If your chosen flour blend does not include xanthan gum, you will need to add about ½ teaspoon per cup of flour. However, be cautious not to add extra xanthan gum if it’s already present in your blend, as too much can result in a gummy or chewy texture – a common pitfall in gluten-free baking!
It’s important to note that this recipe was specifically developed using a rice flour blend. Substituting with flours like almond or coconut flour will alter the texture and moisture content significantly, and the recipe will likely not yield the same delicious results.
Accurate Flour Measurement is Key
For best baking results, especially with gluten-free flours, the “spoon and level” method for measuring flour is highly recommended. This technique involves using a spoon to lightly scoop flour into your measuring cup, then using the back of a knife or a straight edge to level off the excess, ensuring an accurate measurement. Avoid scooping flour directly from the bag with your measuring cup, as this can compact the flour and lead to using more than the recipe requires, resulting in dry, dense donuts.
Selecting Gluten-Free Sprinkles
Sprinkles add a festive and fun touch to any donut, and finding gluten-free options is quite easy. Many popular brands, such as Great Value (Walmart’s brand) or Wilton, offer sprinkles that are naturally gluten-free. However, it’s always crucial to double-check ingredient labels, as manufacturers can change formulations. A quick read of the label will confirm they are safe for your gluten-free diet.
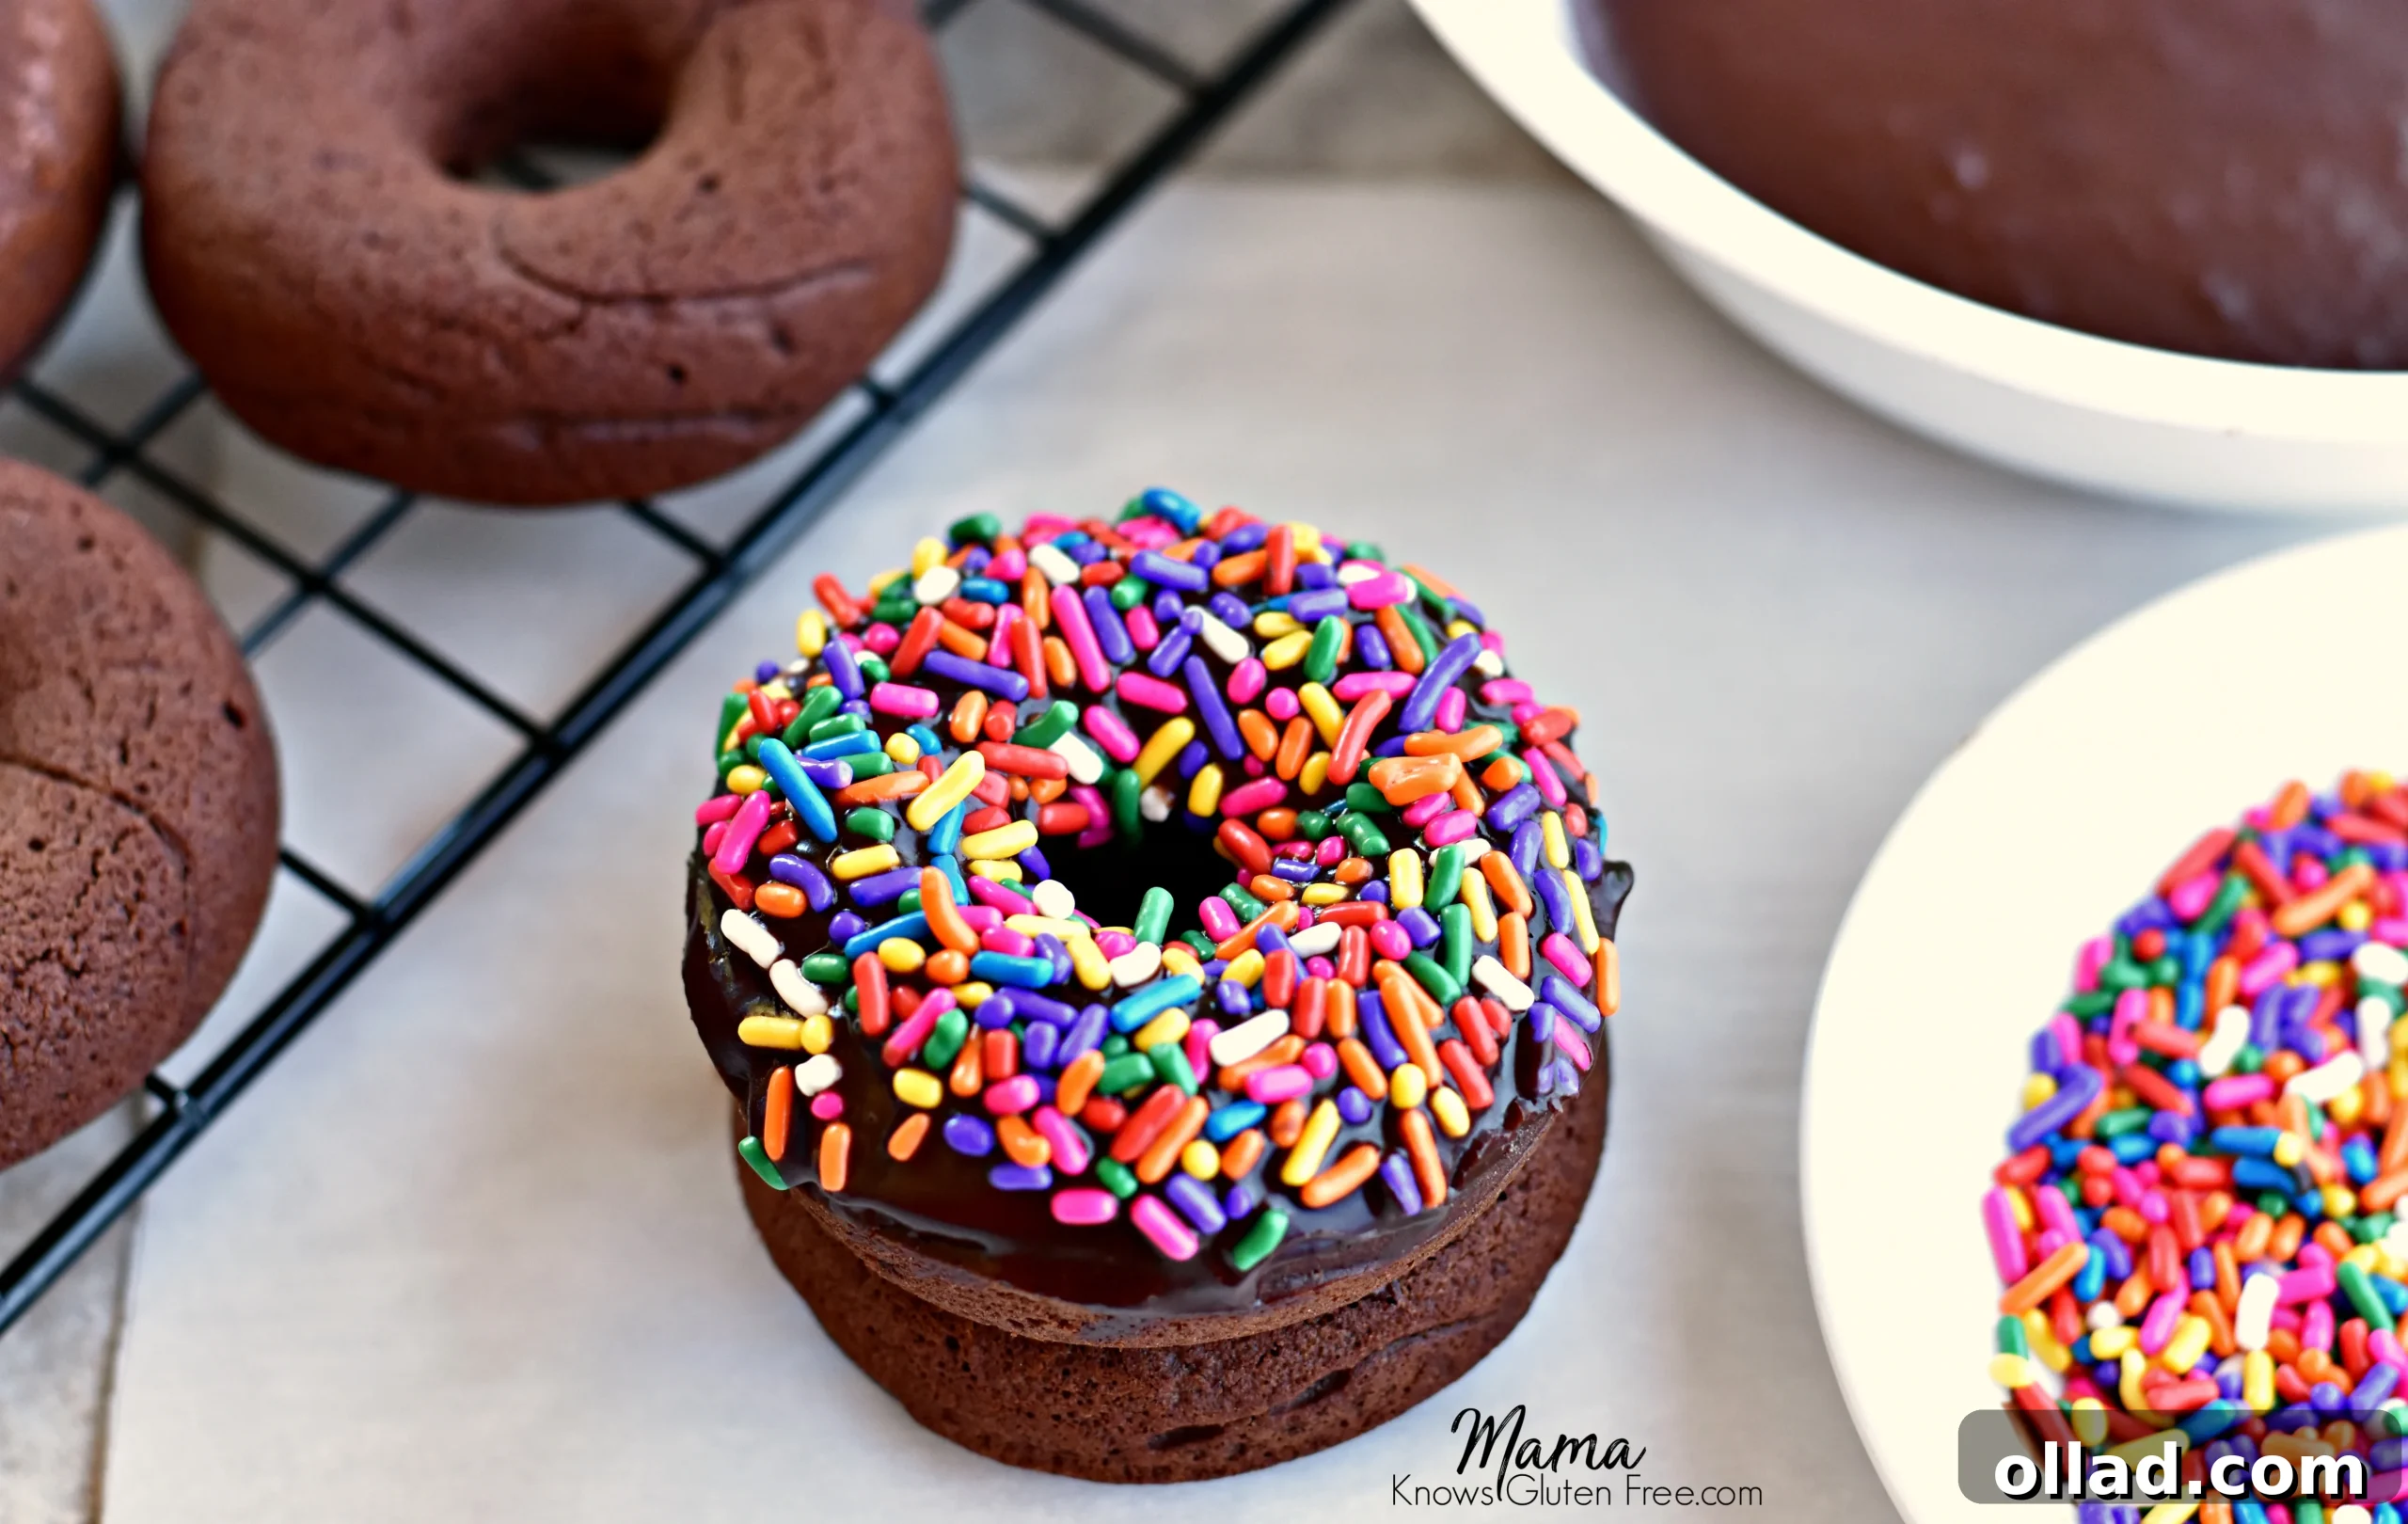
Simply dipping the warm donut into the rich chocolate glaze, then into a colorful array of gluten-free sprinkles, transforms a simple treat into a celebration. While sprinkles are technically optional, they are a must-have in our house! The more sprinkles, the better, and I wholeheartedly agree – they simply make everything happier and more visually appealing.
Delicious Gluten-Free and Dairy-Free Chocolate Donuts
For those with dairy sensitivities or allergies, this recipe thoughtfully includes a dairy-free option. Many members of my family, myself included, follow a dairy-free diet, so it’s a priority to ensure my recipes are adaptable. You can easily achieve equally delicious gluten-free and dairy-free chocolate donuts by making a few simple substitutions.
For the dairy-free version of this recipe, I recommend using Smart Balance butter (or a similar dairy-free butter substitute) and unsweetened almond milk. Other excellent dairy-free alternatives for baking include coconut oil, cashew milk, or even soy milk if you don’t have nut allergies. These alternatives provide the necessary moisture and richness without compromising on flavor or texture. Rest assured, your dairy-free donuts will be just as soft, cakey, and full of rich chocolate flavor as their dairy-containing counterparts.
Whip Up Easy Gluten-Free Chocolate Donuts Today!
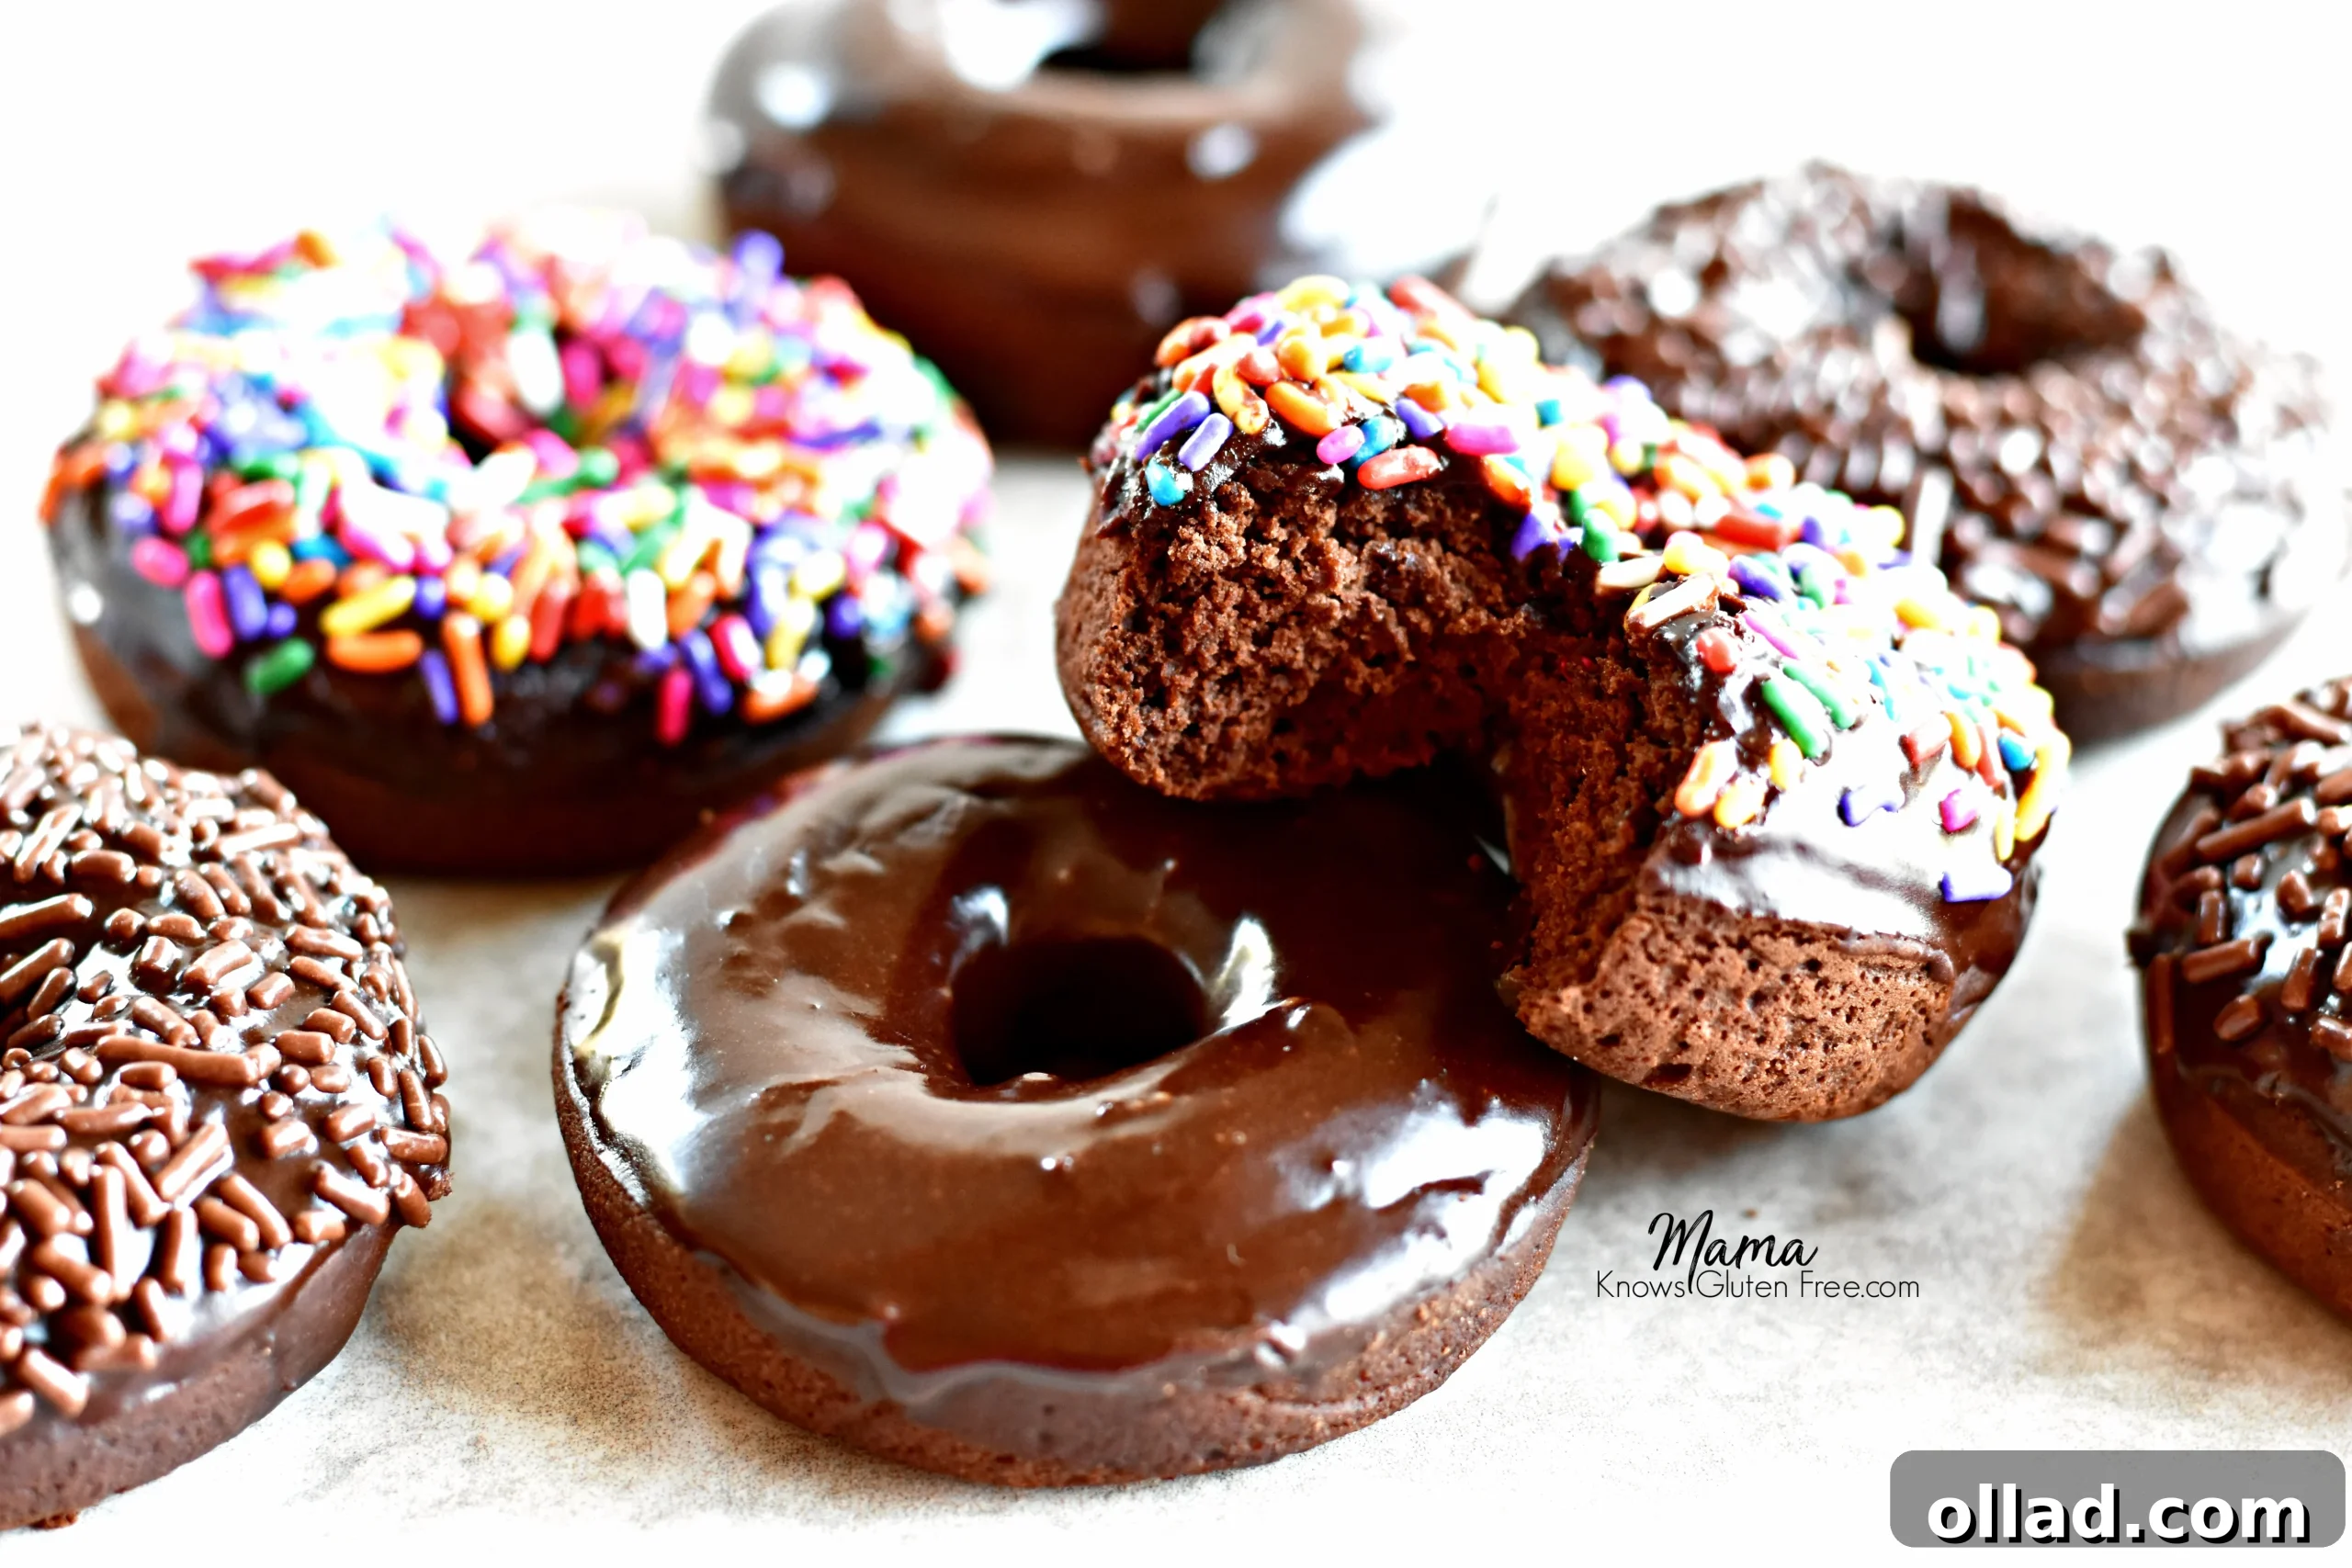
Say goodbye to store-bought gluten-free treats that often lack flavor or texture. Making homemade gluten-free chocolate donuts is incredibly simple and rewarding. In just 20 minutes, you can have a batch of these soft, cakey chocolate donuts, beautifully coated in a rich chocolate glaze and playfully decorated with sprinkles. They are the perfect versatile treat for any occasion – a quick breakfast, a delightful dessert, or a much-needed special indulgence. Get baking and enjoy the simple pleasure of homemade gluten-free goodness!
More Irresistible Gluten-Free Breakfast Recipes
If you’re looking for more ways to make your mornings delicious and gluten-free, explore some of these other fantastic recipes:
- Easy Gluten-Free Pancakes {Dairy-Free & Vegan Option} for fluffy stacks.
- Gluten-Free Buttermilk Biscuits {Dairy-Free Option} for a comforting classic.
- Gluten-Free Banana Bread {Dairy-Free Option} for a moist, flavorful loaf.
Let’s Connect! You can FOLLOW ME on Facebook, Instagram, Pinterest or YouTube!
★Did you make this recipe? Please give it a star rating below in the comments!★
Gluten-Free Chocolate Cake Donuts {Dairy-Free Option}
An easy recipe for gluten-free chocolate cake donuts that are soft, cakey and covered in a rich chocolate glaze. These gluten-free donuts are perfect for breakfast, dessert or as a special treat. The recipe also includes a dairy-free option.
By: Audrey from Mama Knows Gluten Free
Servings: 12 donuts
Prep time: 10 mins
Cook time: 10 mins
Total time: 20 mins
Ingredients
Donuts:
- 1 cup gluten-free all-purpose rice flour blend with xanthan gum (I like Pillsbury gluten-free. Not all gluten-free flours are created equal. You may experience different baking results depending on the gluten-free flour blend you choose.)
- 1 teaspoon gluten-free baking powder
- 1/4 teaspoon baking soda
- 1/4 cup cocoa powder
- 1/4 teaspoon salt
- 1/2 cup packed brown sugar
- 1 large egg
- 3/4 cup milk (for dairy-free, use coconut, almond or cashew milk)
- 3 tablespoons unsalted butter, melted (for dairy-free, use melted Smart Balance butter or another dairy-free butter substitute)
- 1 teaspoon pure vanilla extract
- Gluten-free sprinkles (optional)
Glaze:
- 1 cup powdered sugar
- 1 teaspoon pure vanilla extract
- 4 tablespoons cocoa powder
- 2 to 3 tablespoons milk, depending on how thick you want your glaze (for dairy-free, use unsweetened almond, cashew, or coconut milk)
- Dash of cinnamon (optional)
Instructions
- Preheat oven to 350º F.
- Spray donut pan with gluten-free cooking spray.
- In a large bowl, combine gluten-free flour, baking powder, baking soda, salt, cocoa powder, and brown sugar.
- Add the egg, melted butter, milk, and pure vanilla extract to the dry ingredients. Mix until fully combined. The batter will be thick.
- Add batter to a large plastic storage bag (or piping bag). Place the bag inside a tall cup to make it easier to fill. Close the seal of the bag. Cut the tip off of the bag.
- Squeeze the bag carefully, filling each cavity of the donut pan about two-thirds full.
- Bake for 10-12 minutes, or until a toothpick inserted into a donut comes out clean.
- While the donuts cool slightly, in a small bowl, whisk together the ingredients for the chocolate glaze until smooth.
- Dip each warm donut into the glaze and then into the sprinkles (if using). Place on a plate or wire rack to set. Enjoy!
- Store any leftover donuts in an air-tight container at room temperature.
Notes
- I like Pillsbury gluten-free flour. Not all gluten-free flours are created equal. You may experience different baking results depending on the gluten-free flour blend you choose.
- For the dairy-free option, I used Smart Balance butter and unsweetened almond milk.
- See the post above for freezing instructions to enjoy these donuts later!
- Mama says, “Always check all of your labels!” for gluten-free and dairy-free safety.
Nutrition
Serving: 1 donut
- Calories: 161 kcal
- Carbohydrates: 30 g
- Protein: 3 g
- Fat: 4 g
- Saturated Fat: 2 g
- Cholesterol: 22 mg
- Sodium: 88 mg
- Potassium: 166 mg
- Fiber: 3 g
- Sugar: 19 g
- Vitamin A: 125 IU
- Calcium: 52 mg
- Iron: 1.5 mg
Nutrition information is automatically calculated, so should only be used as an approximation.
Additional Info
- Course: Breakfast, Dessert
- Cuisine: American