

Discover the magic of homemade gluten-free crescent rolls – a beloved staple that brings warmth and comfort to any meal. Whether gracing your holiday table or adding a touch of elegance to a weeknight dinner, these light, flaky, and golden-brown delights are sure to impress. Forget about store-bought alternatives; our easy-to-follow recipe empowers you to create perfectly risen, crescent-shaped rolls right in your own kitchen. We achieve this incredible texture and satisfying chew by expertly combining high-quality gluten-free flour with the binding power of psyllium husk powder. This versatile dough isn’t just for classic crescent rolls; it opens up a world of gluten-free baking possibilities, from sweet cinnamon buns to savory pizzas and even delicate pies.

Thank you for this wonderful recipe! I have been craving little crescent rolls filled with a nut mix my Mom used to make but having to go wheat free haven’t made until seeing this. Adore how you make this difficult transition to gf baking so much simpler and less scary.😊
– Bonnie
The Ultimate Gluten-Free Crescent Rolls Recipe: Fluffy & Flavorful
Crafting the perfect gluten-free crescent roll might seem daunting, but with our carefully developed recipe, you’ll achieve results that rival their traditional counterparts. This recipe leverages the power of instant yeast for an impressive, airy rise, complemented by baking powder for added lift and tenderness. Rich, cold butter is meticulously worked into the dough, creating those coveted flaky layers, while a specialized gluten-free bread flour blend ensures a delightful texture and satisfying chew. These versatile rolls are utterly delicious served warm with a simple spread of butter or your favorite jam. But don’t stop there! The same incredible dough can be transformed into a variety of other delectable baked goods, such as sweet cinnamon rolls, savory pizza crusts, or even a flaky pie base. Get ready to master a fundamental gluten-free dough that will become a cherished part of your culinary repertoire.
Gluten-Free Crescent Rolls
Share by Email
Print Recipe

Find detailed step-by-step photos accompanying the recipe below for visual guidance.
Ingredients
- 2 cups Gluten-Free Flour with Xanthan Gum (recommended for yeast baking, such as Pillsbury or Better Batter Brand)
- 1 tbsp psyllium husk powder
- 1 tsp instant dry yeast
- 1 tsp baking powder
- 1 tsp granulated sugar
- 1 tsp salt
- ¼ cup cold unsalted butter, cubed
- 1 large egg, room temperature, beaten
- ⅔ cup lukewarm milk
- 1 tbsp melted unsalted butter, for brushing
Watch the Recipe Video
Learn how to make perfect Gluten-Free Crescent Rolls with our easy-to-follow video guide!
Instructions
-
Prepare Dry Ingredients: In a generously sized mixing bowl, combine the gluten-free flour (ensure it contains xanthan gum or add it separately if not included), psyllium husk powder, instant dry yeast, baking powder, granulated sugar, and salt. Whisk these dry ingredients thoroughly to ensure they are evenly distributed, which is crucial for a consistent dough texture and optimal rise.
-
Incorporate Butter: Add the cold, cubed unsalted butter to the dry mixture. Using a pastry cutter, fork, or your fingertips, work the butter into the flour mixture. Continue until the butter is fully incorporated and the mixture resembles coarse crumbs, similar to the texture of wet sand. It’s important that no large pieces of butter remain, as this helps create those desirable flaky layers.
-
Combine Wet Ingredients: In a separate, smaller bowl, gently whisk together the room temperature beaten large egg and the lukewarm milk. Ensure the milk is not too hot, as this can kill the yeast, but warm enough to activate it.
-
Form the Dough: Gradually pour the wet ingredients into the bowl with the dry mixture. Mix gently until a soft, cohesive dough begins to form. Be careful not to overmix, as gluten-free doughs can become tough if handled excessively. Stop mixing as soon as the ingredients are just combined.
-
First Rise (Resting Period): Cover the bowl tightly with plastic wrap or a clean kitchen towel. Place the dough in a warm, draft-free spot for 30 minutes. This initial resting period allows the gluten-free flour to fully hydrate and the yeast to begin its work, contributing to the dough’s structure and flavor development.
-
Shape the Crescent Rolls: Lightly dust your work surface with gluten-free flour. Turn the dough out onto the floured surface and gently roll it into a large circle, aiming for a thickness of approximately 1/4-inch. Using a pizza cutter or a sharp knife, divide the circle into equal triangles, much like slicing a pie. Starting from the wider base of each triangle, gently roll the dough towards the pointed end to form the classic crescent shape.
-
Second Rise (Proofing): Line a baking sheet with parchment paper. Carefully arrange the shaped crescent rolls on the prepared baking sheet, ensuring there’s adequate space between each roll to allow for expansion during the proofing and baking process. Cover them lightly with plastic wrap or a clean towel and let them rise in a warm place for an additional 1 hour, or until they have noticeably puffed up and feel light.
-
Bake to Golden Perfection: While the rolls are completing their second rise, preheat your oven to 375°F (190°C). Once preheated and the rolls are proofed, bake them for 15-20 minutes. Keep a close eye on them; they are ready when they achieve a beautiful golden-brown color and sound hollow when lightly tapped on the bottom.
-
Finishing Touch & Serve: As soon as the rolls emerge from the oven, brush them generously with the 1 tablespoon of melted unsalted butter. This adds a lovely sheen, enhances the flavor, and helps keep them soft. Allow them to cool slightly on the baking sheet for a few minutes before transferring them to a wire rack. Serve warm and savor every bite!
Expert Tips & Notes for Success
- Butter Matters: Always use cold, unsalted butter for incorporating into the dough to achieve the flakiest texture. The melted butter for brushing is solely for a rich finish.
- Effortless Shaping: A pizza cutter is your best friend for quickly and efficiently dividing the rolled-out dough into even triangles, making the shaping process a breeze.
- Xanthan Gum: Ensure your gluten-free flour blend already contains xanthan gum. If it doesn’t, add ½ teaspoon per cup of flour to provide the necessary elasticity and bind for yeast baking.
- Dough Consistency: Gluten-free flours vary. If your dough feels too dry after mixing, add milk one tablespoon at a time until it reaches a soft, pliable consistency. Conversely, if it’s too sticky, incorporate a teaspoon of additional gluten-free flour at a time until it’s workable.
- The Power of Two: This recipe cleverly uses both instant yeast and baking powder. The yeast provides a slower, more traditional rise, creating a light and airy crumb, while the baking powder acts as an immediate leavening agent, giving an extra boost for an incredibly fluffy and flaky final product.
Nutrition Information
Calories: 133 kcal
Carbohydrates: 18 g
Protein: 2 g
Fat: 6 g
Saturated Fat: 3 g
Polyunsaturated Fat: 0.3 g
Monounsaturated Fat: 2 g
Trans Fat: 0.2 g
Cholesterol: 30 mg
Sodium: 249 mg
Potassium: 38 mg
Fiber: 1 g
Sugar: 1 g
Vitamin A: 192 IU
Vitamin C: 0.003 mg
Calcium: 40 mg
Iron: 0.1 mg
Nutrition information is automatically calculated and should be used as an approximation. Individual results may vary based on specific ingredients and preparation methods.
Additional Recipe Information
Tried this amazing recipe?
We’d love to see your creations! Mention @mamaknowsglutenfree or tag #mamaknowsglutenfree on Instagram!
Why These Gluten-Free Crescent Rolls Are a Game-Changer
For anyone navigating a gluten-free diet, finding truly satisfying bread products can be a quest. Many gluten-free breads often lack the texture, elasticity, and classic “chew” that traditional wheat-based items offer. That’s where this crescent roll recipe shines as a game-changer. We’ve meticulously developed it to overcome common gluten-free baking challenges, delivering rolls that are not just “good for gluten-free” but genuinely delicious in their own right. The combination of specific ingredients and techniques ensures a light, airy crumb with a beautiful golden crust and a distinct flakiness that will have everyone reaching for seconds. No more dense or crumbly rolls – prepare for a gluten-free revelation that will elevate your meals and holiday spreads.
A Deep Dive into Key Ingredients
The success of these gluten-free crescent rolls lies in the thoughtful selection and combination of ingredients, each playing a crucial role in achieving the desired texture and flavor:
- Gluten-Free Flour Blend with Xanthan Gum: This is the foundation of our rolls. A good quality all-purpose gluten-free flour blend, especially one designed for yeast baking and containing xanthan gum (or to which you add it separately), provides the necessary structure and elasticity typically found in wheat flour. Brands like Pillsbury or Better Batter are often recommended for their consistent results in yeast-based recipes. Xanthan gum acts as a binder, mimicking the role of gluten by preventing crumbling and giving the dough a more cohesive, workable consistency.
- Psyllium Husk Powder: This fibrous ingredient is a secret weapon in gluten-free baking. It’s an excellent binder and moisture retainer, significantly improving the dough’s elasticity and making it easier to handle and roll. Psyllium husk powder also contributes to the bread-like structure and prevents the rolls from becoming dry or brittle, adding a subtle chewiness.
- Instant Dry Yeast: Essential for leavening, instant dry yeast provides the slow, steady rise that gives these rolls their classic light and airy internal structure. It works by producing carbon dioxide bubbles that get trapped in the dough, causing it to expand.
- Baking Powder: While yeast provides the primary rise, baking powder offers an additional lift, ensuring an exceptionally fluffy and tender crumb. It reacts quickly, providing an initial boost during the mixing and early baking stages, contributing to the overall volume and lightness.
- Cold Unsalted Butter: The key to flaky rolls! Using cold, cubed butter and cutting it into the dry ingredients creates pockets of butter throughout the dough. As the rolls bake, these butter pockets release steam, separating the dough layers and resulting in that irresistible flaky texture we all love.
- Lukewarm Milk & Egg: These liquid ingredients bring the dough together, hydrating the flours and activating the yeast. Using room temperature or lukewarm milk helps the yeast become active more quickly, while a beaten egg adds richness, helps with binding, and contributes to the golden color and soft crumb of the finished rolls.
How To Make Gluten-Free Crescent Rolls: Step-by-Step Visual Guide
Follow these detailed steps, complete with visual cues, to bake your own perfect batch of gluten-free crescent rolls.
1. Gather Your Ingredients and Tools
Before you begin, ensure all your ingredients are measured and your tools (mixing bowls, pastry cutter, baking sheet, parchment paper) are ready. This mise en place makes the baking process smooth and enjoyable.
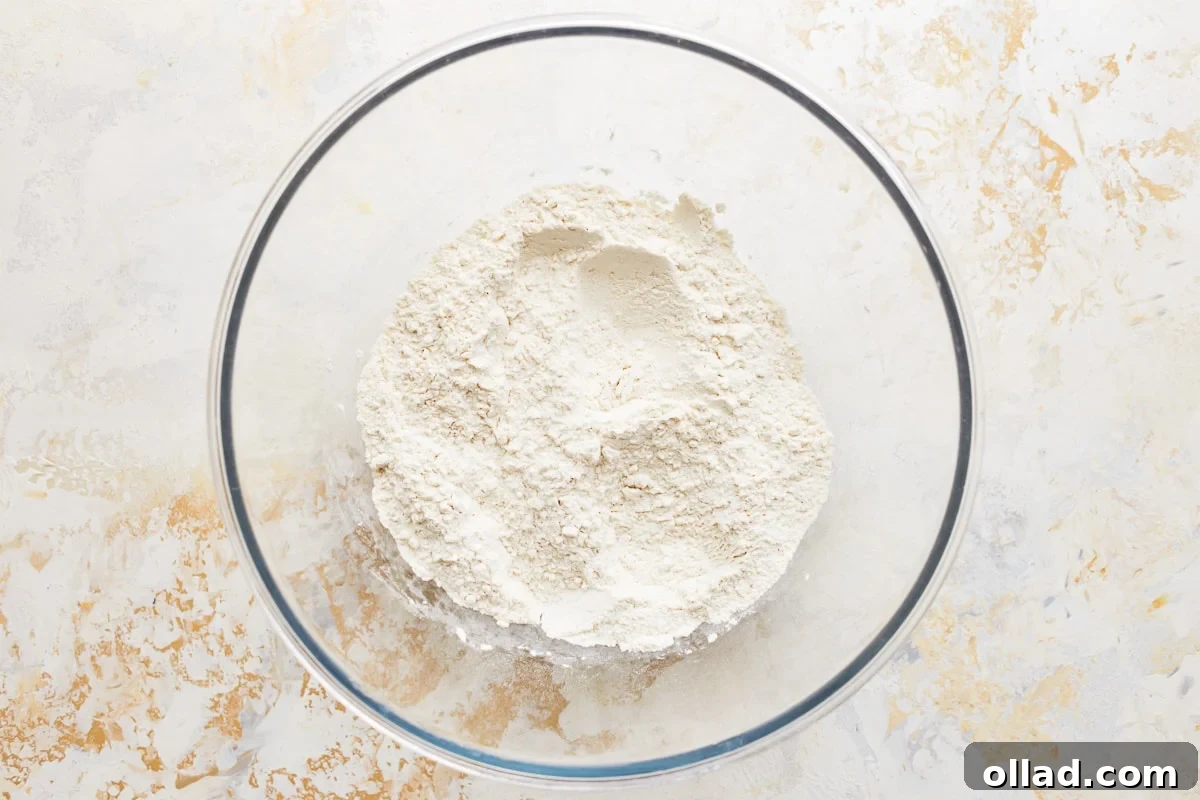
2. Combine Dry Ingredients
In a large mixing bowl, combine the 2 cups of gluten-free flour blend (with xanthan gum), 1 tablespoon of psyllium husk powder, 1 teaspoon of instant dry yeast, 1 teaspoon of baking powder, 1 teaspoon of granulated sugar, and 1 teaspoon of salt. Whisk these ingredients together thoroughly until they are uniformly distributed. This step is crucial for an even rise and consistent texture throughout your rolls.
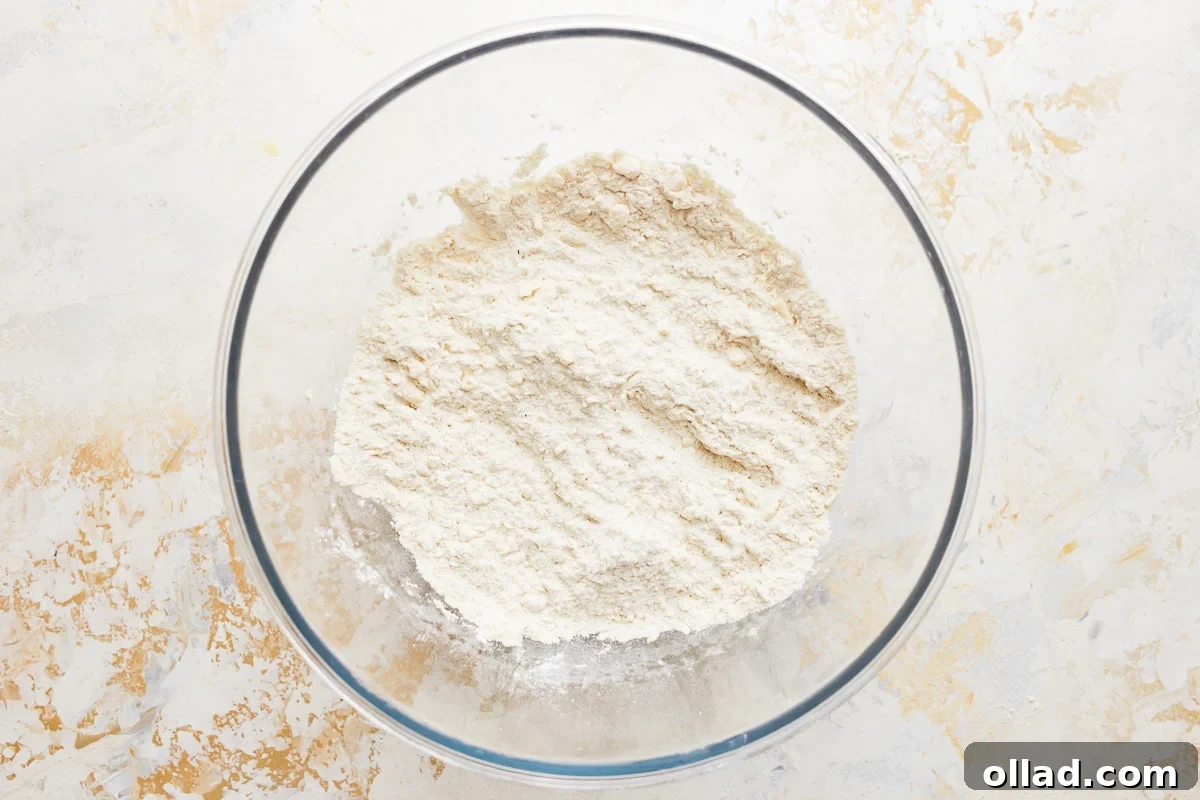
3. Cut in the Cold Butter
Add the ¼ cup of cold, cubed unsalted butter to your dry mixture. Using a pastry cutter, fork, or even your clean fingertips, work the butter into the flour. Your goal is to break down the butter into pea-sized (or smaller) pieces, thoroughly incorporating it into the dry ingredients. The mixture should resemble coarse crumbs, with no large chunks of butter remaining. This technique is key to developing those desirable flaky layers in your baked rolls.

4. Prepare and Add Wet Ingredients
In a separate bowl, whisk together the 1 large beaten egg (at room temperature) and ⅔ cup of lukewarm milk. Ensure the milk is lukewarm (not hot!) to activate the yeast without killing it. Gradually add this liquid mixture to your dry ingredients, mixing gently until a soft, pliable dough forms. Be mindful not to overmix; overworking gluten-free dough can lead to a tougher texture. Cover the bowl with plastic wrap and let the dough rest in a warm, draft-free place for 30 minutes. This initial rest allows the flour to hydrate fully and the yeast to begin working its magic.
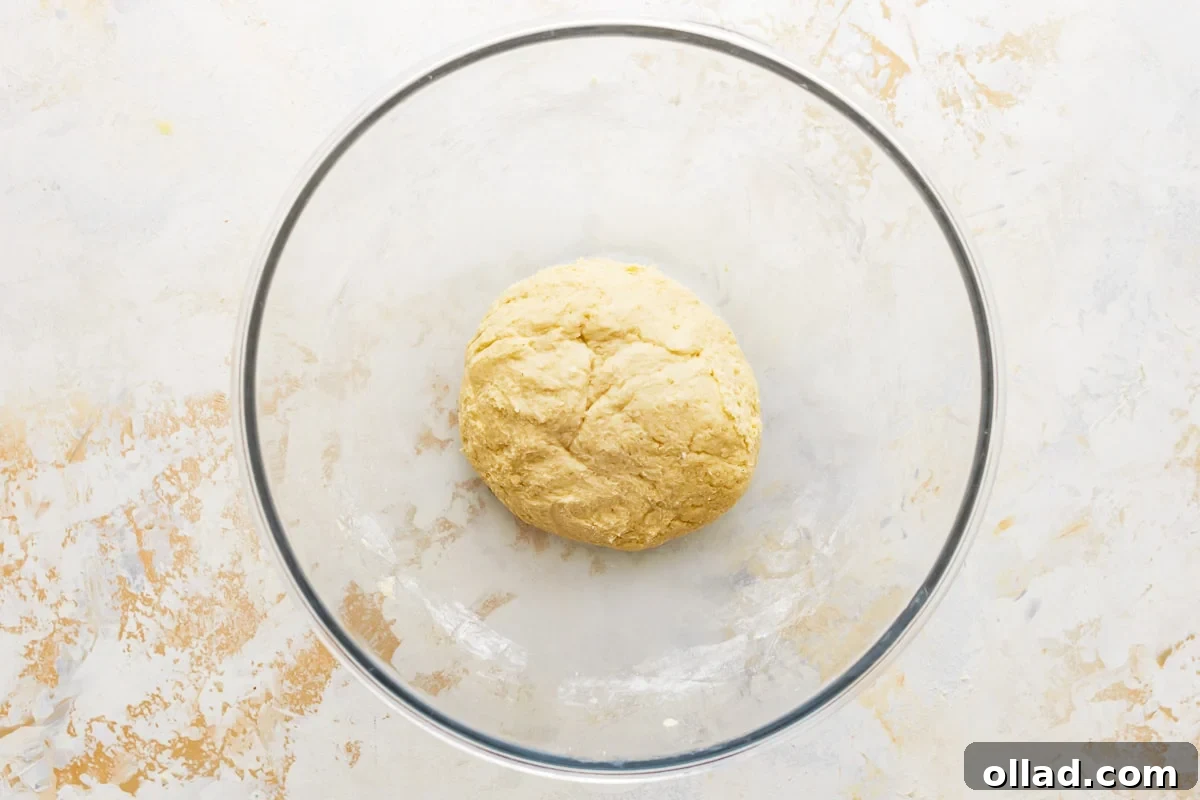
5. Roll Out and Shape the Dough
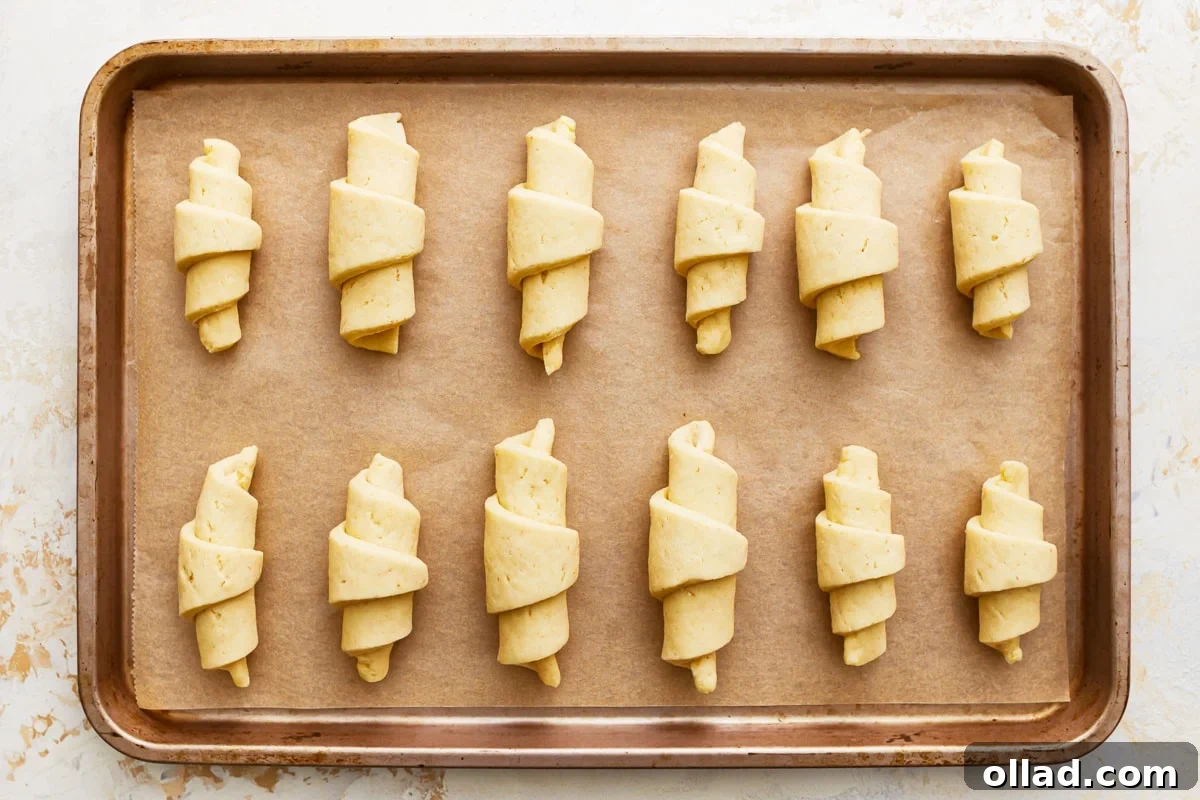
Lightly dust your clean work surface with gluten-free flour. Turn the rested dough out and roll it into a large, even circle, aiming for a thickness of about ¼-inch. Once you have a uniform circle, use a pizza cutter or a sharp knife to cut it into equal triangles, much like slicing a pie. For each triangle, start at the wide base and gently roll it up towards the pointed end, creating the iconic crescent shape. Be gentle to maintain the dough’s airy structure.
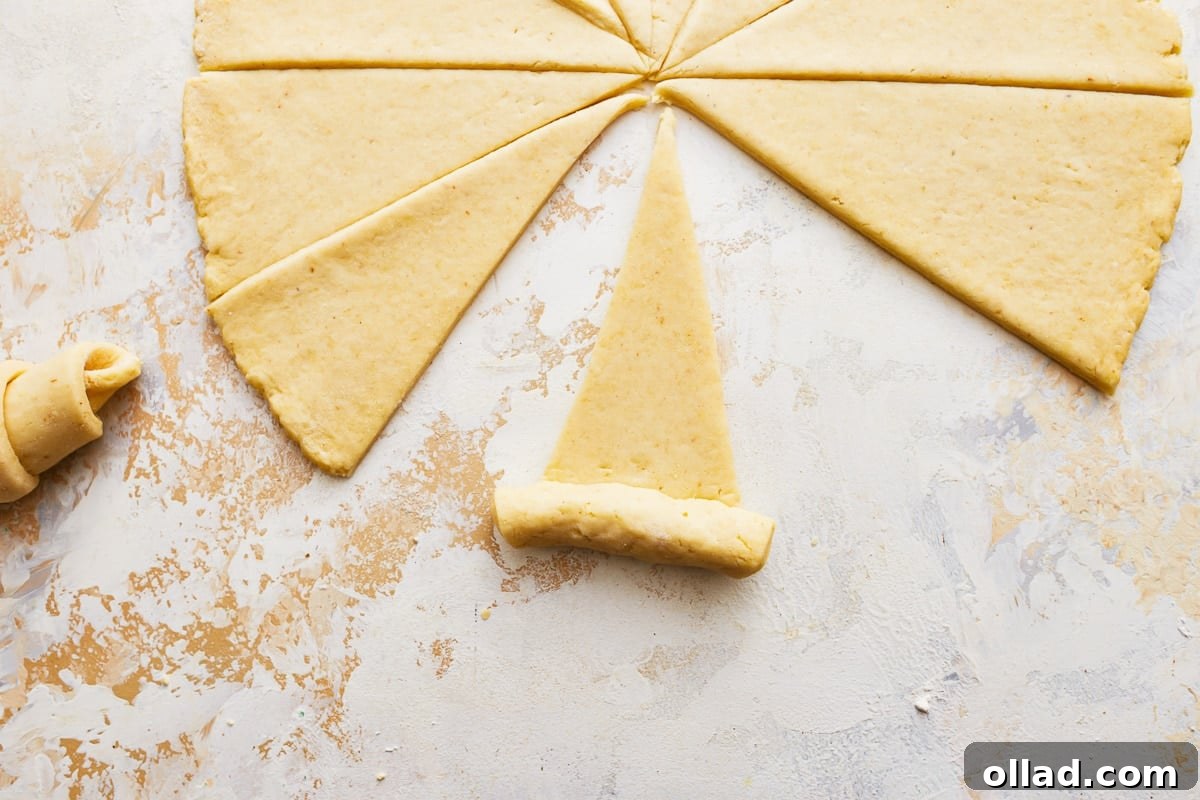
6. Second Rise and Prep for Baking
Line a large baking sheet with parchment paper. Carefully arrange your beautifully shaped crescent rolls on the prepared sheet, making sure to leave ample space between each roll for them to expand during their second rise and baking. Cover the baking sheet loosely with plastic wrap or a clean kitchen towel. Let the rolls rise in a warm, undisturbed spot for approximately 1 hour, or until they have visibly puffed up and feel soft and airy to the touch. This second proofing stage is vital for maximizing their final volume and tenderness.
7. Bake to Golden Perfection and Serve
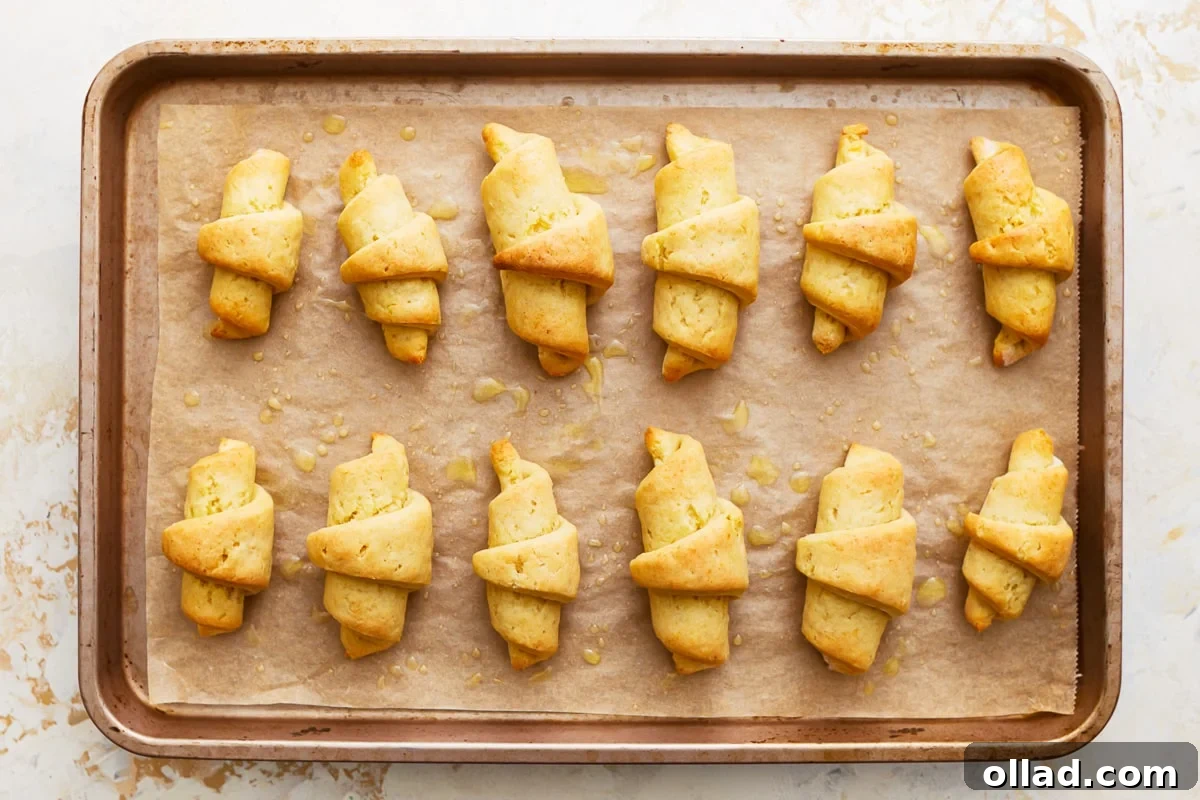
While your rolls are undergoing their final rise, preheat your oven to 375°F (190°C). Once the oven is ready and the rolls are perfectly proofed, bake them for 15-20 minutes, or until they turn a beautiful golden brown color. This indicates they are fully cooked through and have developed a delicious crust. As soon as you remove them from the oven, brush them generously with 1 tablespoon of melted unsalted butter. This adds a fantastic shine, extra flavor, and helps keep the rolls wonderfully soft. Allow them to cool slightly on the baking sheet for a few minutes before transferring to a wire rack. Serve them warm and enjoy the fruits of your labor!
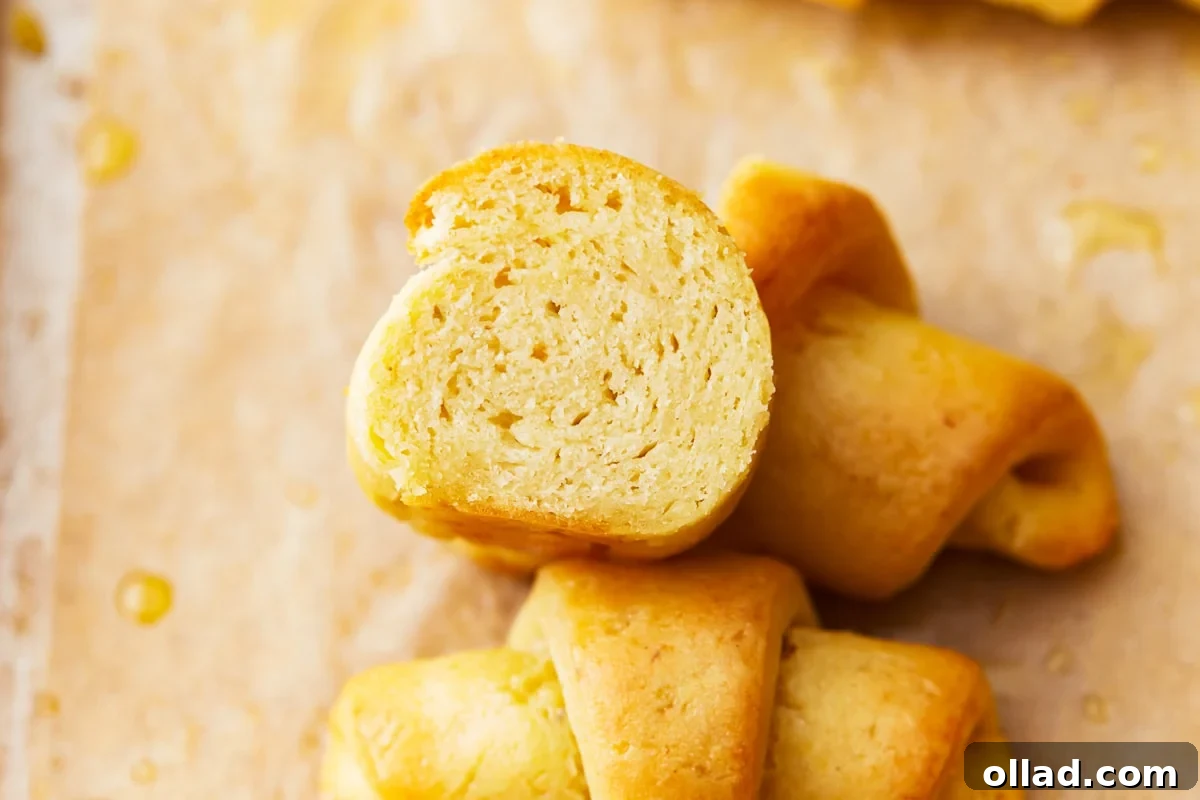
Behold the exquisite interior crumb of a freshly baked gluten-free crescent roll – light, airy, and utterly inviting. This perfectly showcases the success of our recipe in achieving a texture often elusive in gluten-free baking. The delicate layers and tender consistency promise a delightful experience with every bite.
Serving Suggestions for Your Gluten-Free Crescent Rolls
These versatile gluten-free crescent rolls are a wonderful addition to almost any meal, transforming ordinary occasions into something special. Their light, flaky texture and delicate flavor make them suitable for a wide array of pairings, beyond just holiday feasts:
- Classic Comfort: Serve them warm, fresh from the oven, with a generous brushing of melted butter. The glistening finish and soft texture are simply irresistible. They pair perfectly with a dollop of your favorite homemade jam or local honey for a delightful breakfast or brunch treat.
- Holiday Elegance: Elevate your festive spread. Imagine these golden crescents alongside a succulent honey-glazed ham for Easter, or nestled next to a roasted turkey and savory gluten-free stuffing at your Christmas dinner. Their ability to soak up rich gravies or complement herb-infused butter is unmatched.
- Soup & Salad Companion: Enjoy them with a hearty bowl of soup or a crisp green salad. Their mild flavor makes them an excellent vehicle for dipping into broths or complementing fresh greens.
- Sandwich Sliders: For a creative twist, slice them open and fill them with your favorite deli meats, cheeses, or even a flavorful chicken salad for mini gluten-free sliders.
- Sweet & Savory Variations: The versatility of this dough extends to various fillings. For a sweet treat, you could fill them with chocolate chips, a fruit preserve, or a cinnamon-sugar mixture before rolling. For savory options, try a sprinkle of herbs and garlic powder, or a thin spread of pesto.
Whether it’s a grand family gathering or a simple, quiet meal, these homemade gluten-free crescents are a special treat that you’ll be proud to share and enjoy time and time again.
Essential Tips and Notes for Gluten-Free Baking Success
Achieving perfect gluten-free crescent rolls is easier than you think with these helpful tips and insights:
- Overnight Dough Prep: To make your baking day less hectic, you can prepare the dough through step 5 (after the first rise/rest). Simply cover the bowl tightly with plastic wrap and refrigerate it overnight. The next day, let the dough come to room temperature for about 30 minutes before proceeding to shape, proof, and bake as directed. This allows for excellent flavor development.
- Make-Ahead Shaped Rolls: Another fantastic make-ahead option is to shape the rolls after step 6, then place them on a baking sheet, cover loosely with plastic wrap, and refrigerate overnight. On baking day, remove them from the fridge and allow them to come to room temperature for about 1-2 hours, or until visibly puffed, before baking as instructed.
- The Importance of Two Rises (Proofing): While the recipe includes a second rise for optimal results, it’s not strictly mandatory. The second proofing significantly contributes to extra height, a lighter texture, and improved flavor, and we highly recommend taking the time for it. However, if you’re in a rush, the rolls will still be delicious and relatively fluffy after just the first rise and shaping, though perhaps slightly denser.
- Adjusting Dough Consistency: Gluten-free flours vary considerably in their absorption rates. If your dough feels too dry and crumbly, add an extra tablespoon of lukewarm milk at a time, mixing until it reaches a soft, pliable consistency. Conversely, if the dough is too sticky and difficult to handle, gradually sprinkle in a teaspoon of additional gluten-free flour until it becomes more manageable. Always aim for a dough that is soft but not overly tacky.
- The Dual Leavening Approach: This recipe intentionally combines both instant yeast and baking powder. Yeast works over time to develop complex flavors and an airy, open crumb. Baking powder, on the other hand, provides an immediate lift, giving the rolls an extra boost of fluffiness and contributing to their overall flaky texture. This synergistic approach results in uniquely tender and well-risen gluten-free rolls.
- Proper Cooling: While tempting to devour them immediately, allowing the rolls to cool slightly on a wire rack after baking helps them set properly and prevents them from becoming gummy. The melted butter brushing helps maintain softness during this cooling process.
Storage and Reheating Instructions
To ensure your delicious gluten-free crescent rolls remain fresh and enjoyable, follow these storage and reheating guidelines:
- Room Temperature: For immediate consumption, store any leftover rolls in an airtight container at room temperature for 1-2 days. This will help maintain their softness and prevent them from drying out.
- Refrigerator: To extend their freshness, transfer the rolls to an airtight container and refrigerate for up to 4-5 days.
- Freezer: For longer storage, gluten-free crescent rolls freeze exceptionally well. Once completely cooled, place them in a freezer-safe airtight container or heavy-duty freezer bag. They can be stored in the freezer for up to 3 months. This is a great option for meal prepping or always having fresh rolls on hand.
- Reheating:
- From Refrigerator: For rolls stored in the fridge, a quick reheat in a preheated oven (around 300°F/150°C for 5-7 minutes) or a microwave (15-30 seconds) will bring them back to life.
- From Freezer: Thaw frozen rolls overnight in the refrigerator. Once thawed, reheat them in a preheated oven (around 300°F/150°C for 5-10 minutes) until warmed through and lightly crisped on the outside. You can also lightly brush with butter before reheating for extra flavor and moisture.
More Delicious Gluten-Free Pastries to Explore!
If you’ve enjoyed mastering these gluten-free crescent rolls, you’ll be thrilled to discover other wonderful gluten-free baking possibilities. Expand your repertoire with these equally delightful pastry recipes:
- Flaky Gluten-Free Croissants: Experience the joy of buttery, layered croissants without the gluten.
- Versatile Gluten-Free Puff Pastry: A foundational recipe that unlocks endless savory and sweet creations.
- Tender Gluten-Free Danish: Perfect for breakfast or dessert, filled with your favorite fruits or cream cheese.
- Classic Gluten-Free Blueberry Scones: A delightful treat, wonderfully moist and bursting with fresh blueberries.
- Homemade Gluten-Free Pop Tarts: A fun and nostalgic pastry that’s perfect for a sweet breakfast or snack.
Happy baking, and enjoy your journey through the wonderful world of gluten-free pastries!